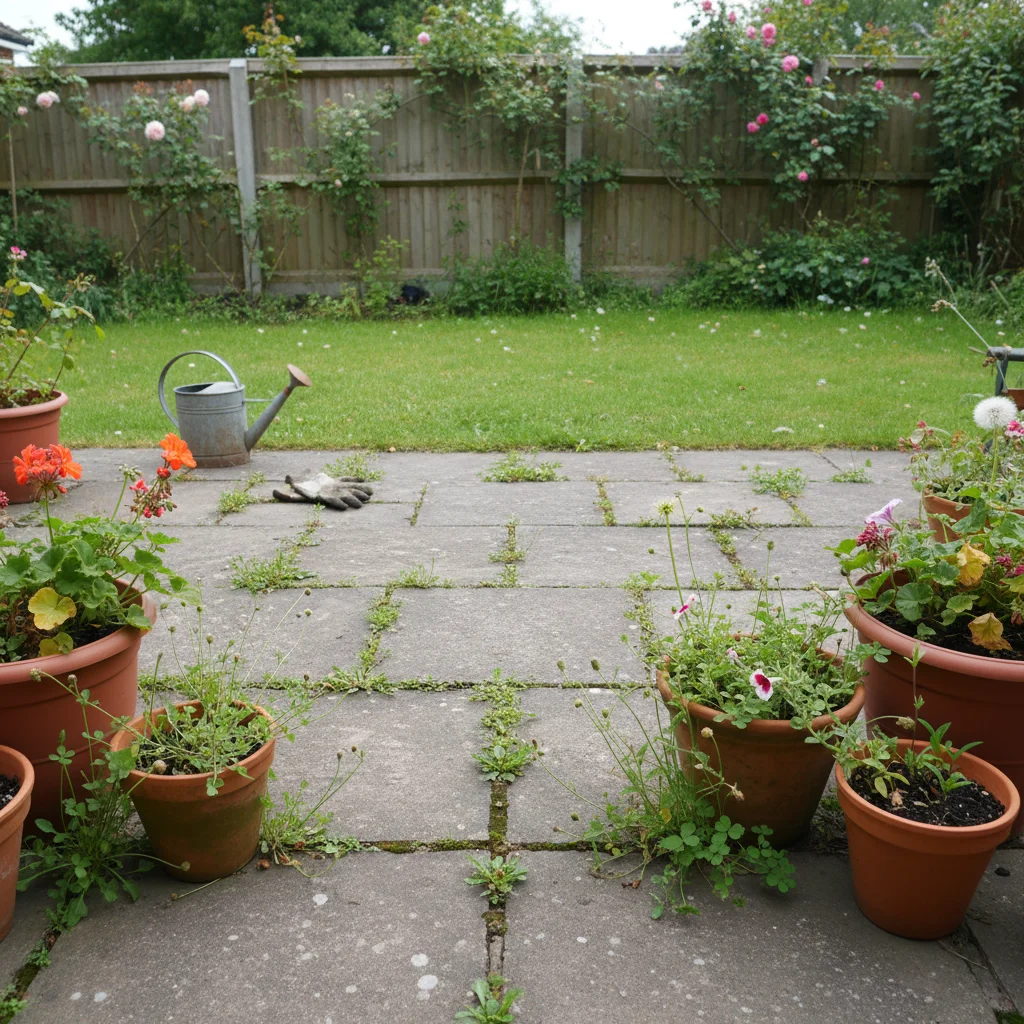
We have all been there. You spend a dry Saturday afternoon on your hands and knees, scraping out every last bit of green from between your paving slabs, only for a fresh crop of weeds to appear just a fortnight later. It is one of the most repetitive and frustrating tasks in the British garden, often feeling like a battle against an invisible enemy that simply refuses to retreat.
The problem is that most of us treat the symptom rather than the cause. We see a dandelion or a tuft of grass and we pull it out, but we leave behind the perfect environment for the next seed to take root. To truly stop patio weeds from returning, we need to understand why they are there in the first place and how to change the conditions of our hardstanding areas to make them inhospitable to unwanted guests.
Whether you are dealing with a classic riven sandstone terrace or a simple concrete block driveway, the principles of weed management remain the same. It requires a combination of thorough removal, the right preventative materials, and a consistent maintenance routine that stops the cycle of regrowth before it even begins.
Why weeds thrive in paving joints
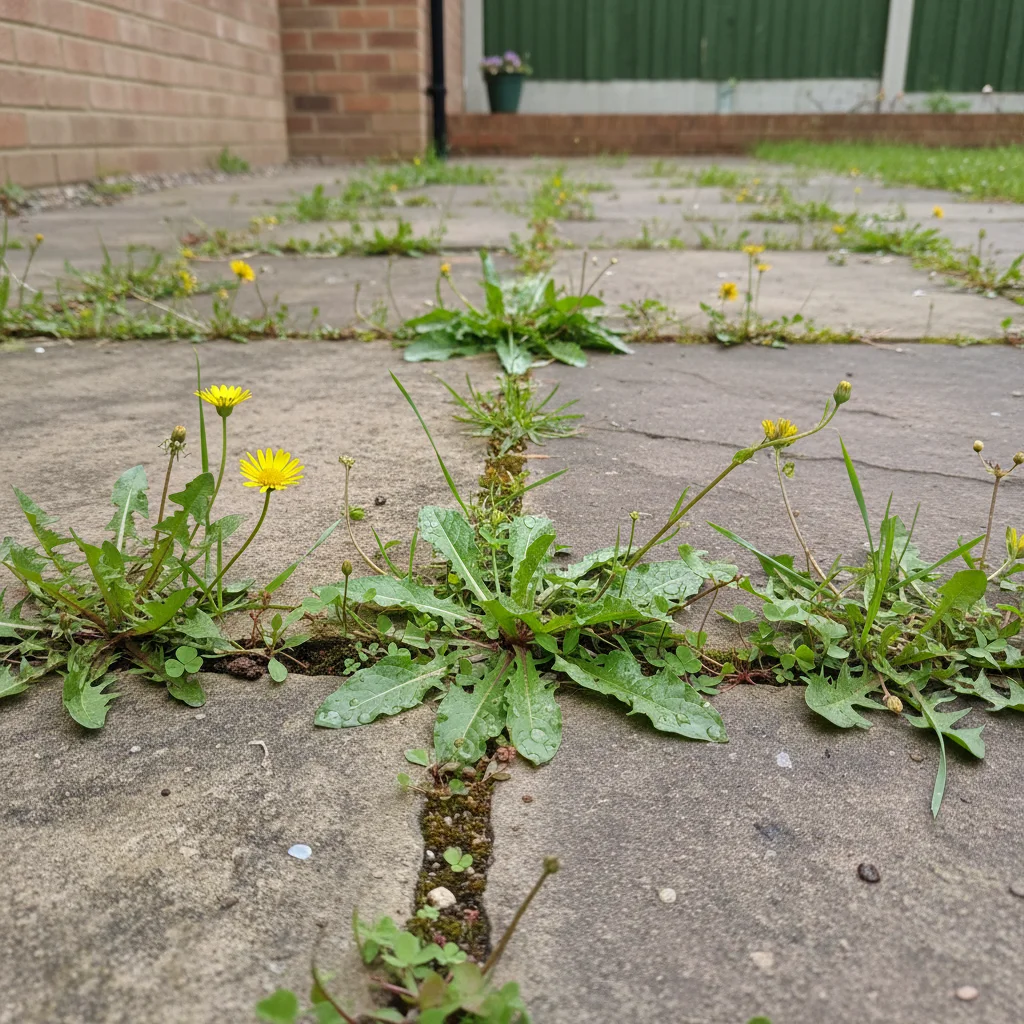
It is a common misconception that weeds grow up from the soil beneath your patio. While some particularly vigorous perennials like horsetail or Japanese knotweed can push through a sub-base, the vast majority of patio weeds actually start from the top. Seeds are blown in by the wind, dropped by birds, or carried on the soles of our shoes, eventually settling into the small gaps between your slabs.
Once a seed finds its way into a joint, it discovers a surprisingly sheltered microclimate. The paving protects the young roots from temperature fluctuations, and the gaps collect moisture and organic debris, such as decomposing leaves and dust. This mixture creates a nutrient-rich "compost" within the cracks, providing everything a weed needs to germinate and thrive away from the competition of the flower borders.
As these weeds grow, their roots expand, often putting pressure on the pointing or jointing sand. This can lead to cracks in the mortar, which in turn allows even more moisture and debris to accumulate. If left unchecked, this cycle doesn't just look untidy; it can eventually destabilise your paving, leading to loose slabs and costly repairs.
The importance of the right tools
Before you begin the task of clearing your patio, you need to ensure you have the correct equipment. Using the wrong tools can make the job twice as hard and may even damage the edges of your paving. A standard kitchen knife is a poor substitute for a dedicated weeding tool, as it lacks the strength and the specific angles required to reach deep into narrow joints.
I always recommend investing in a high-quality weeding knife, sometimes called a paving iron or a crevice tool. These have an L-shaped blade that allows you to hook beneath the root system and pull it out cleanly. A long-handled version is even better if you want to save your back and knees from the strain of a long afternoon’s work.
- Weeding knife: For deep extraction of taproots in narrow gaps.
- Wire patio brush: Excellent for removing moss and small seedlings from the surface.
- Stiff outdoor broom: Essential for regular sweeping to prevent debris buildup.
- Kneeling pad: A simple addition that makes manual weeding much more comfortable.
- Pressure washer: Useful for deep cleaning, but must be used with caution to avoid washing out jointing material.
Manual removal and the taproot challenge
The most effective way to ensure a weed doesn't return immediately is to remove the entire root system. Many common patio weeds, such as dandelions and docks, have long taproots that act as energy stores. If you simply snap off the green leaves at the surface, the plant will use those energy reserves to send up new shoots within days.
When you use your weeding knife, aim to insert it as deep as possible into the joint. Work the tool around the base of the weed to loosen the surrounding sand or grit before pulling. If the weed is particularly stubborn, watering the patio an hour before you start can help soften the debris in the joints, making it much easier to slide the roots out intact.
For smaller, fibrous-rooted weeds like bittercress or annual meadow grass, a wire brush can be very effective. This tool abrades the surface and pulls up shallow roots without the need for precision. However, be careful when using wire brushes on certain types of natural stone, as they can occasionally leave marks or scratches on the surface of the slabs.
Using heat as a natural solution
If you prefer to avoid chemicals, heat is one of the most effective ways to kill weeds. Boiling water is a simple, cost-effective method that works by collapsing the plant's cell structure. It is particularly useful for young weeds and moss that are difficult to pull out by hand. Simply pour the freshly boiled water directly onto the crown of the plant, ensuring it soaks down into the roots.
For a more industrial approach, a flame gun or thermal weeder can be used. These tools use a gas canister to produce a high-intensity flame that "shocks" the plant. You don't actually need to incinerate the weed until it turns to ash; just a few seconds of intense heat will damage the proteins within the leaves, causing the plant to wither and die over the next few days.
Thermal weeding is highly effective for large areas of block paving, but you must be mindful of your surroundings. Never use a flame gun near dry hedges, wooden fences, or plastic drainage pipes. It is also worth noting that while heat kills the visible plant, it may not always reach the very bottom of a deep taproot, so repeat applications might be necessary for persistent perennials.
The role of vinegar and salt
Many gardeners turn to household staples like white vinegar and salt as "natural" weedkillers. While these can be effective, they must be used with a degree of caution. Vinegar contains acetic acid, which burns the foliage of the plant on contact. It works best on a sunny day when the sun can help bake the damaged leaves, but it is a non-selective killer, meaning it will harm any plant it touches.
Salt works by dehydrating the plant and the soil around it, creating a "dead zone" where nothing can grow. While this sounds like the perfect solution for patio cracks, salt can be incredibly damaging to the environment. It can leach out of the paving and into your flower beds or lawn, killing your prized roses or patches of grass. Furthermore, salt can cause some types of stone and mortar to crumble over time.
If you do choose to use a vinegar-based spray, look for "horticultural vinegar," which has a higher concentration of acetic acid than the stuff you find in the kitchen. Mix it with a small amount of eco-friendly dish soap to help the liquid cling to the leaves. Use it sparingly and only in the joints, avoiding any runoff into the surrounding soil or drainage systems.
When to use chemical weedkillers
There are times when manual removal and natural remedies aren't enough, especially if you are dealing with a long-neglected patio. In these cases, a systemic weedkiller containing glyphosate is often the most reliable option. Unlike contact killers that only burn the leaves, systemic treatments are absorbed by the plant and transported down to the roots, ensuring the entire organism is destroyed.
When using any chemical, timing is everything. Apply the treatment on a dry, still day when the weeds are in an active growth phase. If it rains shortly after application, the chemical will be washed away before it can be absorbed. Always follow the manufacturer's instructions to the letter, and wear appropriate protective clothing, including gloves and sturdy footwear.
We should also consider the environmental impact of these products. Many modern gardeners are moving away from glyphosate due to concerns about biodiversity and soil health. If you do use them, treat them as a last resort and use a targeted spray rather than drenching the entire patio. Spot-treating individual weeds reduces the amount of chemical entering the ecosystem while still achieving a clear finish.
Preventing return with jointing compounds
Once you have cleared the weeds, the most important step is to fill the gaps so that new seeds cannot find a home. If your patio has wide gaps where the mortar has fallen out, you should consider repointing. Traditional sand and cement mortar is a classic choice, but it can be prone to cracking over time as the ground shifts or the paving expands and contracts with the seasons.
A more modern and effective solution is the use of polymeric jointing sand or brush-in compounds. These materials stay flexible, meaning they can move with the slabs without cracking. When they come into contact with water, they "set" into a firm but pliable barrier that is incredibly difficult for weeds to penetrate. They are also much faster to apply than traditional mortar; you simply brush the dry powder into the joints and then mist it with a hose.
- Dandelion: Deep taproot, requires thorough extraction.
- Annual Meadow Grass: Fast-spreading, best tackled with a wire brush.
- Hairy Bittercress: Explodes seeds when touched, pull before it flowers.
- Moss: Thrives in shade and damp, requires improved drainage and sunlight.
- Herb Robert: Shallow roots but spreads quickly via seeds.
The power of regular maintenance
The secret to a permanently weed-free patio isn't a one-off miracle cure; it is the habit of regular maintenance. Weeds need a buildup of organic matter to survive. If you keep your patio clean and free of dust, leaves, and soil, you remove the "growing medium" that seeds require to germinate.
A simple sweep with a stiff broom once a week can do wonders. This action disturbs any young seedlings before they can establish a strong root system and clears away the debris that would otherwise settle into the joints. It is also a good opportunity to check the condition of your jointing material and top up any areas where the sand has washed away.
If you have a pressure washer, use it once a year in the spring to remove the winter’s accumulation of grime and algae. However, be careful not to hold the nozzle too close to the joints, as the high-pressure water can easily blast out the sand or mortar. Always finish a pressure wash by brushing in fresh kiln-dried sand to ensure the slabs remain locked together and the gaps are sealed.
Dealing with moss and algae
In the damp UK climate, moss and algae are often more of a problem than traditional weeds, particularly on north-facing patios or those shaded by overhanging trees. Moss doesn't have deep roots, but it creates a thick carpet that traps moisture and eventually turns into soil, which then allows larger weeds to take hold.
To tackle moss, you first need to address the drainage. If water sits on your patio for long periods, moss will always return. Check that your slabs are laid with a slight fall to allow water to run off, and clear any blocked drains nearby. You can use a dedicated moss killer or a simple mixture of biological laundry detergent and water to kill the spores, but the best long-term solution is increasing the amount of light and air reaching the surface.
Pruning back overhanging shrubs or thinning out tree canopies can significantly reduce the amount of moss on your paving. Once the moss has turned brown and died, brush it away with a stiff wire brush and ensure the joints are filled with fresh sand. A dry, sun-drenched patio is a very difficult place for moss to survive.
By taking a methodical approach—removing the roots, sealing the joints, and maintaining a clean surface—you can finally break the cycle of constant weeding. It transforms the patio from a source of weekend chores into a space where you can truly relax. Once the hard work is done, a few minutes of sweeping each week is all it takes to keep your paving looking as good as the day it was laid.