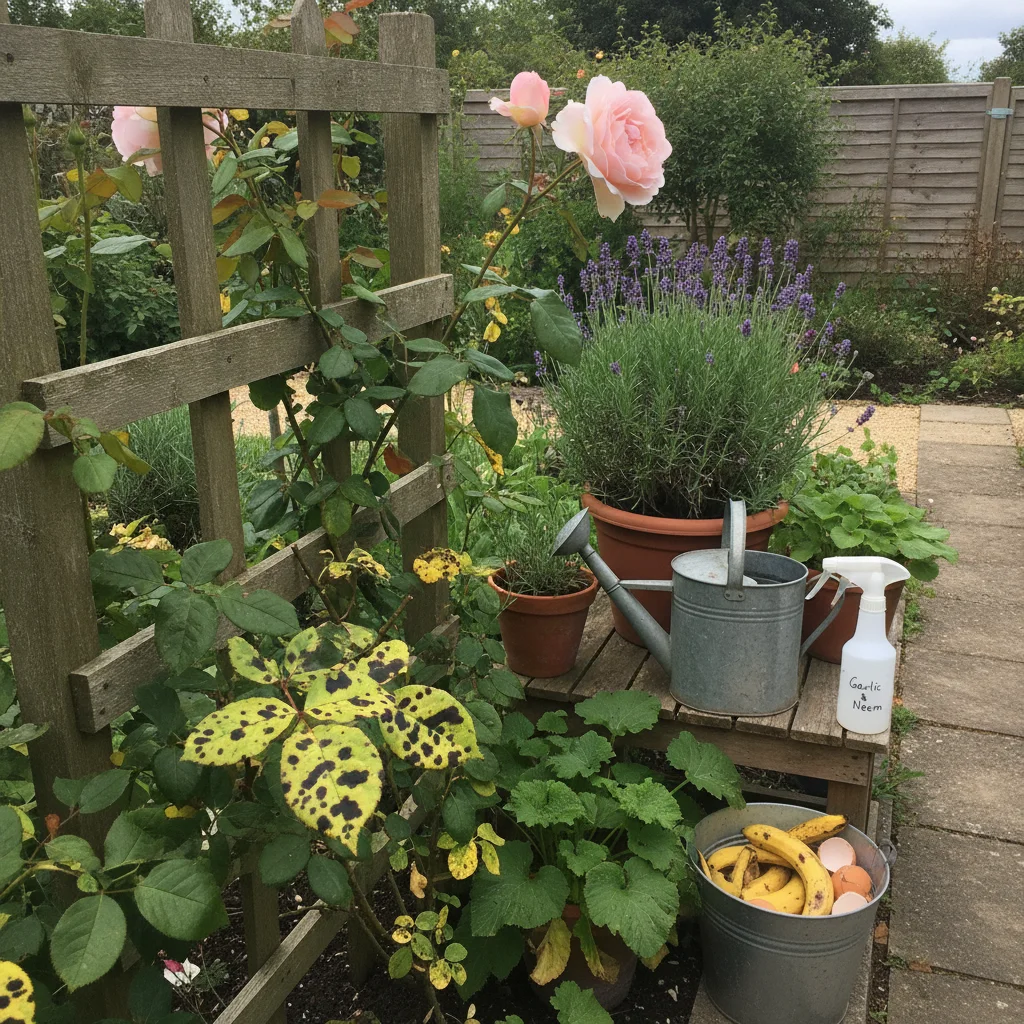
Growing roses is one of the great joys of the British garden. Whether you are tending to a climbing 'Graham Thomas' against a brick wall or a patch of hybrid teas in a formal bed, their scent and colour are synonymous with summer. However, many gardeners find their displays cut short by the arrival of unsightly dark patches and yellowing leaves.
Blackspot is a fungal condition caused by the organism Diplocarpon rosae. It is arguably the most common challenge for rose lovers in the UK, particularly during our damp and mild summers. While it rarely kills a plant outright, it seriously weakens the rose by reducing its ability to photosynthesise. Over time, a heavily infected plant becomes stunted and produces fewer flowers.
The good news is that you do not need a cabinet full of harsh chemicals to manage this. As a former head gardener, I have spent years refining organic methods to keep roses healthy. By focusing on soil health, plant selection, and garden hygiene, we can enjoy beautiful blooms while protecting our local biodiversity and soil microbes.
Understanding the lifecycle of rose blackspot
To beat an enemy, you must first understand how it operates. Blackspot survives the winter as spores on fallen leaves or within the cracks of rose stems. When the weather warms up in spring and rain begins to fall, these spores are splashed onto new, emerging foliage.
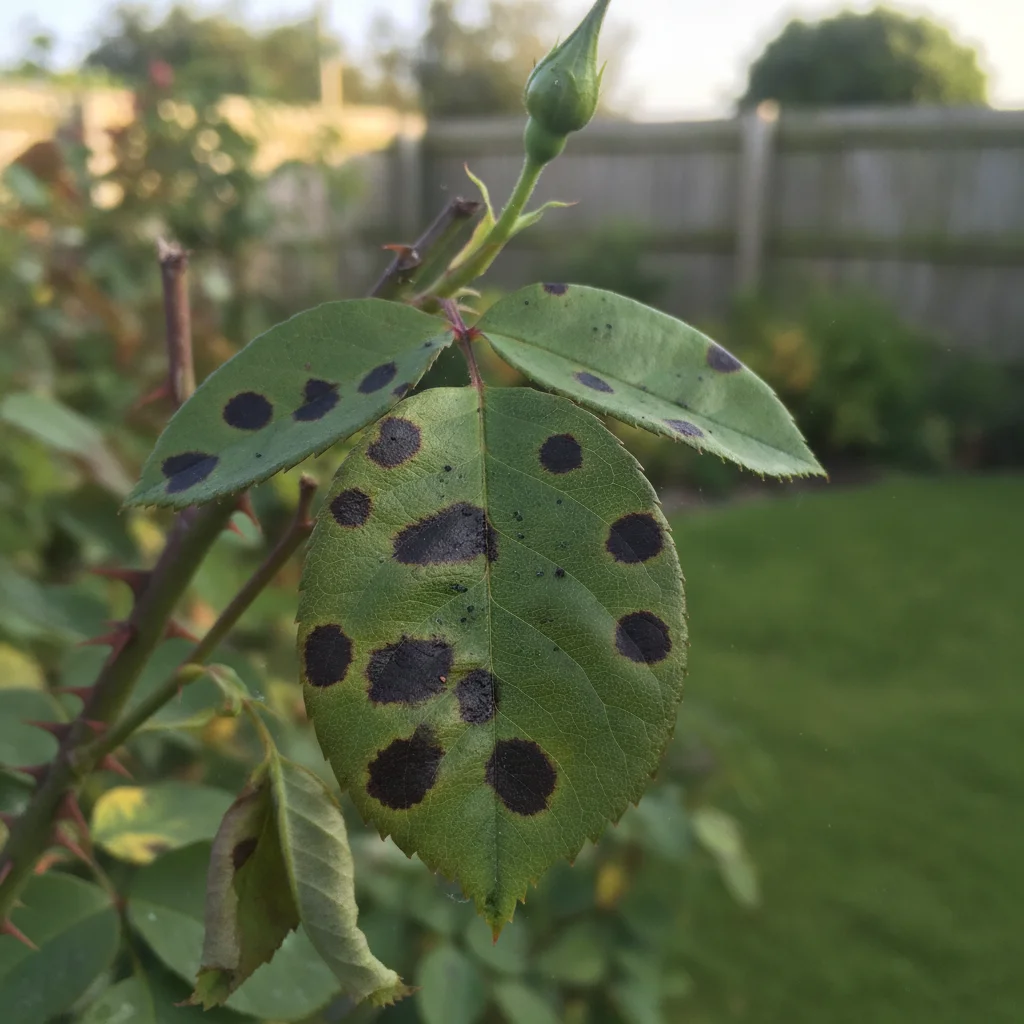
The fungus requires a specific set of conditions to germinate. It needs the leaf surface to remain wet for at least seven hours. Once it takes hold, it spreads rapidly through the plant tissue, eventually producing the characteristic black or dark brown spots with fringed edges.
As the infection progresses, the leaves often turn yellow around the spots. This is the plant's way of shedding the infected tissue, but it often leads to total defoliation. Because the spores are spread by water, a particularly wet June or July can lead to a sudden and dramatic outbreak across your entire collection.
Selecting resistant varieties for your garden
Prevention starts long before you pick up a pair of secateurs. Some rose varieties are naturally more resistant to fungal diseases than others. While no rose is 100 per cent immune, modern breeding has made incredible leaps in producing "healthy" roses that can withstand high disease pressure.
When you are browsing a nursery or a catalogue, look for the RHS Award of Garden Merit (AGM). This is often a good indicator of a plant that has been tested for its vigour and disease resistance. Older varieties, particularly some of the delicate tea roses, are often much more susceptible to blackspot than modern shrub roses.
If you have a garden that is prone to damp conditions, you might want to consider specific groups. Rugosa roses, for instance, are famous for their tough, crinkled foliage that fungi find difficult to penetrate. They are an excellent choice for a low-maintenance hedge that remains green and healthy all season.
Signs that your roses have blackspot
Identifying the problem early is the best way to prevent a total garden takeover. While the name is a bit of a giveaway, the symptoms can sometimes be confused with other issues like soot or mildew. Watch out for these specific indicators on your plants.
- Circular black spots appearing on the upper side of the leaves.
- Fringed or feathery edges to the dark patches.
- Yellow halos forming around the black spots as the leaf begins to die.
- Premature leaf drop, often starting from the bottom of the plant.
- Dark, purplish-black scabs on the young, green wood of the stems.
If you spot these signs, it is time to act. Early intervention prevents the fungus from producing a second generation of spores that will infect the rest of your garden.
Creating the perfect environment for healthy roses
The environment in which your roses grow is the biggest factor in their long-term health. Fungi thrive in stagnant, humid air and shaded spots. If your roses are crowded together or tucked into a corner with no breeze, you are essentially providing a nursery for blackspot.
When planting, ensure you give each rose enough space to breathe. The exact distance depends on the variety, but as a rule of thumb, you should be able to walk between them without snagging your clothes. This allows air to circulate freely, which helps the leaves dry quickly after rain or dew.
Sunlight is another critical factor. Most roses need at least six hours of direct sun to stay healthy. Sunlight not only fuels the plant’s growth but also acts as a natural disinfectant, drying the foliage and making it harder for fungal spores to germinate. If a rose is struggling in a shady spot, it is often better to move it in the autumn than to keep fighting a losing battle with disease.
Feeding and soil health for disease resistance
A well-fed plant is like a person with a strong immune system; it can fight off infections much more effectively. In the UK, our soils vary wildly from heavy clay to light sand, and both have their challenges for roses. Understanding your soil's NPK (Nitrogen, Phosphorus, and Potassium) balance is a great starting point for any gardener.
Nitrogen is essential for growth, but too much of it can be a problem. Over-feeding with high-nitrogen fertilisers produces soft, sappy growth that is incredibly easy for fungal spores to penetrate. Instead, focus on a balanced rose feed that is high in Potassium (K). Potassium strengthens the cell walls of the leaves, making them much tougher and more resistant to infection.
I always recommend using organic matter to build soil health. A thick layer of garden compost or well-rotted manure applied in early spring provides a slow-release source of nutrients. It also encourages beneficial soil microbes and mycorrhizal fungi. These tiny organisms form a symbiotic relationship with the rose roots, helping them take up water and nutrients more efficiently.
The importance of mulching for disease prevention
Mulching is one of the most effective tools in our organic toolkit. As we discussed earlier, blackspot spores overwinter in the soil and on fallen debris. When it rains, these spores are splashed back up onto the lower leaves of the rose, starting the cycle all over again.
By applying a 5cm to 7cm layer of mulch, you create a physical barrier between the soil and the plant. This prevents the "splash-back" effect. Use a peat-free compost, composted bark, or even leaf mould. Avoid using fresh woodchips, as these can temporarily tie up nitrogen in the soil as they break down.
Apply your mulch in late winter or early spring, just after you have finished your main pruning. Ensure the soil is moist before you put the mulch down. Not only does this help with disease prevention, but it also suppresses weeds and helps the soil retain moisture during those dry spells in May and June.
Pruning for maximum air circulation
Pruning is not just about shaping the plant or encouraging flowers; it is a vital part of pest and disease management. When I prune a rose, my goal is always to create an open, "goblet" shape. This means removing any crossing branches in the centre of the bush that might block airflow.
Always use sharp, clean secateurs to make your cuts. A jagged cut takes longer to heal and can provide an entry point for diseases. Aim for a 45-degree angle about 5mm above an outward-facing bud. This ensures that the new growth will head away from the centre of the plant, keeping the structure open.
During the summer, you should also practice "sanitary pruning." If you see a leaf with blackspot, pick it off immediately. If you see a stem with dark lesions, prune it back to healthy wood. By removing the source of the spores as soon as they appear, you can often stop a small problem from becoming a disaster.
Watering techniques to keep foliage dry
How and when you water your roses can make the difference between a healthy plant and a diseased one. Because blackspot spores need moisture to germinate, we want to keep the leaves as dry as possible. This means avoiding overhead watering with a hose or sprinkler.
Always aim your watering can or hose at the base of the plant. Direct the water onto the soil, not the leaves. If you can, water in the early morning. This allows any accidental splashes on the foliage to dry quickly in the morning sun. Watering in the evening is risky, as the leaves may stay damp all night, creating the perfect conditions for fungi.
A good rule of thumb is to check the soil moisture by hand. If the top 2cm of soil feels dry, it is time to water. Roses are deep-rooted plants, so it is better to give them a heavy soak once or twice a week than a light sprinkle every day. This encourages the roots to grow deep into the soil, making the plant more resilient during droughts.
Using organic sprays and natural remedies
While prevention is the best strategy, sometimes you need a little extra help. There are several organic treatments that can help manage blackspot without harming bees or other beneficial insects. These work by changing the pH of the leaf surface or by creating a coating that prevents spores from attaching.
One of the most popular home remedies is a bicarbonate of soda spray. This works by making the leaf surface more alkaline, which inhibits fungal growth. To make it, mix one teaspoon of bicarbonate of soda with a litre of water and a few drops of organic liquid soap (which acts as a "sticker"). Spray this on both sides of the leaves every two weeks during the growing season.
Another traditional method involves using a milk-based spray. Some studies suggest that the proteins in milk have an antifungal effect when exposed to sunlight. A mixture of one part milk to two parts water can be sprayed on roses in the same way as the bicarb solution. While it might sound unusual, many organic gardeners swear by it for keeping their foliage clean.
Maintaining garden hygiene throughout the year
The most important step in controlling blackspot happens when the roses are dormant. If you leave infected leaves on the ground over winter, you are essentially inviting the disease back for next year. Good garden hygiene is the foundation of an organic approach.
In late autumn, once the leaves have fallen, clear every single one from around the base of your roses. Do not put these leaves on your home compost heap, as most domestic heaps do not get hot enough to kill the spores. Instead, put them in your local authority green waste bin or burn them.
I also recommend a "winter wash" for your roses. After pruning in February, you can spray the bare stems with a natural sulphur-based solution. Sulphur is a naturally occurring mineral that has been used for centuries to control fungi. This helps to kill any spores that are hiding in the bark before they can infect the new spring growth.
Recommended disease resistant roses for UK gardens
If you are looking to add new roses to your garden, choosing the right variety is half the battle won. These selections have proven themselves to be particularly robust in the British climate.
| Variety Name | Rose Type | Key Features |
|---|---|---|
| 'Olivia Rose Austin' | Shrub Rose | Exceptional disease resistance and a classic fruity scent. |
| 'Kew Gardens' | Shrub Rose | Almost thornless with huge clusters of white flowers. |
| 'The Mayflower' | Shrub Rose | One of the first to bloom and stays remarkably clean. |
| 'Mortimer Sackler' | Climbing Rose | Very healthy foliage and beautiful soft pink blooms. |
| 'Rosa rugosa' | Species Rose | Incredibly tough with beautiful hips in the autumn. |
By combining these hardy varieties with the cultural practices we have discussed, you can create a rose garden that is both beautiful and sustainable. It takes a little more observation and care than simply reaching for a chemical spray, but the reward is a healthier garden ecosystem and the satisfaction of working with nature rather than against it.
Starting your prevention routine early in the spring will set your roses up for a spectacular, spot-free summer display. Keep your secateurs sharp and your mulch thick, and you will soon find that blackspot is no longer a major player in your garden.