We have all been there. You stand on your balcony or small patio, looking at a hosta that has grown so large it is practically bursting out of its terracotta pot. Or perhaps you have a corner of a shared garden where the daylilies have stopped flowering quite so brilliantly as they used to. In the city, where every square inch of green space is precious, we need our plants to work hard for us. When they start to look a bit tired or congested, it is often a sign that they need a little bit of tough love to rediscover their sparkle.
Dividing perennials is one of those gardening "secrets" that feels like a magic trick once you master it. It is the art of taking one large, overcrowded plant and turning it into three, four, or even five smaller, healthier versions of itself. Not only does this rejuvenate the original plant, but it also gives you a constant supply of new greenery without spending a single penny at the garden centre. For those of us gardening in small spaces or on a budget, it is the ultimate way to expand our collection and keep our urban oases looking lush.
You do not need a massive potting shed or a degree in botany to do this. In fact, most of the plants we love in UK gardens, from the shade-loving hostas to the sun-drenched daylilies and architectural grasses, are remarkably resilient. They actually benefit from being ripped apart every few years. It sounds brutal, but it is one of the kindest things you can do for your garden. By the time you finish reading this, you will have the confidence to take a knife to your favourite plants and come out the other side with a more vibrant, productive garden.
Why dividing plants is a superpower
In a small garden or a collection of containers, space is the most valuable commodity we have. When a perennial plant stays in the same spot or the same pot for too long, it begins to compete with itself for nutrients and water. The centre of the clump often becomes woody or dies away entirely, leaving you with a hollow "doughnut" shape that looks messy and thin. Dividing the plant allows you to discard that old, exhausted centre and replant the vigorous, young growth from the outer edges.
There is also the simple joy of getting something for nothing. If you have a balcony that feels a bit bare, or a window box that needs a leafy companion, dividing a hosta is the quickest way to fill that gap. We often forget that plants are living, breathing things that want to expand. By helping them along, we are just working with nature to fill our grey urban spaces with more life. It is also a fantastic way to garden sustainably, reducing the plastic waste and carbon footprint associated with buying new nursery-grown plants.
Beyond the aesthetics and the savings, dividing perennials is essential for plant health. Crowded plants have poor air circulation, which can lead to mildew and fungal issues, especially in the damp UK autumn. When we split them up, we give each new plant the room it needs to breathe and grow. This is particularly important for those of us in London or other cities where the air can be still and the microclimates a bit humid. A well-spaced garden is a healthy garden.
When to pick up your trowel
Timing is everything when it comes to splitting your plants. In the UK, we generally have two main windows of opportunity: early spring and early autumn. The goal is to move the plants when they are not in their peak flowering phase and when the soil is moist and workable. If you try to divide a plant in the middle of a scorching July heatwave, the stress of the move combined with the dry air will likely be too much for the tender new roots to handle.
Spring is arguably the best time for most of us, especially if you are working with hostas or ornamental grasses. As the "noses" or small green shoots start to poke through the soil in March or April, the plant is full of energy and ready to grow. Because the weather is warming up but remains reliably damp, the new divisions will establish themselves quickly. This gives them a full growing season to get their roots down before the next winter frost arrives.
Autumn is also a brilliant time, particularly for plants like daylilies that have finished their summer show. Doing this in September or October allows the plants to settle into their new homes while the soil still holds some of the summer's warmth. By the time the British winter truly kicks in, the roots will be tucked in safely. Just be sure to get your dividing done at least six weeks before the first hard frost is expected, giving the plants a fair chance to anchor themselves.
Signs your plants are feeling cramped
It can be tempting to leave a plant alone if it looks "fine," but there are subtle clues that it is crying out for more room. If you notice any of these signs, it is time to get your hands dirty and start splitting.
- The centre of the plant looks dead, bare, or woody while the edges stay green.
- The plant is producing fewer or smaller flowers than it did in previous years.
- Leaves are smaller than usual, or the plant looks generally "sparse" rather than lush.
- Roots are visible on the surface of the soil or are pushing against the sides of the pot.
- The plant has simply outgrown its allotted space and is swamping its neighbours.
The simple toolkit for small spaces
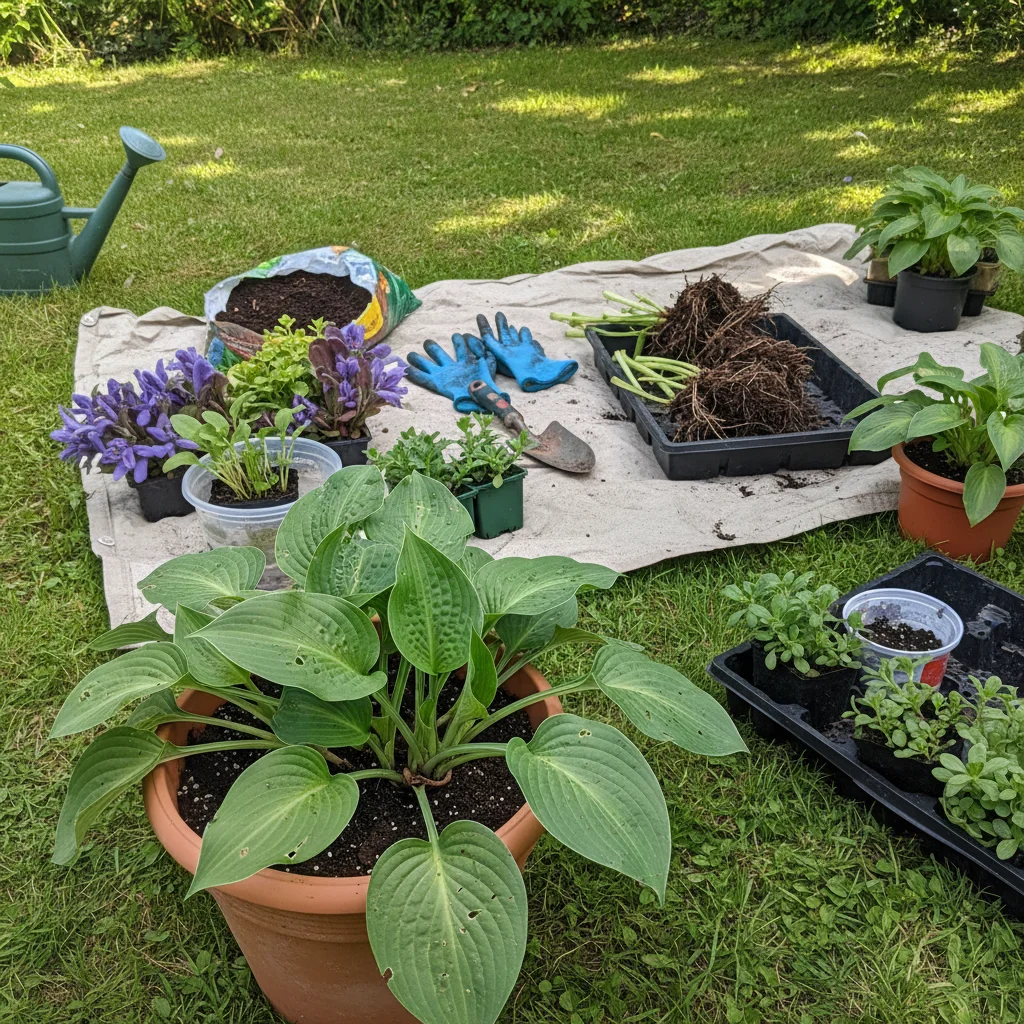
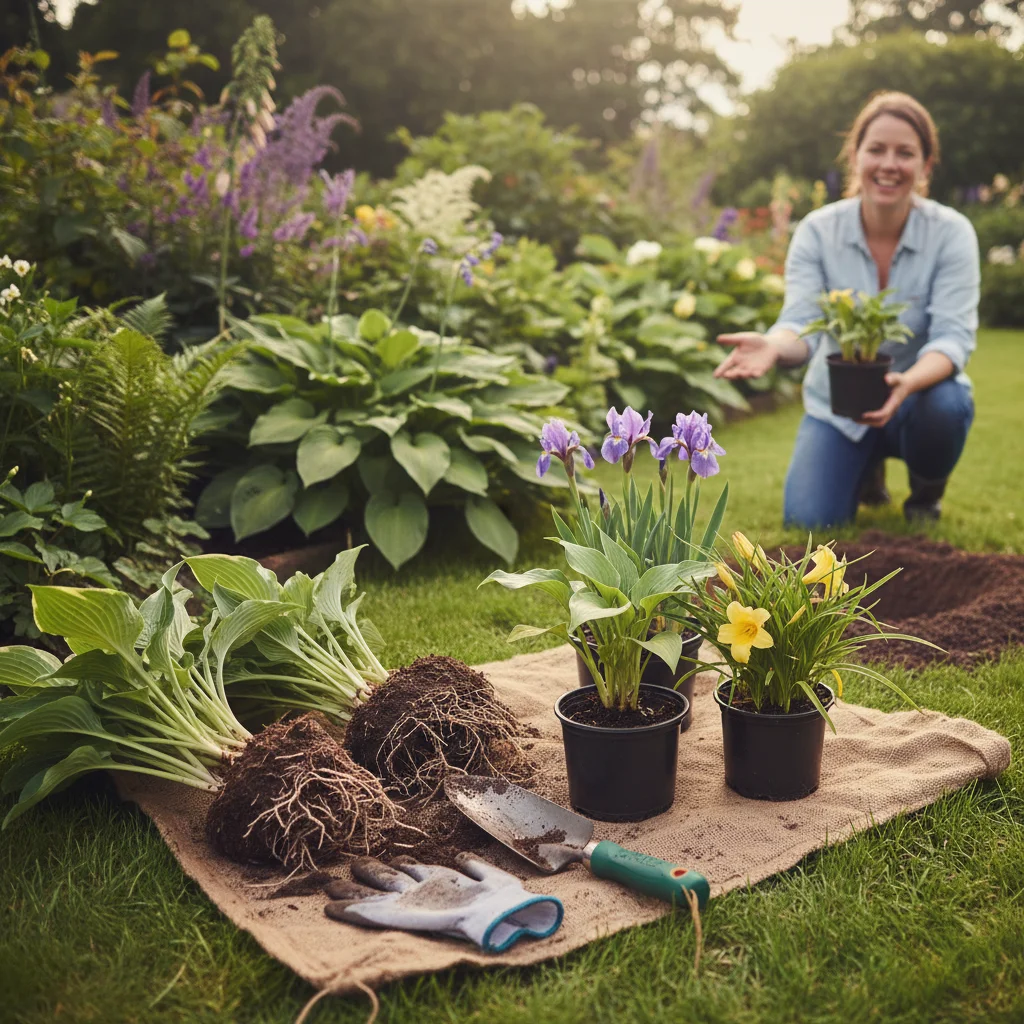
One of the best things about Sarah’s approach to gardening is that you do not need a shed full of specialised equipment. Most of us living in flats or houses with small yards only have room for the basics. For dividing perennials, you really only need a few simple items that you likely already own. If you are working with containers, you can even do most of this on a piece of old newspaper on your kitchen floor or a small outdoor table.
A sturdy hand trowel is your best friend here. It allows you to dig around the root ball with precision without damaging nearby plants. If you are dealing with particularly large or tough plants, like established ornamental grasses, you might find a sharp garden knife or even an old serrated bread knife incredibly useful. I have used a kitchen knife many times to saw through a stubborn root ball—just make sure you give it a good wash afterwards!
If you have a bit more space or a small lawn, a garden fork can be helpful for levering plants out of the ground. However, for most urban gardeners, a hand fork and a bit of elbow grease will do the trick. You will also want some fresh peat-free compost and a few spare pots. Even if you plan to put the divisions back into the ground, having a few pots on hand is useful for gifting extras to neighbours or friends.
How to split your hostas
Hostas are perhaps the most satisfying plants to divide because they are so incredibly tough. Whether you have a giant 'Sum and Substance' or a tiny 'Mouse Ears' variety, the process is the same. Start by watering the plant well the day before you plan to move it. This ensures the roots are hydrated and the soil is easier to work with. If the hosta is in a pot, turn it on its side and gently tap the base until the root ball slides out.
Once the plant is out, shake off the excess soil so you can see the root structure. You will notice the "crown" of the plant, which is where the leaves meet the roots. To divide it, simply use your hands or a knife to pull the sections apart. Ensure that each new piece has at least one or two healthy-looking buds (the "noses") and a good clump of roots attached. Do not worry if you hear a bit of cracking; hostas are resilient and will forgive a bit of rough handling.
After you have your new sections, trim away any dead or mushy roots with your clean knife. If the leaves are already quite large, you can trim them back by about half to reduce the amount of water the plant loses while it tries to re-establish its roots. Replant your new hostas immediately into fresh compost, ensuring they are at the same depth they were previously. Give them a generous drink of water and keep them in a shady spot while they recover.
Working with daylilies and grasses
Daylilies (Hemerocallis) are another urban garden staple that thrives on division. They grow from thickened roots that look a bit like tiny sweet potatoes. When you lift a daylily, you will see it is made up of several individual "fans" of leaves. These are very easy to wiggle apart by hand. Simply tease the roots away from each other, ensuring each fan has a healthy portion of the root system. Like hostas, they appreciate being cut back slightly to help them focus their energy on root growth.
Ornamental grasses, such as Miscanthus or Pennisetum, can be a bit more of a challenge because their root mats are often very dense and fibrous. This is where that serrated knife really earns its keep. You might need to literally saw the root ball into halves or quarters. It feels like you are doing something wrong, but I promise the grass will thank you for it. Focus on keeping the younger, greener sections from the outside and discarding any brown, dead material from the middle.
When replanting grasses, make sure you firm them in well. Because they are often tall and catch the wind—especially on a high-up balcony—they can easily be rocked loose before their roots have a chance to take hold. A layer of mulch or some decorative stones on top of the soil can help keep them stable and retain moisture. Grasses are particularly thirsty after being moved, so keep a close eye on the watering can for the first few weeks.
| Plant Type | Best Time to Divide | Method | Key Tip |
|---|---|---|---|
| Hostas | Early Spring | Slice or pull apart | Keep in shade after moving |
| Daylilies | Autumn or Spring | Wiggle fans apart | Trim leaves to a 'V' shape |
| Grasses | Mid-Spring | Saw through root ball | Firm in well to avoid wind-rock |
| Heucheras | Spring | Snap off "legs" | Replant deep to cover woody stems |
Replanting for success
Once you have your pile of new plants, the temptation is to just stick them anywhere. However, taking five minutes to prepare their new home will make a world of difference. If you are planting back into the ground, dig a hole that is twice as wide as the root ball and mix in some well-rotted organic matter or fresh compost. This gives the young roots a soft, nutrient-rich environment to grow into. If you are planting into pots, ensure you use a good quality peat-free potting mix.
In our small urban spaces, we often have to deal with "tired" soil that has been in a pot for years. Never reuse the old soil from the centre of the plant you just discarded. It is likely depleted of nutrients and may contain pests like vine weevil larvae. Start fresh. If you are worried about the weight of large pots on a balcony, you can mix in some perlite to keep the compost light and airy while still providing the drainage these perennials need.
When you set the plant into its new spot, pay close attention to the planting depth. The "crown"—the point where the roots meet the stems—should be level with the soil surface. Planting too deep can cause the crown to rot in our wet British winters, while planting too shallow can lead to the roots drying out in the sun. Firm the soil down gently with your hands to remove any large air pockets, but do not stomp on it; you want the roots to be able to push through easily.
What to do with your new plants
The beauty of dividing is that you suddenly have more plants than you know what to do with. This is the perfect opportunity to experiment with your garden layout. Maybe those hostas that were in the shade would look great lining a path, or perhaps those extra grasses could provide a bit of privacy screening between your balcony and the neighbour's. Because the plants were free, there is no pressure—if an experiment doesn't work, you haven't lost anything.
If your own space is completely full, why not share the wealth? One of the best ways to build a community in a city is through gardening. I often leave a few potted hosta divisions on my front doorstep with a "Free to a good home" sign. They usually vanish within the hour. You could also trade your daylilies for a neighbour’s herbs or a friend’s strawberry runners. It is a wonderful way to diversify your garden without spending a penny.
For those with only a window sill or a tiny balcony, remember that these divisions make excellent gifts. A small hosta in a pretty glazed pot is a much more thoughtful (and lasting) gift than a supermarket bunch of flowers. Just make sure you tell the recipient what the plant is and how much light it needs. Most perennials are incredibly easy to care for once they are established, making them the perfect introduction to gardening for your non-green-fingered friends.
Keeping your divisions happy
The first two weeks after dividing are the most critical. Think of it as the plant’s recovery period after surgery. Even the toughest hosta will feel a bit of "transplant shock." You might notice some wilting or yellowing of the outer leaves—don't panic. This is normal. The plant is simply redirecting its energy from the foliage down to the roots. Keep the soil consistently moist but not waterlogged.
In the UK, our weather can be unpredictable. If a sudden late frost is forecast after you have divided your plants in the spring, throw a bit of horticultural fleece or even an old towel over the new divisions overnight. This protects the tender new shoots from being scorched by the ice. If you divided in the autumn, a thick layer of mulch (like bark chippings or leaf mould) around the base of the plant will act as a blanket, keeping the roots warm through the coldest months.
By the following summer, you will likely find that your "free" plants are growing with more vigour than the original clump ever did. The leaves will be larger, the flowers more abundant, and the overall shape much more pleasing. You have successfully hit the reset button on your garden’s health. And the best part? In three or four years, you can do it all over again, ensuring your urban sanctuary continues to thrive and expand year after year.
Now that you know how simple it is to multiply your collection, take a look at your pots and borders this weekend. If you see a plant that looks a bit crowded or a hosta that has lost its lustre, don't reach for the garden centre catalogue—reach for your trowel instead. You have everything you need to create a lush, thriving garden for free, one simple division at a time.