There is something incredibly satisfying about creating new life from a single leaf. If you live in a city flat or a house with limited outdoor space, succulents are the ultimate companions. They don't demand a sprawling lawn or a massive shed; they are perfectly happy on a sunny kitchen windowsill or a small balcony table.
Propagating succulents is essentially the art of getting more plants for free. We’ve all been there—you see a beautiful Echeveria in a friend's flat or a trailing String of Pearls and wish you had one too. By learning a few simple techniques, you can turn a leggy plant or a fallen leaf into a whole new generation of greenery.
In the UK, our main challenges are light and damp. Unlike the arid deserts these plants often call home, our homes can be a bit grey and humid, especially in autumn and winter. However, with a bit of grit and the right timing, you can successfully multiply your collection even in the middle of a London winter.
When to start propagating
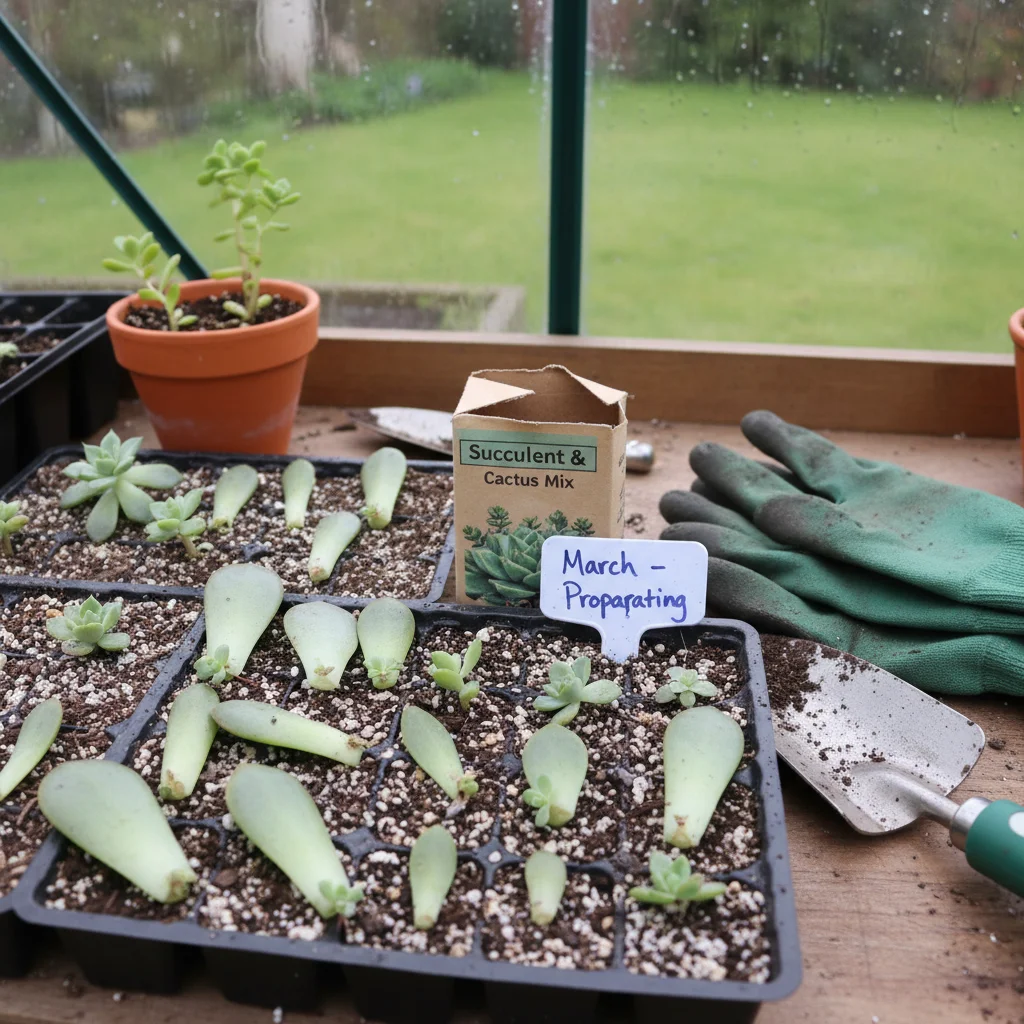
Timing is everything when it comes to plant growth. While you can technically propagate succulents year-round indoors, you will have much better results if you follow the natural rhythm of the seasons. In the UK, the best time to start is during the spring and early summer, typically from late March through to June.
During these months, the days are getting longer and the light levels are increasing. This extra "fuel" from the sun gives your cuttings the energy they need to push out new roots and tiny leaves. If you try to propagate in the dark depths of November, you might find your cuttings just sit there or, worse, succumb to rot before they ever get started.
If your succulents have become "leggy" or stretched out over the winter—a common sight in UK homes where light is scarce—spring is the perfect time to give them a haircut. This process, often called "beheading," allows you to tidy up the parent plant while using the top portion to start a brand-new, compact succulent.
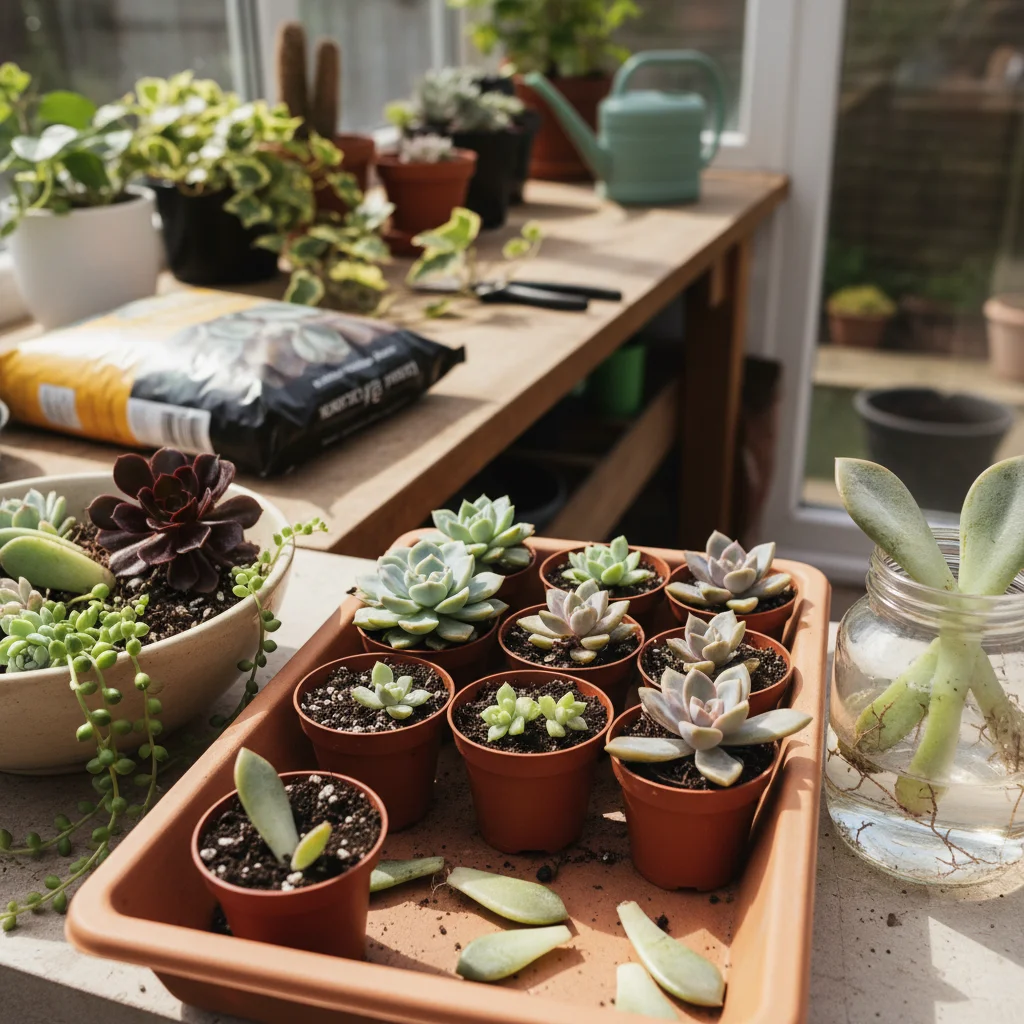
Essential kit for your windowsill
You don’t need a fancy potting shed or expensive equipment to get started. Most of what you need is likely already in your kitchen or can be picked up at a local garden centre for a few pounds. Because we are working with small spaces, we can keep our "nursery" very compact.
- A sharp, clean pair of scissors or a craft knife.
- A shallow tray or even a recycled plastic take-away container.
- Peat-free multipurpose compost and horticultural grit or perlite.
- A small spray bottle for misting.
- Small terracotta pots or even yogurt pots with holes poked in the bottom.
Having a dedicated "gritty mix" is the secret to success in the UK. Because our air is more humid than a desert, standard potting soil often stays too wet for too long. By mixing your compost with plenty of grit or perlite, you ensure that water drains away quickly, protecting those delicate new roots from rotting.
The leaf propagation method
This is perhaps the most magical way to grow new plants. It works brilliantly for varieties like Echeveria, Sedum, and some Crassula (like the Jade plant). You start with a single leaf and end up with a miniature version of the parent plant growing from the base.
To begin, choose a healthy, plump leaf from the bottom of your succulent. Gently wiggle it from side to side until it snaps off cleanly. It is vital that the leaf comes off whole; if the base of the leaf is left on the stem, it won't be able to grow roots. We want a clean "pop" that leaves the entire leaf structure intact.
Once you have your leaves, lay them out on a dry surface, like a saucer or a piece of kitchen paper. Leave them for two to three days in a spot with bright, indirect light but no direct scorching sun. This allows the "wound" where the leaf joined the stem to callous over. This callous acts as a scab, preventing bacteria and moisture from entering and rotting the leaf.
After the callous has formed, lay the leaves on top of a tray filled with your gritty soil mix. You don't need to bury them; just let them sit on the surface. Within a few weeks, you should see tiny pink or white roots wiggling out of the end, followed by a microscopic baby plant.
Growing from stem cuttings
If you have a succulent that has grown too tall or has a long, bare stem, stem cuttings are the way to go. This method is much faster than leaf propagation because you are starting with a larger piece of the plant. It’s a great way to "reset" a plant that has lost its shape.
Using your clean scissors, snip the top off the succulent, leaving about an inch or two of stem attached to the head. Remove any leaves from the bottom half-inch of that stem so you have a clear section to insert into the soil. Just like with the leaves, you must let this cutting sit out for a few days until the cut end feels dry and firm to the touch.
Once calloused, poke a small hole in your gritty compost and tuck the stem in. Firm the soil around it so the cutting stands upright. Avoid watering it immediately; wait about a week for the plant to settle and start searching for moisture with new roots.
This method works wonders for Aeoniums and many types of Crassula. If you’re doing this on a balcony, make sure the pot is heavy enough or tucked into a corner so the wind doesn't blow your top-heavy cutting over before the roots have a chance to anchor it down.
Understanding the callousing process
It can feel counter-intuitive to leave a plant part out on a tray for days without water. Most of us are used to putting flower cuttings straight into a vase. However, succulents are different; they store vast amounts of water in their tissues, which makes them highly susceptible to fungal infections if they are put into damp soil while they have an open wound.
In a typical UK home, the humidity can vary. If your kitchen is particularly steamy from cooking, your cuttings might take an extra day or two to callous. You are looking for the end to look dull and feel slightly woody or leathery rather than wet and green.
If you skip this step, you will likely notice the leaf or stem turning black and mushy within a few days of touching the soil. This is the most common reason propagation fails for beginners. Patience in the first week is the best tool you have.
Water propagation for succulents
While soil is the traditional route, many urban gardeners prefer water propagation because it looks beautiful on a shelf and allows you to see the roots growing in real-time. This is particularly effective for String of Pearls, String of Hearts, or even larger stem cuttings.
To do this, take your calloused cutting and suspend it over a small jar or glass of water. The base of the stem should be just hovering above the water line, or just barely touching it. You can use cling film over the top of the jar with a hole poked through it to keep the cutting in place.
The humidity rising from the water encourages the roots to reach downwards. Once you have a healthy cluster of roots about an inch long, you can carefully transition the plant into a pot with gritty soil. Be aware that "water roots" are quite brittle, so handle them with care during the move.
Managing light on a UK windowsill
In the UK, our light is often "directional." A south-facing window is the gold standard for succulents, providing the bright, direct light they crave. If you only have north-facing windows, you might find your new propagations become "etiolated"—this is when they stretch out and become pale and weak as they hunt for the sun.
If you are propagating on a balcony, be careful of the transition. A baby succulent that has been growing in a shaded corner of your living room will get "sunburnt" if suddenly moved into the midday sun on a July afternoon. Introduce them to the outdoors gradually, starting with an hour or two of morning sun.
During the winter, we often have to move our "nursery" closer to the glass to catch every bit of light. Just be careful that the leaves aren't actually touching the cold windowpane, as the frost can damage the cells. A bit of white card placed behind the tray can also help reflect light back onto the plants.
Watering your new arrivals
One of the biggest questions is when to start watering. For leaf cuttings, you don't really need to water them at all until the mother leaf starts to shrivel. The baby plant is getting all its nutrients and moisture from that original leaf. Once the mother leaf is a dry, crispy husk, you can gently pull it away and start treating the baby like a real plant.
For stem cuttings, wait until you feel some resistance when you give the plant a very gentle tug. Resistance means roots have formed and are gripping the soil. At this point, you can start a "soak and dry" routine.
Water the soil thoroughly until it runs out of the bottom of the pot, then wait until the soil is bone dry all the way through before watering again. In a small flat, a simple way to check is to pick up the pot; if it feels light as a feather, it’s time to water. If it feels heavy, leave it alone.
Common varieties for beginners
If you are new to this, some succulents are much more "forgiving" than others. Starting with a plant that wants to grow will give you the confidence to try trickier species later on.
- Echeveria: These rosette-shaped beauties are the stars of leaf propagation.
- Sedum (Stonecrop): Very hardy and will often root if a leaf just falls on the soil.
- Crassula ovata (Jade Plant): Great for stem cuttings and very long-lived.
- Graptopetalum: Known for being incredibly easy to grow from almost any part.
- Schlumbergera (Christmas Cactus): These root very easily in water or soil from segment cuttings.
Avoid starting with very thick-leaved "Lithops" (living stones) or very rare variegated plants, as these can be much slower and more prone to rotting if the conditions aren't perfect. Stick to the classics first, and you'll soon have a windowsill full of healthy babies to swap with friends.
Troubleshooting common issues
If your leaves are turning yellow and translucent, they are likely getting too much water. This is common if you are misting them too frequently in a room that doesn't have much airflow. In the UK, we often don't need to mist at all; the natural humidity in the air is often enough for the roots to find.
If your cuttings look shrivelled and brown, they might be getting too much direct sun or aren't getting enough moisture once the roots have formed. Try moving them slightly further back from the window or increasing the frequency of your watering slightly, ensuring the soil still dries out in between.
Pests aren't usually a huge problem for indoor propagations, but keep an eye out for mealybugs—they look like tiny bits of white cotton wool tucked into the crevices of the leaves. If you see them, dab them with a cotton bud dipped in surgical spirit. Catching them early is key, especially when the plants are small and vulnerable.
Sharing your plants is one of the best parts of gardening. Once your babies are established in their own little pots, they make the perfect sustainable gift for neighbours or colleagues. There is a real joy in knowing that a plant thriving in someone else's home started as a single leaf on your own windowsill.
By following these simple steps, you can transform your small space into a productive little nursery. It’s a slow, rewarding hobby that teaches you to watch the seasons and appreciate the small changes in your indoor garden. Grab a tray, find a healthy leaf, and start your propagation journey today.