There is something inherently hopeful about a packet of seeds. When you live in a city and your "garden" consists of a few containers on a balcony or a sunny windowsill, those tiny black specks represent a massive potential harvest. We often think we need a professional greenhouse or a sprawling allotment to grow our own food, but the truth is that your kitchen table is the perfect place to start.
Starting seeds indoors gives us a massive head start on the British summer. Our growing season can be frustratingly short, especially if you are waiting for the ground to warm up in a damp April. By sowing indoors, you take control of the environment. You provide the warmth and protection those fragile babies need to become robust plants ready to face the elements.
It is also incredibly cost-effective. A single packet of tomato seeds might cost two pounds and contain thirty seeds. Buying thirty established plants from a garden centre in May would cost you a small fortune. For those of us gardening in small urban spaces, seed sowing also lets us choose varieties you simply cannot find as ready-grown plants, such as compact balcony tomatoes or unusual herbs that thrive in pots.
Why Start Seeds Indoors
Control is the biggest advantage when we talk about indoor sowing. In a small flat or a house with a tiny garden, we don't have the luxury of losing half our crop to a sudden late frost or a hungry slug. By starting seeds in a controlled environment, we ensure a much higher germination rate. We are creating a micro-nursery where the temperature stays stable and the "weather" is always perfect.
Starting early also means harvesting early. For crops like chillies and peppers, which need a long, hot season to ripen, every week counts. If you wait until it is warm enough to sow them outside in London, you might find yourself with a plant full of green fruit just as the first autumn frosts arrive in October. Indoor sowing buys you those extra months of growth.
It also allows us to be more creative with our space. When you grow from seed, you can stagger your planting. You might sow a few salad leaves every two weeks on a windowsill, ensuring a constant supply of greens for your balcony table rather than one giant harvest that goes to seed before you can eat it. It is about making your small space work harder for you.
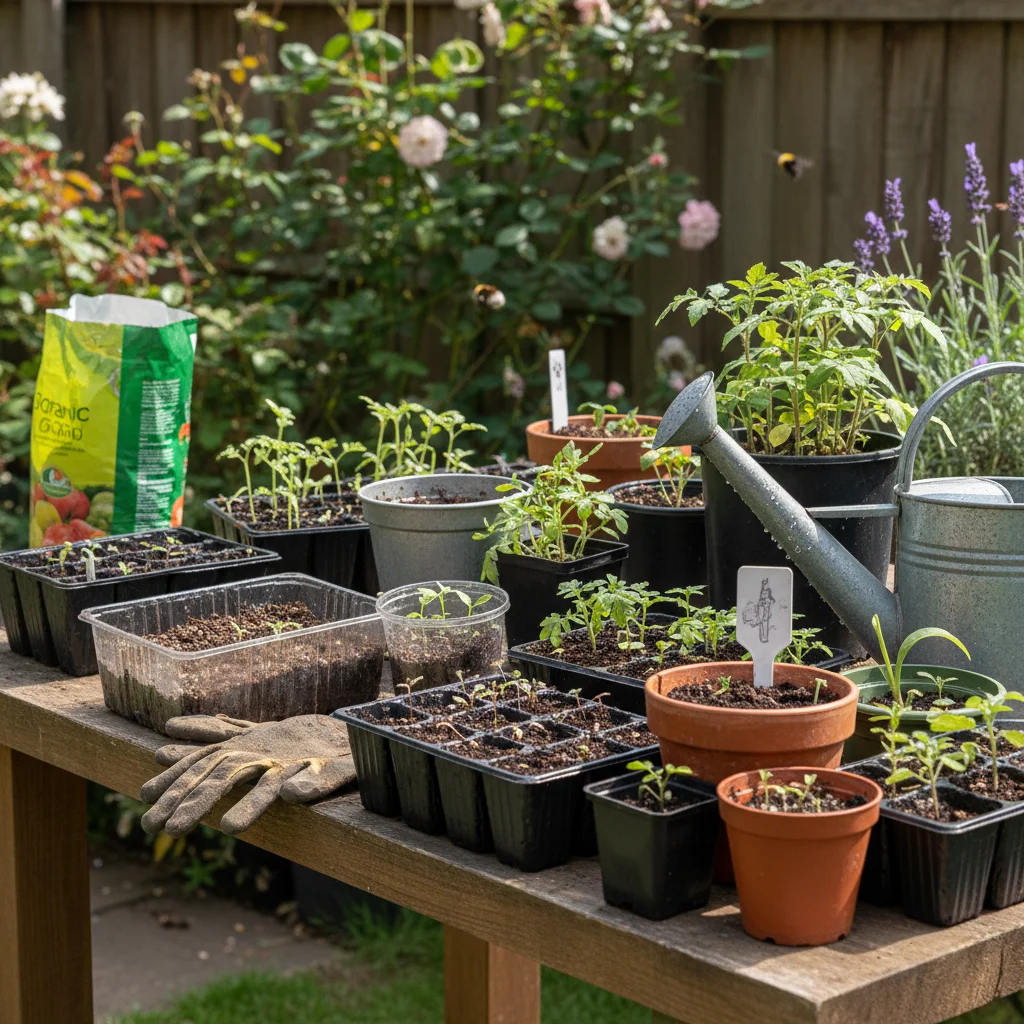
What You Need to Get Started
You don't need a shed full of expensive equipment to be successful. Most of us living in urban environments have limited storage, so "multi-purpose" is the name of the game. You can repurpose items you already have, like yogurt pots or the plastic trays that mushrooms come in, provided you poke plenty of drainage holes in the bottom.
The one thing you shouldn't skimp on is the growing medium. Always choose a high-quality, peat-free seed compost. Seed compost is finer than regular multipurpose compost, which allows tiny roots to move easily. It also has fewer nutrients; this sounds counter-intuitive, but too much "food" can actually burn delicate new roots. We want the plant to work a little bit to find its feet.
To keep things simple and tidy in a small home, I recommend a basic kit that can be tucked away in a cupboard when not in use. You don't need a dedicated potting bench when a tray on the kitchen counter does the job perfectly well.
- A bag of peat-free seed compost
- Clean modular trays or recycled small pots
- A waterproof tray to sit your pots in
- A fine-rose watering can or a simple spray bottle
- Plant labels and a permanent marker
- Clear plastic lids or simple freezer bags to hold in moisture
Choosing Varieties for Small Spaces
When space is at a premium, variety selection is everything. We want plants that are productive but stay relatively compact. Look for words like "determinate," "patio," or "dwarf" on the seed packet. These varieties have been bred to grow happily in containers without taking over your entire balcony or blocking the light from your windows.
For tomatoes, look for varieties like 'Maskotka' or 'Terrenzo'. These are trailing types that look beautiful spilling over the edge of a hanging basket or a tall pot. If you want upright plants, 'Tiny Tim' is a classic that stays very small but produces heaps of sweet cherry tomatoes. They are perfect for a sunny windowsill if you don't even have an outdoor space.
Herbs are the ultimate urban crop. Basil, coriander, and parsley are all easy to start from seed indoors. Because we use them frequently in the kitchen, having them right there on the windowsill makes sense. They don't need deep soil, so you can grow them in shallow troughs or even repurposed tin cans. Just remember to keep them away from cold draughts in the early spring.
Timing Your Sowing for the UK Climate
The biggest mistake we make is sowing too early. It is tempting to get started in January when the days are grey and we are desperate for some greenery, but without professional grow lights, February is usually the earliest you should consider. Seedlings started too early will become "leggy"—tall, thin, and weak—as they stretch desperately toward the weak winter sun.
In the UK, March is generally the sweet spot for most indoor sowing. This timing aligns with the increasing day length and rising light levels. By the time your seedlings are large enough to be moved outside in late May or early June, the risk of frost has usually passed. London and the south of England often see their last frost in late April, but it is always safer to wait a little longer.
Always check the back of your seed packet for specific advice. Some plants, like sweet peas, can handle a bit of chill and can be started earlier. Others, like cucumbers and courgettes, grow incredibly fast and will quickly outgrow your windowsill if you start them before April. Patience is a virtue in the urban garden; a plant started later in better light will often overtake a struggling, early-sown plant.
The Art of Sowing
Sowing is a mindful process. Fill your pots or trays with compost, tapping them gently on the table to settle the soil. You don't want to pack it down hard; the roots need air as much as they need water. I like to water the compost before I sow the seeds. This prevents the tiny seeds from being washed away or buried too deep by a heavy stream of water later.
As a general rule, seeds should be planted at a depth roughly twice their size. Very tiny seeds, like poppies or some herbs, barely need any covering at all—just a fine dusting of compost or vermiculite. Larger seeds, like beans or nasturtiums, can be pushed deeper into the soil. Use your finger or a pencil to make a small hole, drop the seed in, and gently cover it back over.
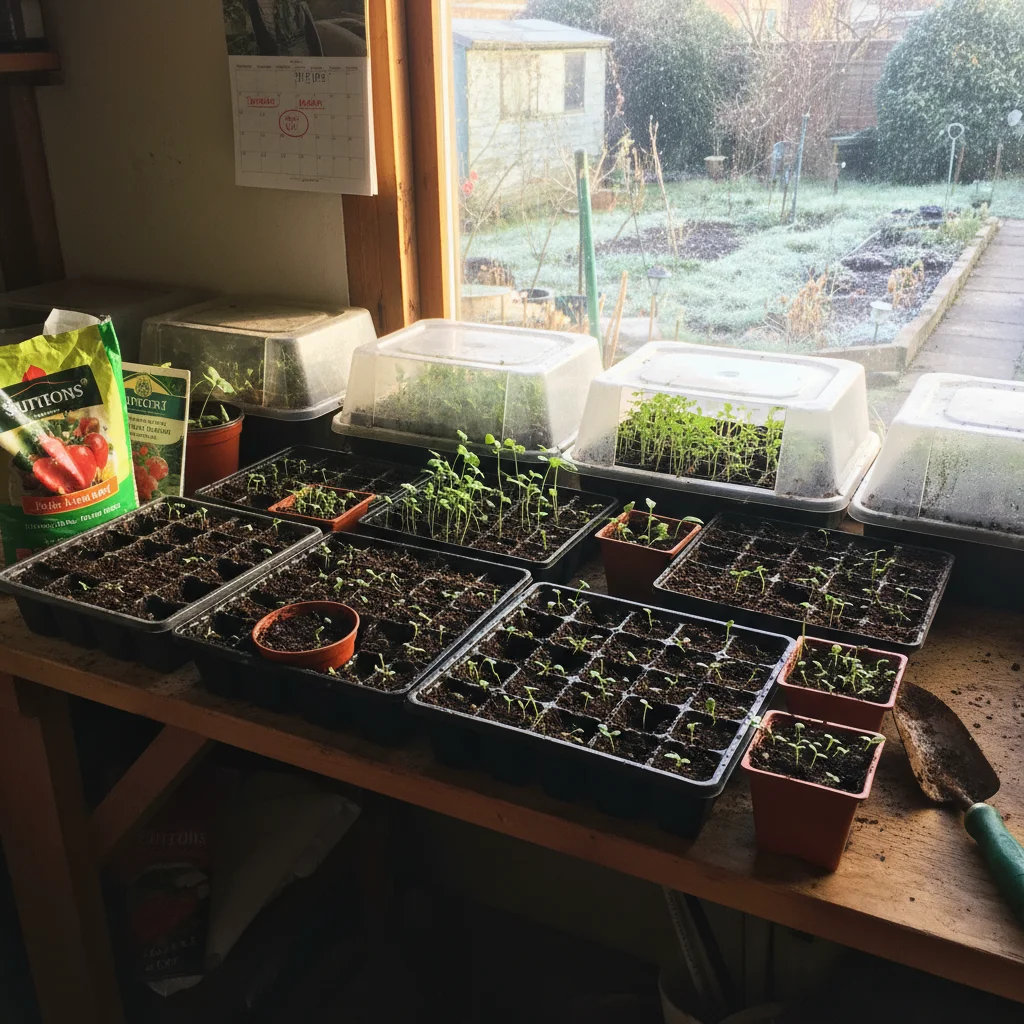
Once sown, your seeds need consistent moisture and warmth to germinate. This is where a "propagator" comes in, which is really just a fancy word for a lid. You can use a clear plastic bag held up with a couple of lolly sticks or a piece of glass. Place your trays somewhere warm, like on top of a fridge or near a radiator, but keep them out of direct sunlight until the first green shoots appear.
Managing Light on a Windowsill
Once those first green loops emerge from the soil, light becomes your most important factor. In a typical UK home, a south-facing windowsill is the gold standard. However, even there, the light only comes from one side. To prevent your plants from leaning and becoming weak, give your trays a quarter-turn every single day. It’s a simple habit that makes a massive difference in plant strength.
If you find your seedlings are still looking a bit pale and spindly, you can create a simple light reflector. Line a piece of cardboard with kitchen foil and place it behind your seedlings. This reflects the light back onto the "dark" side of the plant, doubling the amount of energy they receive. It’s a classic urban gardening hack that costs nothing but works wonders.
Be careful with temperature on the windowsill. While it might be warm during a sunny day, the temperature can drop significantly at night, especially if you close the curtains and trap the plants against the cold glass. I usually move my trays onto the kitchen table at night during March and April, just to keep them away from that evening chill.
Moving Seedlings to Larger Pots
As your plants grow, they will eventually outgrow their first small pots. You’ll know it’s time when you see roots starting to peek out of the drainage holes at the bottom, or when the plant has developed two or three sets of "true" leaves. The first leaves that appear are called cotyledons; the ones that follow will look like the leaves of the adult plant.
"Potting on" is an essential step to keep the plant growing vigorously. Choose a pot that is only one or two sizes larger than the current one. If you put a tiny seedling into a massive pot, the excess soil stays too wet and can cause the roots to rot. We want the plant to colonise the new soil quickly.
When handling seedlings, always hold them by a leaf, never by the stem. A bruised leaf can be replaced, but a crushed stem is fatal. Ease the plant out of its old pot, place it in the new one, and fill around the sides with fresh compost. Firm it down very gently and give it a good drink to help the roots settle into their new home.
Preparing Plants for the Great Outdoors
You cannot simply move a plant from a warm, still kitchen to a windy balcony or patio overnight. The shock would likely kill it, or at least set its growth back by weeks. This transition period is called "hardening off," and it is perhaps the most critical stage of the whole process. We are essentially toughening up the plant’s "skin" and teaching it to handle the wind and sun.
The process takes about a week to ten days. You want to gradually increase the plant's exposure to the outside world. If you have a balcony, this is easy enough to manage, but even if you only have a front doorstep, the principle remains the same. Start on a calm, mild day and keep the plants in a sheltered spot out of direct, scorching midday sun.
- Days 1-2: Put plants outside in a sheltered, shady spot for two hours, then bring them back in.
- Days 3-4: Increase the time to four or five hours, including some dappled sunlight.
- Days 5-6: Leave them out all day, but bring them in before the sun goes down.
- Day 7: If the nights are mild (above 10°C), leave them out overnight in a sheltered spot.
- Day 10: Your plants are now ready to be planted into their final containers or balcony troughs.
Common Seedling Problems and Solutions
Even with the best care, things can sometimes go wrong. The most common issue is "damping off," where a seemingly healthy seedling suddenly collapses at the base and dies. This is caused by a soil-borne fungus that thrives in cold, wet, stagnant conditions. To prevent it, ensure your pots have great drainage, don't overwater, and try to use fresh tap water rather than water from a rain butt for young seedlings.
Another nuisance for the indoor gardener is the fungus gnat—those tiny black flies that hover around the soil. They are attracted to damp compost. The easiest way to deal with them is to let the top centimetre of soil dry out between waterings, as the larvae cannot survive in dry conditions. You can also cover the surface of the soil with a thin layer of fine grit or sand to discourage the adults from laying eggs.
If your plants look yellow and stunted despite having plenty of light, they might have run out of nutrients. Most seed composts only have enough food for about four to six weeks. If you aren't ready to pot them on yet, you can start giving them a very weak liquid seaweed feed once a week. This gives them the boost they need to keep growing until they reach their final home.
The beauty of seed starting is that it connects us to the rhythm of the seasons, even in the heart of the city. There is a profound sense of achievement in sitting down to a salad or a pasta sauce made with ingredients you raised from a tiny speck on your windowsill. It transforms a balcony or a patio from a simple outdoor space into a productive, living larder that brings joy throughout the summer months.
Now is the perfect time to clear a space on your brightest windowsill and get started. Grab a bag of peat-free compost, pick out a few packets of your favourite veg or herbs, and start your journey toward a bumper harvest. Once you see those first green shoots pushing through the soil, you’ll be hooked on the magic of growing your own.