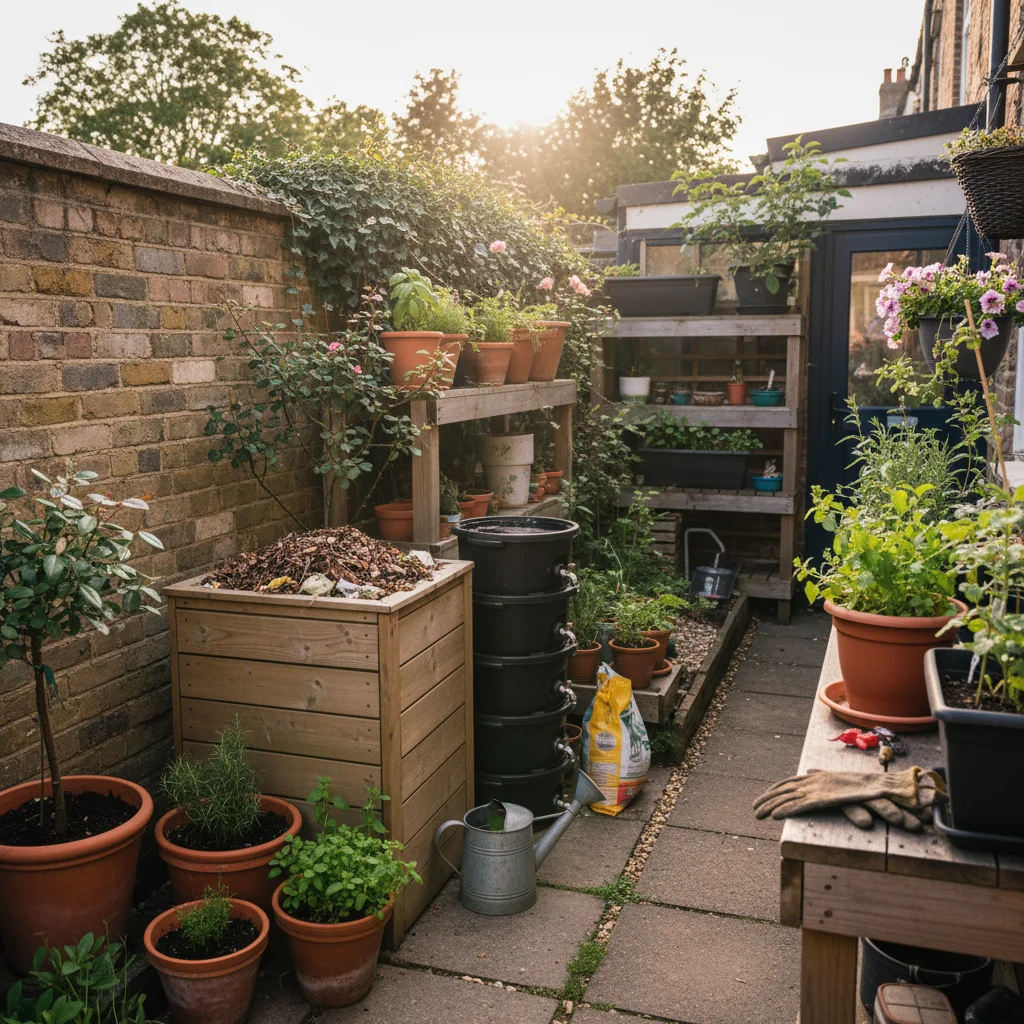
Composting might seem like something only gardeners with sprawling plots can do, but that’s simply not true. Even if you only have a small balcony, patio, or just a tiny corner of a garden, you can still create your own nutrient-rich compost to feed your plants. It’s easier than you think, and a great way to reduce waste while boosting your garden's health.
Why Compost in a Small Space?
Composting, even on a small scale, offers big benefits. You'll reduce your household waste, turning kitchen scraps and garden trimmings into a valuable resource. That homemade compost then enriches your soil, leading to healthier, happier plants. Plus, you'll save money on buying compost!
Choosing Your Composting Method
Several compact composting methods are perfect for small spaces. Let's explore a few popular options:
- Bokashi Bin: This uses a special bran inoculated with beneficial microbes to ferment food waste. It’s great for all types of kitchen scraps, including meat and dairy (which you can't put in a regular compost bin).
- Worm Composting (Vermicomposting): Worms break down food scraps in a contained bin. It's odourless when done right and produces nutrient-rich compost and "worm tea" (liquid fertiliser).
- Small Compost Tumbler: These rotating bins make turning compost easy, speeding up the decomposition process. Look for models designed for balconies or patios.
- Stackable Compost Bins: These consist of stackable trays with holes that allow worms or other compost critters to move between levels. As the material in one tray decomposes, the critters migrate upwards to the next tray with fresh material.
Each method has its own advantages, so consider your space, the type of waste you generate, and how much time you want to dedicate to the process.
Setting Up Your Small-Space Compost
Once you've chosen your method, it's time to set it up.
- Location: Find a spot that's easily accessible but out of direct sunlight. A shady corner of your balcony or patio is ideal.
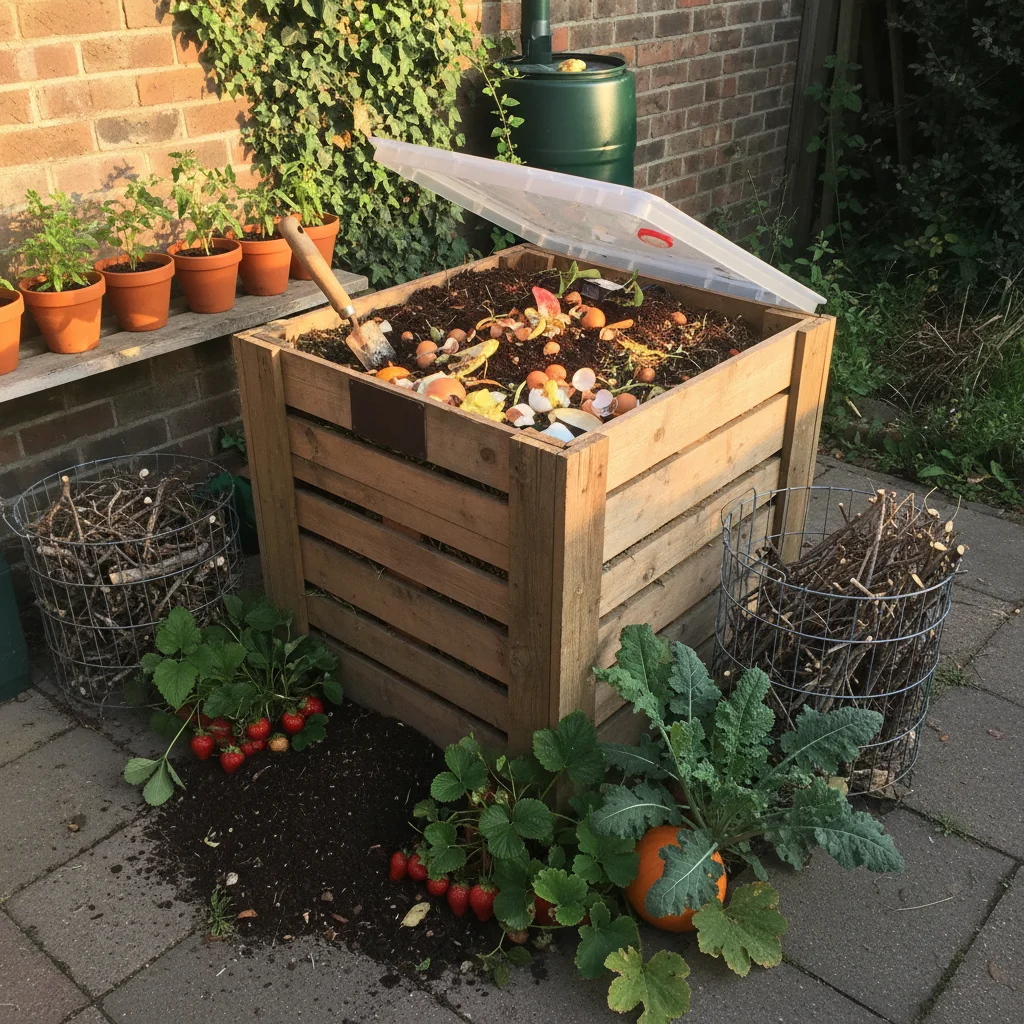
- Assembly: Follow the instructions that came with your bin or tumbler. For worm composting, you'll need to add bedding material like shredded paper or coconut coir.
- Initial Charge: Start with a base layer of "brown" materials like dried leaves, shredded cardboard, or paper. This provides carbon, which is essential for composting.
What to Compost (and What to Avoid)
The key to successful composting is understanding what to add (greens and browns) and what to avoid.
Greens: Nitrogen-Rich Materials
- Fruit and vegetable scraps
- Coffee grounds and tea bags
- Fresh grass clippings (use sparingly)
- Plant trimmings
Browns: Carbon-Rich Materials
- Dried leaves
- Shredded cardboard and paper
- Small twigs and branches
- Sawdust (untreated wood only)
What Not to Compost
- Meat, fish, and dairy (unless using a Bokashi bin)
- Oily foods
- Diseased plants
- Weeds with seeds
- Pet waste
Maintaining Your Compost
Maintaining a healthy compost bin involves a few simple steps:
- Balance Greens and Browns: Aim for a roughly 50/50 mix. Too much green can make the compost smelly; too much brown can slow down decomposition.
- Moisture: The compost should be damp like a wrung-out sponge. If it's too dry, add water. If it's too wet, add more brown materials.
- Turning: Regularly turn the compost to aerate it. This helps the microbes break down the materials more quickly. Tumblers make this easy; for other methods, use a garden fork or trowel.
Troubleshooting Common Composting Problems
Even with the best intentions, composting can sometimes present challenges. Here are a few common problems and how to fix them:
- Smelly Compost: This is usually caused by too much green material or not enough aeration. Add more brown material and turn the compost more frequently.
- Slow Decomposition: This can be due to a lack of moisture, not enough nitrogen, or temperatures that are too cold. Add water or green materials, and make sure the compost is in a relatively warm location.
- Fruit Flies: These can be attracted to fruit scraps. Bury the scraps deeply in the compost and cover them with a layer of brown material. You can also use a fruit fly trap.
Using Your Compost
After a few months (the exact time depends on the method and materials), your compost should be ready to use. It will look dark brown and crumbly, with a earthy smell.
- Potting Mix: Mix compost with potting soil for container plants.
- Soil Amendment: Dig compost into garden beds to improve soil structure and fertility.
- Mulch: Use compost as a mulch around plants to retain moisture and suppress weeds.
Composting Timeline: What to Expect
The time it takes to create usable compost depends on several factors, including the composting method, the materials used, and the environmental conditions.
- Bokashi: The fermentation process takes about 2 weeks, followed by a 2-4 week period of burying the fermented waste in soil to fully decompose.
- Worm Composting: This can take 3-6 months, depending on the size of the worm population and the amount of food scraps added.
- Tumbler Composting: With regular turning and a good balance of greens and browns, you can have usable compost in as little as 6-8 weeks.
Beyond the Bin: Other Ways to Enrich Your Soil
Even if you don’t have space for a compost bin, you can still improve your soil with simple techniques. Consider these options:
- Leaf Mold: Collect fallen leaves in autumn and store them in a bag or bin. Over time, they will decompose into a rich soil amendment.
- Grasscycling: Leave grass clippings on the lawn after mowing. They will break down and return nutrients to the soil.
- Direct Burial: Bury small amounts of food scraps directly in your garden beds. This works best for vegetable scraps like potato peelings or banana peels. Just be sure to bury them deep enough to avoid attracting pests.
Composting in a small space is a rewarding way to reduce waste, improve your garden, and connect with nature. Don't be afraid to experiment and find what works best for you. Start small, be patient, and you'll soon be enjoying the benefits of homemade compost. Now go turn those kitchen scraps into something amazing!