We have all been there. You nip out to the patio with your morning cuppa, ready to enjoy the vibrant display you planted a few weeks ago, only to find a plant looking decidedly sorry for itself. Perhaps the leaves are yellowing, the stems are drooping, or it simply looks like it has lost its sparkle. It is a disheartening moment, especially when you have a limited amount of space and every pot counts.
The good news is that most container problems are easier to fix than you might think. Plants are remarkably resilient, and usually, they are just trying to tell you that something in their environment isn't quite right. Whether you are growing 'Tumbler' tomatoes on a balcony or lavender in a window box, a few simple adjustments can turn things around.
In my years of growing in small UK spaces, from a tiny Yorkshire courtyard to a busy allotment, I have learned that "black thumbs" don't really exist. We just need to get better at listening to what our plants are saying. Let’s look at how to diagnose those common niggles and get your potted garden back to its best.
The mystery of the drooping leaf
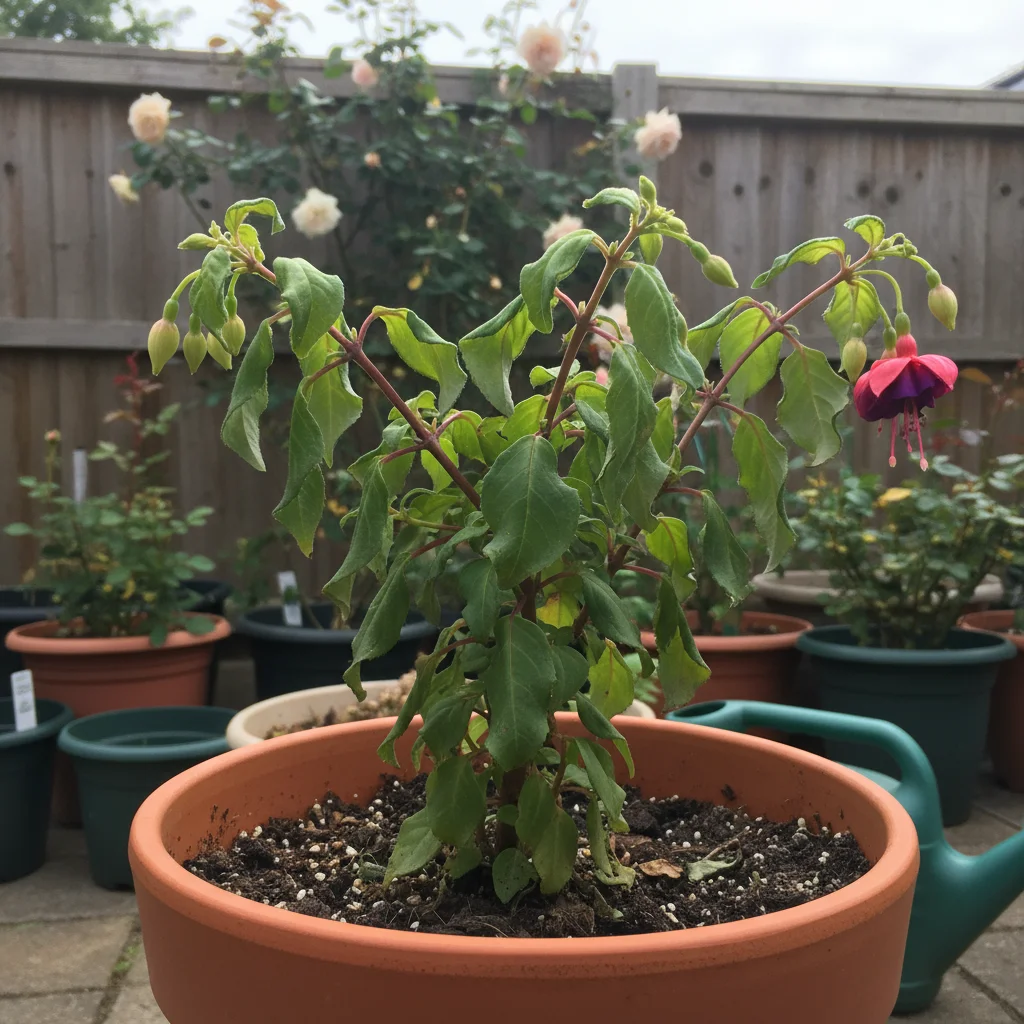
When we see a plant wilting, our first instinct is almost always to reach for the watering can. However, drooping leaves can actually be a sign of two very different problems: either the plant is parched, or it is drowning. In a typical UK summer, where we can have a heatwave on Monday and a torrential downpour on Tuesday, container plants often struggle to find a middle ground.
To figure out which it is, you need to get your hands dirty. Push your finger into the soil about two inches deep. If the soil feels bone dry and dusty, your plant is thirsty and needs a deep soak. If the soil feels soggy or smells slightly sour, the roots are likely sitting in water and are struggling to breathe.
If you find your pots are constantly waterlogged, check the drainage holes. Sometimes they get blocked by roots or compacted compost. You can easily fix this by "potting up" your containers—lifting them onto small terracotta feet or even a few flat stones—to let the excess water run away freely.
Why yellow leaves happen
Yellowing leaves, often called chlorosis by the pros, are a common cry for help in the container world. In most cases, this is a sign that the nutrients in the compost have been used up. Unlike plants in the ground, container plants have a very limited larder to draw from. Once they have eaten everything in that pot, they start to go hungry.
Most modern peat-free composts only have enough fertiliser to feed a plant for about four to six weeks. After that, it is up to us to provide the snacks. If the older leaves are turning yellow while the new ones stay green, your plant likely needs a nitrogen boost. A simple liquid seaweed feed once a fortnight can work wonders for tired-looking foliage.
However, if the leaves are yellow but the veins remain green, it might be a sign of "iron deficiency," which is common in ericaceous (acid-loving) plants like blueberries or camellias if they aren't in the right soil. Always make sure you are using the correct type of compost for your specific plant to avoid these nutritional hiccups.
Dealing with the dreaded vine weevil
If you notice your plants are suddenly collapsing even though the soil is moist, or if you see strange semi-circular notches cut out of the leaf edges, you might have a visitor. The vine weevil is perhaps the most frustrating pest for UK container gardeners. The adults nibble the leaves, but their larvae do the real damage underground by eating the roots.
To check for this, gently tip the plant out of its pot. If you see small, C-shaped white grubs with brown heads nestled in the soil, you’ve found the culprits. It feels a bit brutal, but the best course of action is to wash all the old soil off the roots, squish any grubs you find, and repot the plant in fresh, clean compost.
You can prevent these pests by adding a layer of grit or gravel to the top of your pots, which makes it harder for the adults to lay their eggs. For a more natural approach, you can also buy biological controls—tiny organisms called nematodes—that you water into the soil in spring and autumn to keep the weevil population under control.
When plants outgrow their homes
Sometimes a plant looks sickly simply because it is "pot-bound." This happens when the roots have filled every available inch of space and have started to grow in tight circles around the inside of the pot. When this happens, there is no room left for water or air, and the plant begins to suffocate.
You can usually tell a plant is pot-bound if you see roots poking out of the drainage holes at the bottom or if the water seems to run straight through the pot without soaking in. It’s like trying to wear shoes that are two sizes too small; it’s uncomfortable and eventually causes real damage.
The fix is straightforward: move it to a larger home. Choose a pot that is only one or two sizes bigger than the current one. If you go too big, the excess soil stays too wet and can cause root rot. Give the roots a gentle tease with your fingers to encourage them to grow outwards into their new space, and they will usually reward you with a flush of new growth within a few weeks.
Essential signs your plant needs help
Before you give up on a specimen, look for these specific clues that tell you exactly what is going wrong in your little garden.
- Crispy brown leaf edges: This usually suggests the air is too dry or the plant is being scorched by direct sun or wind.
- Long, spindly stems: Your plant is "reaching" for light and needs to be moved to a sunnier spot on your patio or balcony.
- White powdery coating: This is powdery mildew, often caused by poor airflow or the roots getting too dry while the leaves stay damp.
- Green slime on the soil surface: This is algae, a sure sign that the soil is staying too wet and the drainage needs improving.
- Small sticky spots on leaves: This is often "honeydew" left behind by aphids or scale insects hiding on the undersides of the foliage.
The emergency plant rescue plan
If you have a plant that looks like it is on its last legs, don’t bin it just yet. I’ve seen some incredible recoveries from plants that looked like nothing more than a few brown sticks. The first step is to prune away anything that is clearly dead or rotting. This allows the plant to focus its remaining energy on its healthy core.
Next, give it a "bottom soak." Fill a bucket or a sink with lukewarm water and sit the pot inside it for about half an hour. This ensures the entire root ball is rehydrated, which is much more effective than watering from the top when the soil has become very dry and hard. Once it has had a good drink, move it to a sheltered, shady spot away from drying winds.
Avoid feeding a stressed plant immediately. It might seem like a good idea to give it a "tonic," but fertiliser can actually shock the roots of a struggling plant. Wait until you see signs of new, green growth before you start a regular feeding routine. It is all about giving the plant a quiet place to recover, much like we need a bit of peace and quiet when we are feeling under the weather.
Choosing the right pot for the job
Sometimes the problem isn't the plant or the gardener, but the container itself. In the UK, we love our terracotta pots because they look beautiful and classic. However, terracotta is porous, meaning it breathes and loses moisture very quickly. In a hot summer, a plant in a small terracotta pot might need watering twice a day.
If you find you haven't got the time for that level of maintenance, consider switching to plastic, metal, or glazed ceramic pots. These hold onto moisture for much longer. If you love the look of terracotta but hate the watering schedule, you can line the inside of the pot with a bit of plastic (like an old compost bag) with holes cut in the bottom. This gives you the best of both worlds.
Also, consider the size of the container. Small pots dry out incredibly fast. If you are a busy person, using larger containers—even for small plants—gives you a much bigger "buffer" of moisture and nutrients. It makes your gardening life much easier and your plants much happier in the long run.
Managing the British weather
Our weather is famously unpredictable, and this can play havoc with container plants. A late frost in May can blacken the leaves of tender plants like fuchsias or geraniums. If you see frost damage, don't prune it off straight away. That damaged foliage actually acts as a bit of insulation for the rest of the plant until the danger of frost has truly passed.
Wind is another silent killer in UK gardens, especially on balconies or in coastal areas. Strong gusts can physically damage stems, but they also dry out leaves at an alarming rate. If your plants look "wind-scorched," try grouping your pots together. This creates a little microclimate where the plants can protect each other and trap a bit of humidity.
During those rare but intense heatwaves, move your most sensitive pots into the shadow of larger ones or tuck them into a corner that only gets the morning sun. It is much easier to move a pot than it is to revive a plant that has been baked crisp by the afternoon sun. Being flexible and moving your containers around as the seasons change is one of the great advantages of gardening in small spaces.
Refreshing your compost
Over time, even the best compost loses its structure. It becomes dusty, loses its ability to hold water, and can become quite acidic. If you have a permanent planting, like a shrub or a perennial in a large pot, you don't need to replace all the soil every year. Instead, you can perform a "top-dressing."
Carefully scrape away the top two or three inches of old compost, being careful not to damage the main roots. Replace it with fresh, high-quality compost mixed with a little slow-release fertiliser. This simple act provides a fresh burst of nutrients and improves the look of the pot instantly. It is a fantastic job to do in early spring just as the plants are starting to wake up.
For annual displays like summer bedding or winter pansies, it is always best to start with entirely fresh compost. Reusing old soil from last year’s tomatoes for this year’s petunias is a recipe for pests and diseases to hang around. You can always add the old, spent compost to your borders or a compost heap so it doesn't go to waste.
Keeping your garden thriving
Gardening in containers is a constant learning process, but that is part of the joy. Every time a plant looks a bit peaky, it is an opportunity to learn something new about what it needs to thrive. By keeping an eye on the moisture levels, providing a little extra food during the growing season, and being mindful of our quirky UK weather, you can keep your pots looking spectacular from spring right through to the first frosts.
The most important thing to remember is that you are in charge. If a plant isn't working in one spot, move it. If it’s outgrown its pot, give it a bigger one. With a little bit of observation and these simple troubleshooting steps, you will find that your small-space garden becomes more resilient and beautiful every year. Now, why not head outside and give your pots a quick check? A little bit of attention today can prevent a big problem tomorrow.