There is something truly magical about the way a pile of old potato peelings and grass clippings can transform into "garden gold." If you have ever felt a bit guilty throwing away kitchen scraps, you are already halfway to becoming a master composter. It is one of the most rewarding parts of growing your own food, and honestly, it is much easier than you might think.
When I first started my little veg plot in a windy corner of Yorkshire, the soil was heavy and stubborn. I spent a fortune on bags of compost from the local garden centre, lugging them back and forth in the boot of the car. It wasn't until I started my own heap that I realised I had everything I needed right under my nose. Making your own compost doesn't just save you money; it builds a level of soil health that store-bought bags simply cannot match.
In this guide, we will look at how you can start your own composting journey, no matter how much space you have. Whether you have a sprawling allotment or a few pots on a sunny patio, you can create the nutrient-rich fuel your vegetables crave. Let’s get stuck in and see how we can turn your waste into a bumper harvest of 'Tumbler' tomatoes and crunchy carrots.
Why making your own compost matters
Compost is the heartbeat of a healthy vegetable garden. It acts like a slow-release multivitamin for your plants, providing the essential nutrients they need to grow strong and resist pests. Unlike chemical fertilisers, which offer a quick hit that quickly washes away in our typical British rain, compost improves the very structure of your soil.
If your soil is sandy, compost helps it hold onto water so your lettuces don't wilt the moment the sun comes out. If you are dealing with heavy clay, like I do, the organic matter opens up the soil, allowing roots to breathe and water to drain away. It is the ultimate problem-solver for any gardener, and the best part is that it is completely free.
Beyond the plants, composting is a wonderful way to do your bit for the environment. By recycling your kitchen and garden waste at home, you are keeping organic matter out of landfill. This reduces the production of methane gas and means fewer lorries on the road delivering heavy bags of peat-based products. It is a win for your garden and a win for the planet.
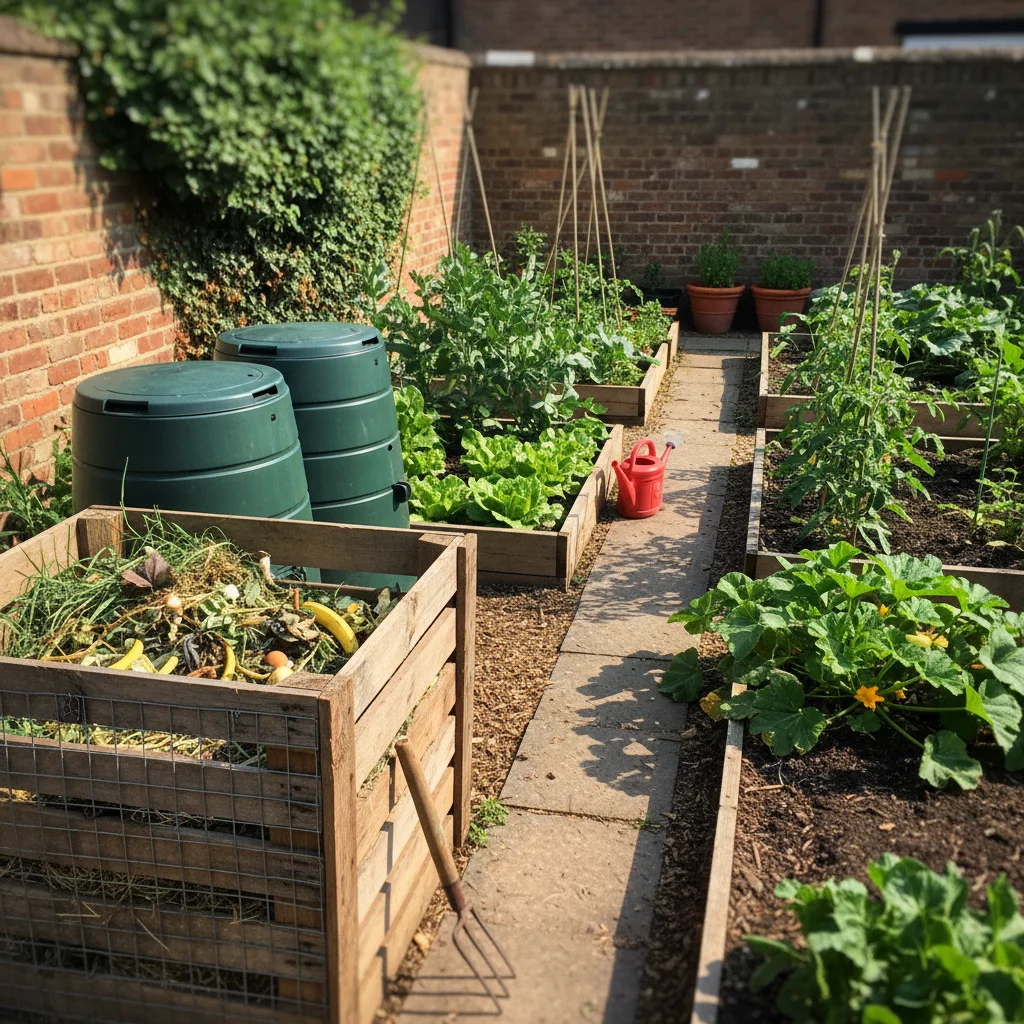
Finding the perfect spot for your bin
You don't need a huge, professional three-bay system to get started. Many people begin with a simple "dalek" style plastic bin, which is perfect for smaller gardens. These bins are great because they keep the heat in and the rain out, which speeds up the decomposition process. If you have a bit more space or a friendly neighbour with some spare pallets, you can easily knock together a wooden bin that looks quite rustic and charming.
The location of your compost heap is more important than the bin itself. You want a spot that is reasonably sunny, as the warmth will help the bacteria and fungi do their work. However, you don't want it in full, scorching sun all day, or it might dry out too quickly. A bit of dappled shade under a hedge or in a quiet corner is usually ideal.
Try to place your bin on bare soil rather than on paving or decking. This allows the local "underground army" of worms, beetles, and microscopic organisms to climb up into the heap and start breaking things down. If you only have a patio, don't worry—you can still compost in a closed bin, but you might want to add a handful of soil or some "compost starter" to get things moving.
The simple science of greens and browns
The secret to a successful compost heap is getting the balance right between "Greens" and "Browns." Think of it like baking a cake; you need the right mix of wet and dry ingredients to get the perfect texture. If you have too much of one and not enough of the other, you might end up with a soggy mess or a pile of dry leaves that never changes.
"Greens" are your nitrogen-rich materials. These are usually wet, fresh, and green in colour. They provide the protein that the tiny organisms in your heap need to grow and multiply. Without enough greens, your compost heap will be cold and slow.
Here are some of the best green materials you can find around your home:
- Fresh grass clippings from the lawn
- Vegetable peelings and fruit scraps
- Spent coffee grounds and tea leaves
- Annual weeds that haven't gone to seed yet
- Young hedge trimmings
"Browns" are your carbon-rich materials. These are typically dry, fibrous, and brown. They provide the energy for the composting process and help to create air pockets in the heap. Without enough browns, your heap can become compacted and start to smell a bit like old gym socks because air can't get in.
You can find plenty of brown materials in your house and garden:
- Cardboard boxes (torn into small pieces)
- Dry autumn leaves and straw
- Scrunched-up newspaper or egg cartons
- Woody prunings that have been shredded
- The contents of your paper shredder
Getting the balance right
A good rule of thumb for a healthy heap is to aim for roughly equal amounts of greens and browns by volume. I like to keep a bag of dry leaves or a stack of flattened cardboard next to my bin. Every time I empty my kitchen caddy of vegetable scraps (the greens), I throw in a handful of torn-up cardboard (the browns).
If you find that your heap is looking very wet and slimy, it is a sign you need more browns. You can fix this by mixing in some shredded paper or dry straw. On the other hand, if the heap looks exactly the same as it did three months ago and feels very dry, you probably need more greens or a quick splash of water from the watering can.
In a typical UK summer, our heaps can sometimes dry out if we have a long dry spell. If you poke a garden fork into the middle and it feels parched, give it a little drink. You want the heap to be about as damp as a wrung-out sponge. Not dripping wet, but definitely not bone dry.
What to leave out of your heap
While most organic matter can be composted, there are a few things you should avoid putting in your bin to keep it healthy and pest-free. We want to attract helpful worms, not local rats or foxes. Avoid adding any cooked food, meat, fish, or dairy products to a standard garden compost bin. These materials can smell as they break down and are much more likely to attract unwanted visitors.
You should also be careful with weeds. Most annual weeds are fine, but try to avoid "perennial" weeds with deep, stubborn roots like dandelions or bindweed. If your heap doesn't get hot enough, these roots can survive the composting process and you will end up planting them right back into your veg patch next year. Similarly, avoid adding weeds that have already produced seeds.
Pet waste from cats and dogs should never go in a compost bin used for vegetables, as it can carry harmful pathogens. However, waste from herbivorous pets like rabbits or guinea pigs is absolutely brilliant for the heap. I also avoid putting in thick woody branches unless they have been put through a shredder first, as they can take years to break down on their own.
Managing your compost through the seasons
Composting is a bit slower during our chilly UK winters. The bacteria that break down the waste go into a bit of a dormant phase when the temperature drops. You might notice that your bin stays quite full from November through to March. Don't worry—this is perfectly normal. You can help things along by insulating your bin with an old piece of carpet or some bubble wrap to keep what little heat there is inside.
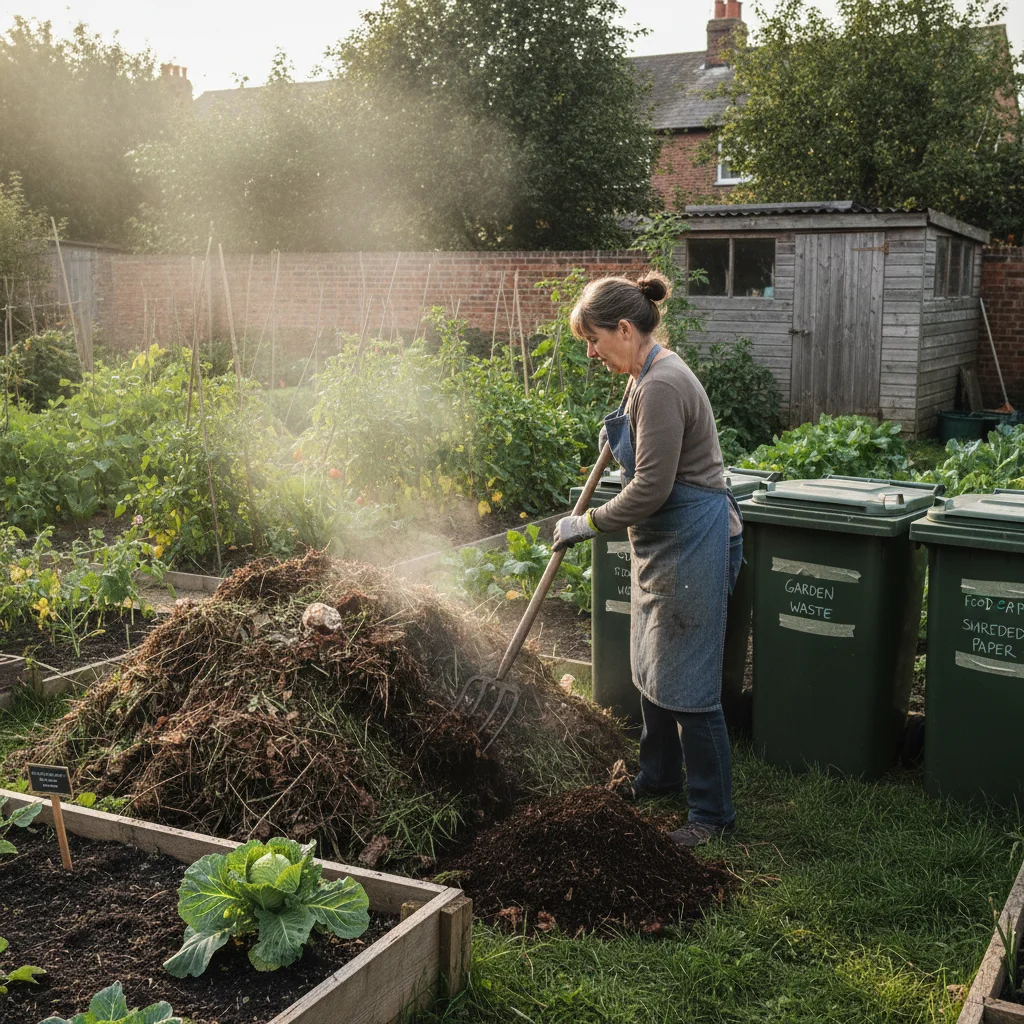
When spring arrives and the first frosts have passed, the heap will naturally start to wake up. This is a great time to give it a "turn." Using a garden fork, try to move the material from the outside of the heap into the middle. This introduces fresh oxygen, which acts like a shot of caffeine for the composting organisms.
If you are a busy gardener, you don't actually have to turn your compost. It will still turn into lovely soil eventually; it just takes a bit longer. I often find that a "lazy" heap takes about a year to be ready, whereas a heap that is turned every few weeks can be finished in four to six months. Do whatever fits your schedule—gardening should be a joy, not a chore.
How to tell when it is ready to use
Knowing when your compost is ready is one of the most satisfying moments in the gardening calendar. You are looking for something that no longer looks like kitchen scraps or grass. It should be dark, crumbly, and have a wonderfully earthy smell, a bit like a damp woodland floor. I always say it should look like a moist chocolate cake.
You will usually find that the material at the very bottom of the bin is ready first. If you have a bin with a little hatch at the bottom, you can start harvesting the good stuff while the top layers are still breaking down. If you have a simple pile, you might need to move the top un-composted layer aside to get to the "black gold" underneath.
Don't worry if there are still a few stubborn bits of eggshell or small twigs in the mix. You can either pick these out or just leave them in; they won't harm your plants. If you want a really fine compost for starting seeds, you can pass it through a garden sieve, but for general use in the veg patch, a few lumps and bumps are perfectly fine.
Using your garden gold in the veg patch
Once you have your finished compost, the fun really begins. There are so many ways to use it to boost your yields. One of my favourite methods is "mulching." This involves spreading a thick layer (about 5cm) of compost over the surface of your soil around your plants. It helps to suppress weeds and keeps the moisture in the ground, which is a lifesaver for thirsty crops like runner beans.
You can also use your homemade compost to give your heavy feeders a boost. When you are planting out your courgettes or pumpkins, dig a hole a bit bigger than the root ball and fill it with a few big handfuls of compost. This gives the young plants a nutrient-rich "launchpad" to help them get established quickly.
If you grow in containers or raised beds, you can mix your compost with some topsoil or old potting mix to refresh it for the new season. I find that a 50/50 mix of homemade compost and soil works wonders for 'Scarlet Runner' beans and even potatoes grown in bags. It provides plenty of "oomph" to keep them growing strongly all summer long.
Solving common composting problems
Even the best gardeners run into a few hiccups now and then. If your compost heap starts to smell, it is almost always because it is too wet or has too much green material. The solution is simple: turn the heap to get some air in and add a generous amount of dry "browns" like shredded cardboard. Within a few days, the smell should vanish.
If you find lots of tiny fruit flies hovering around your bin, it is usually because there is exposed fruit or veg on the top. You can easily fix this by covering the fresh scraps with a layer of brown material or a thin layer of finished compost. This acts as a barrier and stops the flies from getting to the food.
Sometimes a heap just seems to sit there and do nothing. This is usually because it is too dry or too small. A small heap can struggle to generate enough heat to keep the process moving. Try to make your bin at least one cubic metre if you can, or simply add some high-nitrogen "activators" like fresh grass clippings or even a bit of comfrey tea to give it a kickstart.
Start small and grow from there
The beauty of composting is that you can start today with just a small container under your kitchen sink. You don't need to be an expert or have a massive garden to make a real difference to your soil health. Every eggshell and potato peeling you save is a step towards a more productive, sustainable vegetable patch.
I remember how proud I felt when I harvested my first basket of potatoes grown entirely in my own homemade compost. They tasted better than anything I had ever bought, and knowing I had closed the loop from kitchen to garden made them taste even sweeter. It is a simple habit that quickly becomes a natural part of your gardening life.
Why not pick out a spot for your first bin this weekend? Once you see the results in your 'King Edward' potatoes and lush green spinach, you will wonder why you didn't start sooner. Your soil will thank you, your plants will thrive, and you will be well on your way to a truly thriving, nutrient-rich vegetable garden.