There is something truly magical about the first time you reach into a pot of soil and pull out a handful of smooth, golden potatoes. If you have ever tasted a "new" potato boiled with a sprig of mint and a knob of butter within an hour of it being dug up, you will know exactly why we gardeners get so excited. The flavour is incomparable to anything you can buy in a supermarket.
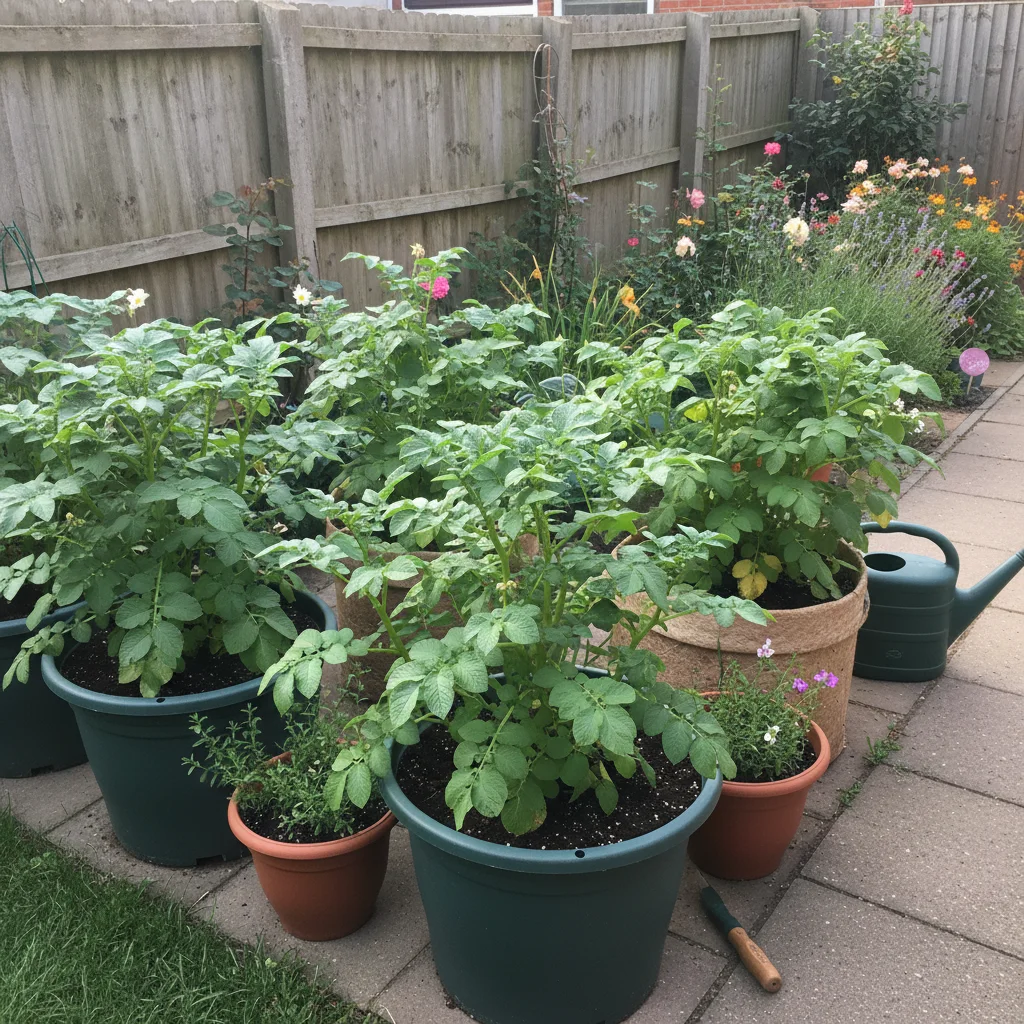
The best part is that you don’t need a sprawling allotment or a massive vegetable patch to enjoy this. In fact, some of my most successful crops have come from a small collection of pots tucked into a sunny corner of my patio. Whether you have a tiny balcony in the city or a small courtyard in a terrace house, you can absolutely grow your own spuds.
Growing in containers is actually one of the easiest ways to start your vegetable gardening journey. It takes away much of the heavy lifting and the daunting task of digging over large beds. If you have ever felt overwhelmed by the idea of "managing a garden," starting with a few pots of potatoes is the perfect way to build your confidence.
Why grow potatoes in pots
One of the biggest advantages of container gardening is the control it gives you. When you grow in the ground, you are at the mercy of whatever soil happens to be there. In many parts of the UK, we deal with heavy clay or stony ground that can make life difficult for root vegetables. With pots, you choose the compost, ensuring your potatoes have the perfect, loose environment to expand.
Pots also help keep pests at bay. Soil-borne problems like eelworms are much less likely to affect your crop when you use fresh, bagged compost. It is also much harder for slugs to reach your precious plants when they have to climb up the side of a tall container. I’ve found that my patio potatoes often look much healthier than the ones I’ve struggled with in the ground.
Another benefit is the ease of harvesting. Forget the back-breaking work of digging with a fork and accidentally skewering half your crop. When your container potatoes are ready, you can simply tip the pot over onto a tarp or a lawn and pick them out by hand. It feels like a treasure hunt, and it is a fantastic activity to do with children or grandchildren.
Picking the right potato varieties
When you are growing in containers, the variety you choose makes a big difference. Potatoes are generally categorised by when they are harvested. First earlies are the "new potatoes" we love in early summer. They are small, have thin skins, and are perfectly suited for pots because they don’t need a huge amount of space to develop.
Second earlies take a few weeks longer but still produce wonderful, waxy tubers that are great for salads. I often recommend varieties like 'Charlotte' or 'Maris Peer' for beginners. They are reliable, delicious, and they stay relatively compact in a pot. You get a decent harvest without the plant becoming unmanageably large.
Maincrop potatoes are the ones we usually roast or mash in the autumn. While you can grow them in containers, they need much more space and stay in the soil for a lot longer. If you are just starting out or have limited space, I suggest sticking to first or second earlies. You will get your harvest sooner, usually by June or July, which leaves your pots free to grow something else for the late summer.
Getting your seed potatoes ready to grow
Before you put anything in the soil, you will want to "chit" your potatoes. This is just a gardening term for letting the potatoes start to grow small sprouts. It gives them a head start and usually leads to a bigger, healthier crop. You typically start this in late January or February, about six weeks before you plan to plant them out.
You don’t need any fancy equipment for this. An old egg box is the classic tool for the job. Place your seed potatoes in the egg box with the "eyes" (the little indentations where sprouts will form) facing upwards. Keep them in a cool, bright place, like a windowsill in a spare room. You want to avoid direct, scorching sun, but they need plenty of light so the sprouts grow strong and green rather than long and spindly.
Once the sprouts are about an inch long, they are ready to go. If you live in a colder part of the UK, like my old plot in Yorkshire, you might want to wait until the risk of heavy frost has passed before planting. Usually, late March or early April is the sweet spot for most of us.
What you need to get started
Before you head to the garden centre, it helps to have a quick list of the basics. You don’t need to spend a fortune; in fact, being resourceful is part of the fun. I have used everything from dedicated potato sacks to old 10-litre buckets with holes drilled in the bottom.
- Seed potatoes: Buy these from a reputable supplier to ensure they are disease-free.
- Large containers: Aim for at least 30cm deep and wide with good drainage holes.
- Peat-free compost: A good quality multi-purpose compost works perfectly.
- Watering can: Potatoes are thirsty plants, especially when grown in pots.
- Sunlight: A spot that gets at least six hours of sun a day is ideal.
Planting your potatoes step by step
Start by filling the bottom of your container with about 10cm to 15cm of compost. You don’t fill the pot all the way to the top yet; this is a common mistake that beginners make. We plant them low down so we can add more soil as the plant grows, a process we call "earthing up."
Place your chitted seed potatoes on top of the compost with the sprouts pointing upwards. For a standard 30cm pot, one or two seed potatoes are plenty. If you are using a large 40-litre bag, you might fit three. Don't be tempted to crowd them; potatoes need space to breathe and grow. If you put too many in, you will end up with lots of tiny, marble-sized spuds.
Cover the potatoes with another 10cm of compost and give them a gentle water. Place the pots in a sunny, sheltered spot. If a late frost is forecast once the green shoots have poked through, simply throw an old bit of fleece or some newspaper over the top for the night to protect the delicate leaves.
The secret to a big harvest is earthing up
As your potato plants grow, you will see green leafy stems reaching for the sky. When they get to about 15cm tall, it is time to "earth them up." This simply means adding more compost to the pot, covering the lower stems and leaving just the top few leaves showing. It might feel like you are burying your hard work, but I promise it is for a good reason.
Earthing up encourages the plant to grow more stems underground. Since potatoes grow from the stems rather than the roots, more stems mean more potatoes. It also ensures that the developing tubers stay covered and dark. If potatoes are exposed to light, they turn green and become toxic, so keeping them tucked under the soil is essential.
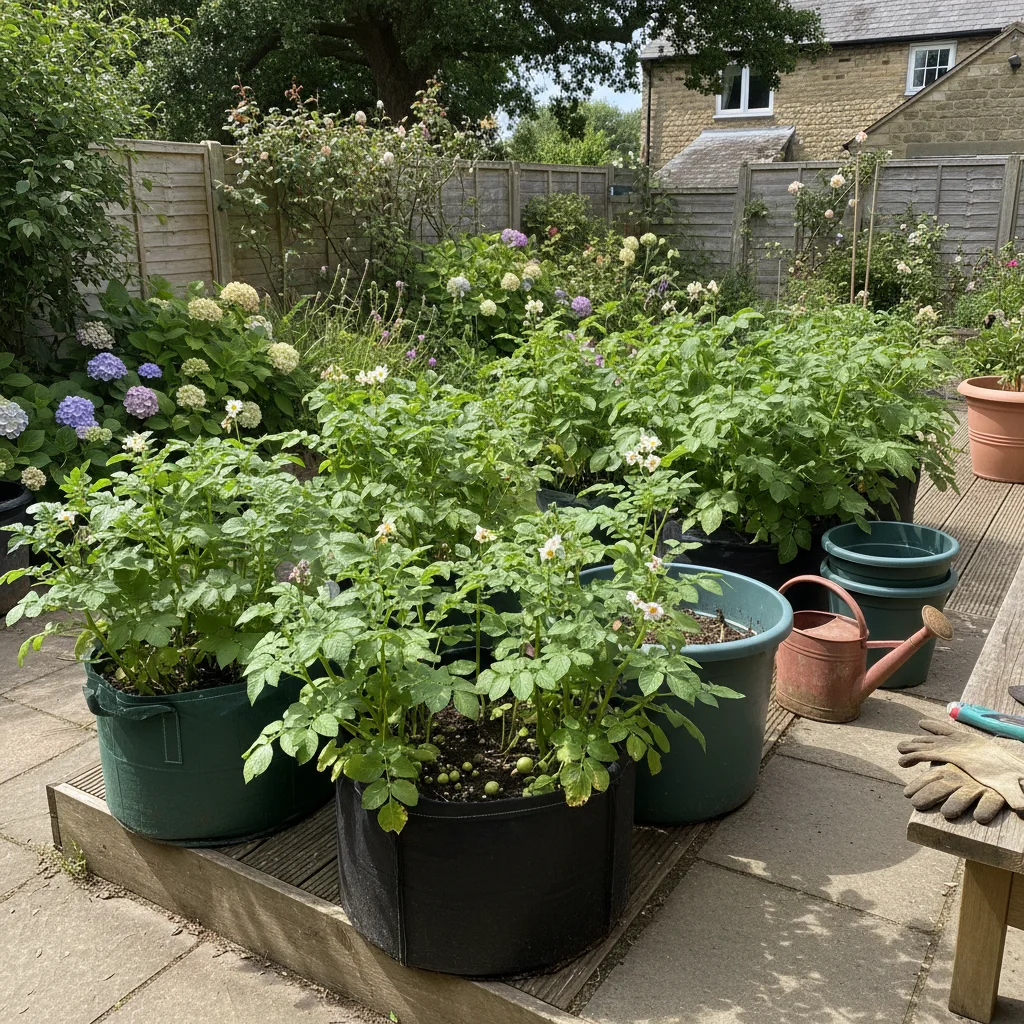
You will repeat this process every couple of weeks until the compost reaches the top of the container. By the time the pot is full, your plants should be bushy and vigorous. This method maximises your space and ensures that every centimetre of that pot is working hard to produce food for you.
Keeping your plants healthy and hydrated
Potatoes are mostly water, so it shouldn't come as a surprise that they need a lot of it to grow. Containers dry out much faster than the ground, especially during a typical UK "heatwave" or even a breezy spring day. I like to check my pots every morning. If the top inch of soil feels dry to the touch, it is time for a drink.
When you water, try to aim for the base of the plant rather than soaking the leaves. Wet leaves in warm weather can encourage blight, which is a fungal disease that can ruin a crop very quickly. Keeping the soil consistently moist—not sodden, but like a wrung-out sponge—is the goal.
While good compost has enough nutrients to get the plants started, they will appreciate a little extra boost once they are established. Every fortnight, I give mine a liquid feed. A high-potash fertiliser, like the one you use for tomatoes, is perfect. It encourages the plant to focus its energy on growing tubers rather than just making more leaves.
Best varieties for container growing
Choosing the right variety can feel a bit overwhelming when you see the long lists in catalogues. To make it easier, I have narrowed down a few of my absolute favourites that consistently perform well in pots and taste fantastic.
- Swift: True to its name, this is one of the fastest first earlies to harvest.
- Charlotte: A classic second early with a wonderful waxy texture, perfect for salads.
- Pentland Javelin: A very reliable first early that has great resistance to common diseases.
- International Kidney: These are essentially the same variety as Jersey Royals and taste divine.
- Ratty: A fun, finger-shaped salad potato with a nutty flavour that kids love.
Knowing when to harvest your crop
The wait for the harvest is the hardest part, but there are signs to look out for. For first and second earlies, you usually wait for the flowers to open or the buds to drop. This is a signal from the plant that the tubers underneath are reaching a good size. This usually happens around 10 to 12 weeks after planting.
If you aren't sure, you can do what I call the "rummage test." Gently stick your hand into the side of the compost and feel around for a potato. If it feels large enough to eat, you are good to go. If they still feel like tiny peas, give them another week or two. There is no rush; the longer they stay in, the bigger they get, though "new" potatoes are best when they are about the size of a hen's egg.
When you are ready to harvest the whole pot, the easiest way is to tip it out. I usually spread an old compost bag or a tarp on the ground and pour the contents of the pot onto it. Sifting through the loose soil to find the hidden potatoes is incredibly satisfying. Make sure you check the very bottom of the pot, as a few cheeky ones often hide in the corners.
Storing and enjoying your homegrown spuds
Because container-grown potatoes are usually earlies, they have very thin, delicate skins. This means they don't store as well as the thick-skinned maincrops you buy in sacks during winter. They are at their absolute best when eaten on the day they are harvested. If you do have a bumper crop, keep them in a cool, dark place in a paper bag. Never use plastic bags, as the potatoes will "sweat" and rot.
To prep them, you don't even need to peel them. A gentle scrub with a soft brush under cold water is enough to remove any bits of compost. Steam or boil them gently until tender, and serve them simply. I find that when you have grown them yourself, you don't want to mask the flavour with heavy sauces.
Growing potatoes in pots is a brilliant way to reconnect with where your food comes from, even if you only have a few square feet of outdoor space. It is a low-risk, high-reward project that proves you don't need to be a professional farmer to produce something delicious. Once you have experienced the joy of your own patio harvest, you will likely find yourself adding more pots every single year.
The best time to start planning is right now, so why not grab a couple of bags of compost and a few seed potatoes this weekend? You are only a few months away from the best-tasting dinner you've had all year.