You don’t need a sprawling country estate or a heavy-duty excavator to bring the magic of water into your garden. In fact, some of the most successful wildlife havens I’ve seen in London are no bigger than a washing-up bowl. Whether you have a tiny paved courtyard, a balcony, or just a corner of a shared garden, a small pond is the single most effective thing you can do to invite nature into your space.
The beauty of a wildlife pond on a budget is that nature isn't picky about aesthetics. A frog doesn't care if your pond is a designer glass feature or an upcycled plastic tub from the back of the shed. It just needs clean water, a way to get in and out, and a few plants to hide in. We often think of gardening as an expensive hobby, but creating a watery habitat is mostly about clever repurposing and a bit of patience.
Even in the middle of a busy city, water acts like a magnet. Within days of setting up a small pool, you might spot birds bathing or dragonflies hovering over the surface. If you’re lucky, you’ll eventually find frogs or newts moving in to keep the local slug population in check. It’s a wonderful way to feel connected to the seasons, even if your "view" is mostly brick walls and chimney pots.
Where to Put Your Tiny Pond
Finding the right location is the first step, and it’s especially important when space is at a premium. Ideally, you want a spot that gets a decent amount of light, but isn't in blistering sun all day long. Too much direct heat in a small container can turn the water into a pea-soup of algae very quickly. Aim for a place that gets about five or six hours of sunlight, which is enough to keep your aquatic plants happy without boiling the residents.
If you are working with a balcony or a roof terrace, you must consider the weight of the water. A full container of water is surprisingly heavy, so it is always best to place your pond near a load-bearing wall or over a joist. We’ve all seen the weight limits on balcony specs, and while a small bowl is usually fine, it’s worth being mindful before you go for a massive stone trough.
Avoid placing your pond directly under overhanging trees if you can. While a bit of dappled shade is lovely, falling leaves can quickly overwhelm a small volume of water. As they rot, they release nutrients that encourage blanket weed and strip the water of oxygen. If you only have space under a tree, just be prepared to scoop out the leaves regularly during the autumn months.
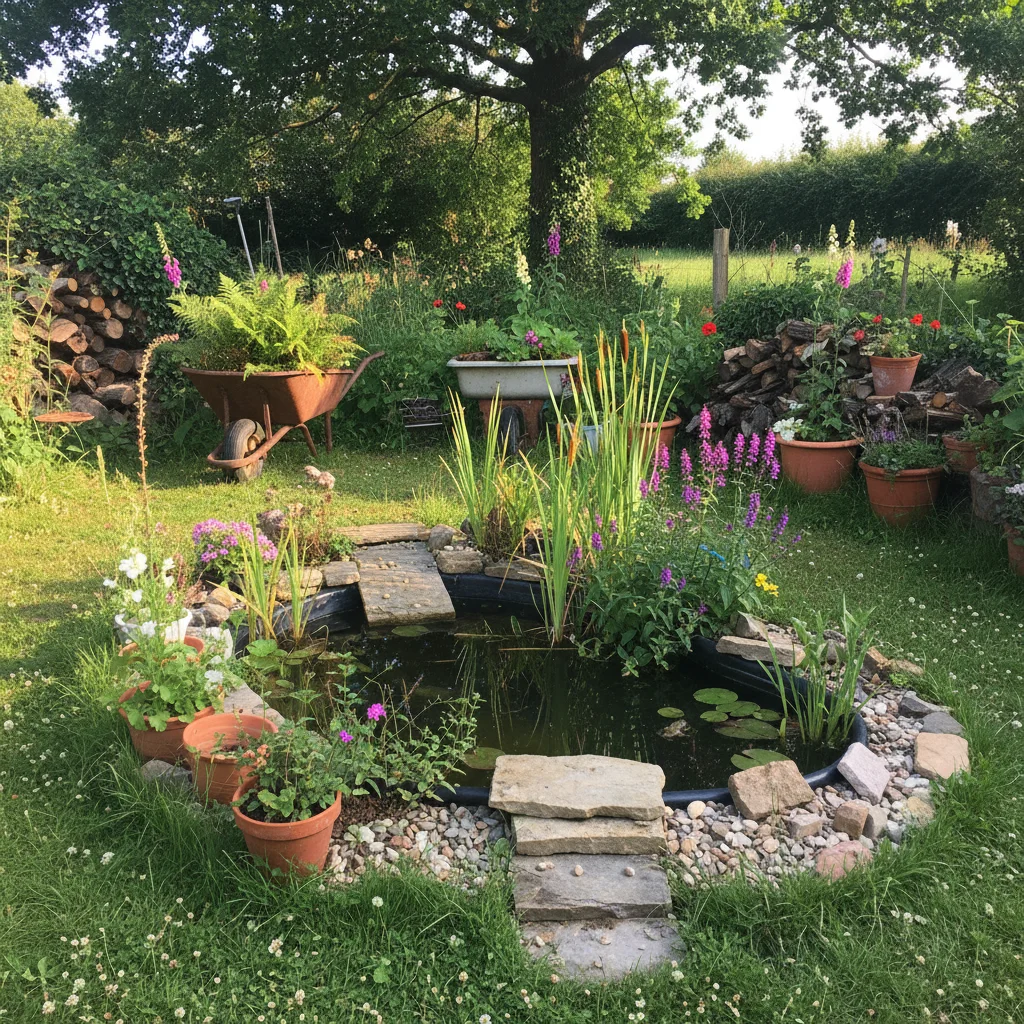
Choosing Your Budget Container
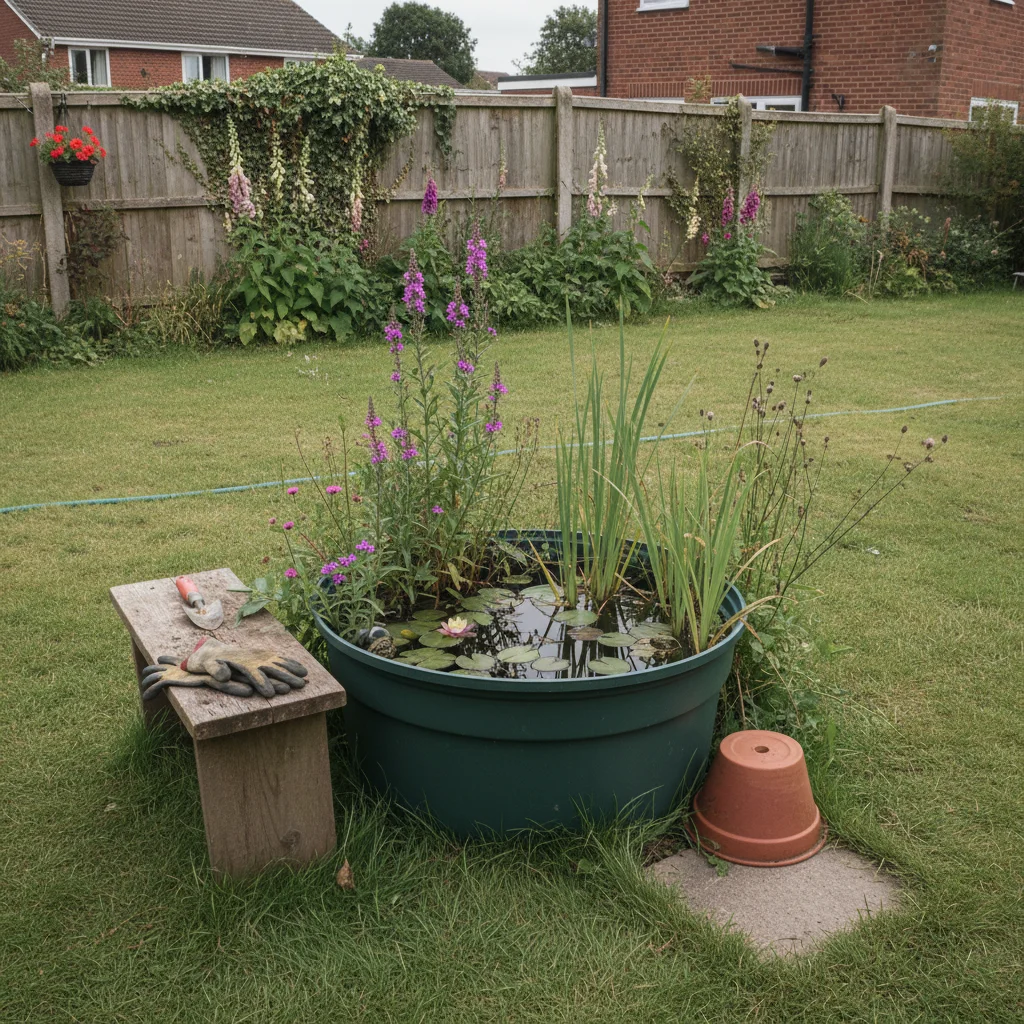
This is where you can save the most money. You don’t need to buy a specialist pre-formed pond liner or a heavy ceramic pot. Look around your home or local charity shops for anything that can hold water. An old baby bath, a large plastic storage crate, or even a sturdy washing-up bowl can work perfectly well.
If you happen to find an old butler sink or a galvanised metal tub, these make beautiful features on a patio. Just keep in mind that metal can get very hot in the summer and very cold in the winter, which can be tough on the plants and animals inside. If you use a metal container, lining it with a bit of leftover pond liner or even a heavy-duty bin bag (if it’s just for a season) can help regulate the temperature slightly.
For those with a bit more space who want to dig a hole, a small offcut of flexible pond liner is usually very cheap at garden centres. You can often find "remnants" at the end of the roll for a fraction of the price. If you’re digging down, make sure the edges are level so the water doesn't all drain out of one side when it rains.
Essential Items for Your Build
While we are keeping costs low, there are a few bits and pieces you will need to gather before you start. Most of these can be found for free if you keep your eyes peeled during a walk or ask neighbours who might be clearing out their sheds.
- A waterproof container like a tub, trough, or lined hole.
- A bag of washed gravel or some smooth stones.
- A few larger rocks or bricks to create different depths.
- A collection of logs or branches for a wildlife ramp.
- Rainwater from a water butt if possible.
- A small selection of native UK pond plants.
You don't need fancy tools for this project. A trowel is handy if you’re digging, but if you’re making a container pond on a patio, your hands are the best tools you have. The gravel is important for providing a home for beneficial bacteria, which helps keep the water clear and healthy over time.
Making the Pond Safe for Wildlife
The most common mistake people make with small ponds is creating a "death trap" with steep, slippery sides. If a hedgehog or a frog falls into a container with vertical walls, they won't be able to climb back out and will eventually drown. Safety is the most important part of a wildlife pond, and it’s very easy to fix with a bit of creative stacking.
Use bricks or large stones inside the pond to create "steps." This allows creatures to move between different depths and gives them a platform to sit on just below the surface. Frogs love to lounge in the shallows where the water is a bit warmer. Make sure the top step is level with the edge of the container so anything that falls in can simply walk out.
On the outside of the pond, you should provide a ramp if the container is sitting on the ground. A sloped pile of stones or a sturdy log leaning against the side works perfectly. It also helps to tuck the pond near some pots or long grass, giving small creatures a "corridor" to travel through so they don't feel exposed to predators like cats or magpies while they’re approaching the water.
Filling the Pond the Right Way
It is very tempting to just stick the garden hose in and fill your pond in two minutes, but tap water isn't ideal for wildlife. UK tap water contains chlorine and chloramines to make it safe for us, but these chemicals can be harmful to delicate pond life. Tap water is also often high in nitrates, which act as fertiliser for algae, leading to that dreaded green murky water.
The best option is always rainwater. If you have a water butt, use that. If you don't, you can leave a few buckets out to catch the next British downpour. If you absolutely have to use tap water because we’re in the middle of a dry spell, let the water sit in the container for at least 24 to 48 hours before adding any plants. This allows the chlorine to dissipate into the air.
Once the pond is filled, try to resist the urge to keep "cleaning" it. A bit of sediment at the bottom is actually a good thing, as it provides a place for small insects to hide. As long as the water isn't smelling bad or completely covered in thick green slime, it’s best to let the mini-ecosystem find its own balance.
Selecting the Right Plants
Plants are the lungs of your pond. They provide oxygen, soak up excess nutrients, and offer shade and protection for wildlife. In a small budget pond, you only need three or four plants to get started. It’s best to stick to native UK species as they are hardier and better suited to our local insects.
Oxygenators and Marginals
Oxygenating plants stay mostly submerged and are essential for keeping the water clear. Rigid Hornwort (Ceratophyllum demersum) is a fantastic choice because it doesn't even need to be planted in soil; you can just drop a handful into the water and it will start growing. It’s very affordable and grows quickly, though you might need to thin it out once a year.
Marginal plants grow in the shallow edges. Marsh Marigold (Caltha palustris) is a personal favourite of mine because it produces cheerful yellow flowers very early in the spring, just when the first bees are waking up. It’s a tough plant that can handle the cramped conditions of a small pot or tub.
Floating Plants
Floating plants like Frogbit (Hydrocharis morsus-ranae) provide essential shade. By covering about half of the water's surface with leaves, you keep the water temperature down and prevent algae from taking over. Avoid the temptation to buy invasive species like Fairy Fern or Floating Pennywort, as these can escape into the wild and cause huge problems for our natural waterways.
Managing the Seasons in a Small Space
In a small urban garden, your pond will react quickly to the weather. During a hot British summer, the water level will drop due to evaporation. Always top it up with rainwater if you can. If you have to use the tap, add just a little bit at a time so you don't shock the residents with a sudden change in temperature or chemistry.
When autumn arrives, keep an eye on falling leaves. A few are fine, but a thick layer will rot and turn the water black. I usually just spend five minutes once a week scooping them out with my hands or a kitchen sieve. This is also a good time to trim back any plants that have become a bit too enthusiastic and are taking over the whole space.
Winter care is quite simple. If the surface freezes over, don't smash the ice with a hammer, as the shockwaves can harm any creatures hibernating at the bottom. Instead, rest a pan of hot water on the ice to melt a small hole. This allows gases to escape and oxygen to get in. Most native pond life is perfectly happy to sit in the cold mud at the bottom until spring returns.
What to Expect from Your New Guests
One of the most rewarding parts of building a wildlife pond on a budget is seeing who moves in. Don't be disappointed if you don't see frogs on day one. It can take a season or two for them to find you, especially if you live in a very built-up area. However, you will almost certainly see smaller visitors much sooner.
Water boatmen and pond skaters are usually the first to arrive, often seemingly out of nowhere. Birds will quickly start using the shallow edges for a drink or a bath, which is a joy to watch from a window. If you stay very still on a summer evening, you might even see bats swooping low over the water to catch the midges that hatch from the surface.
Whatever you do, please avoid the temptation to add goldish. While they are pretty, they are predators in a small pond. They will eat the frogspawn, the dragonfly larvae, and the small crustaceans that keep the water clean. A true wildlife pond is much more interesting when you let the natural balance of insects and amphibians take centre stage.
Building a small pond is a quiet act of rebellion against the concrete of the city. It proves that you don't need a massive budget or a huge plot of land to make a real difference to your local environment. Once your pond is established, you’ll find yourself spending more time outside, watching the ripples and waiting to see which new visitor has decided to call your little patch of water home.