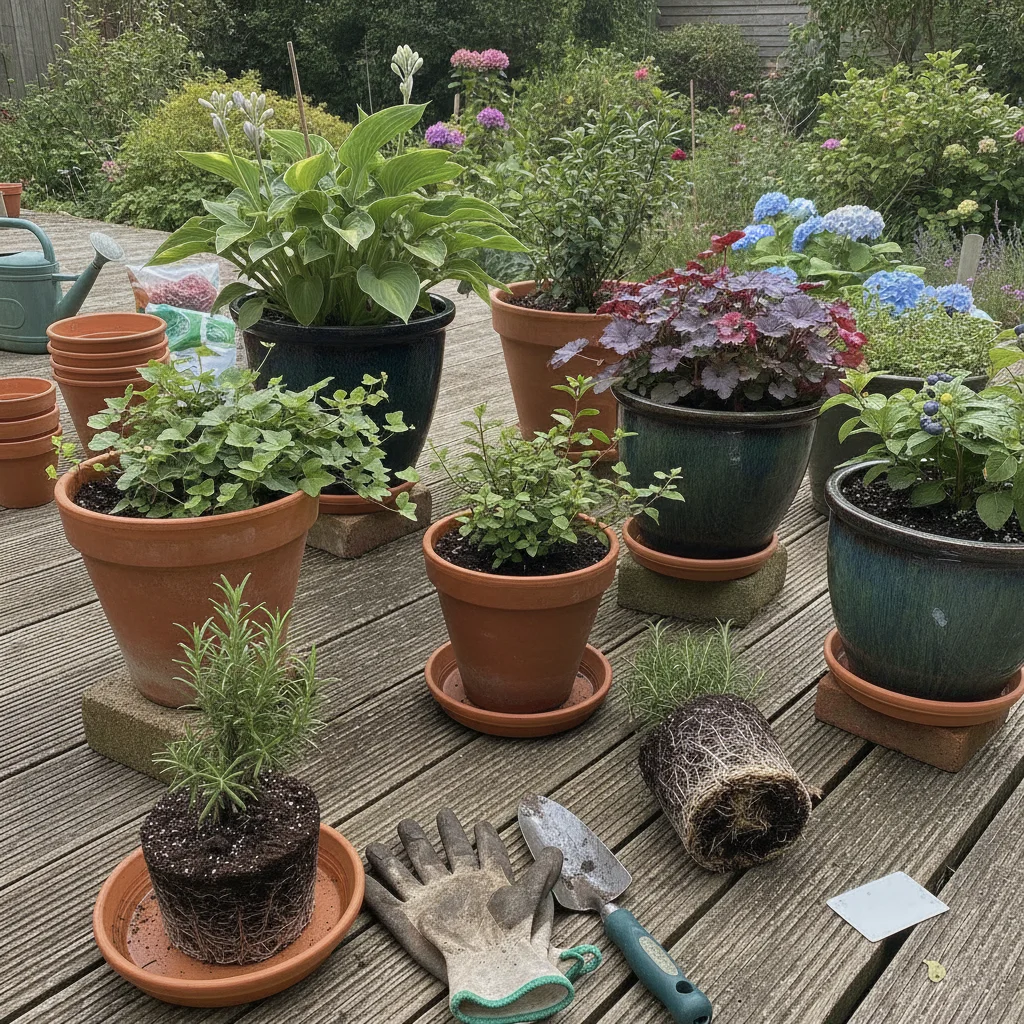
We have all been there. You find a beautiful new plant at the garden centre, bring it home, and tuck it into a lovely new pot. A few weeks later, instead of thriving, it looks a bit yellow and sad. You give it more water, thinking it’s thirsty, but it only gets worse. When you finally pull it out of the pot, the roots are dark, mushy, and smell a bit like a damp basement.
This is the classic sign of root rot, and it is the number one reason why container plants fail. I remember my first tiny balcony garden in Leeds, where I lost a whole row of herbs because I didn't understand how water moved through a pot. It felt like a personal failure, but it really wasn't. It was just a lack of proper drainage.
The good news is that preventing root rot is much easier than you might think. Once you understand a few simple secrets about how soil and water behave together, you can grow almost anything in a container. Whether you are working with a large allotment or a couple of pots on a window sill, these techniques will help your plants stay healthy and vibrant all year round.
Why roots need to breathe
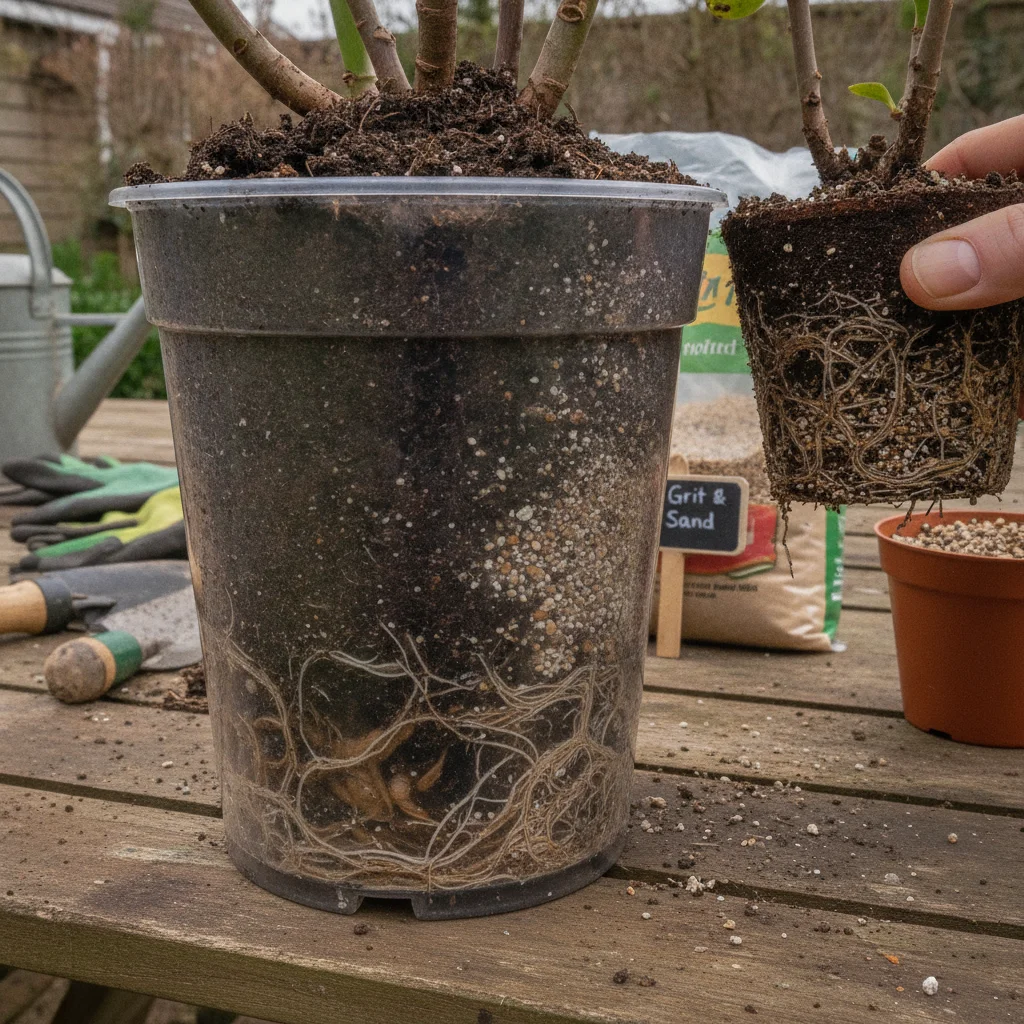
It might sound strange to think of roots breathing, but they actually need oxygen just as much as we do. In a healthy container, there are tiny pockets of air between the bits of soil. When you water your plant, that water should move through those pockets, leaving them damp but still full of air.
If a pot has poor drainage, the water gets trapped. It fills up all those tiny air pockets and stays there. This essentially drowns the roots. Without oxygen, the root tissues begin to die and decay, which is what we call root rot. Once the rot starts, it can spread quickly, making it very hard for the plant to take up any nutrients or water at all.
In our typical UK climate, we have to be especially careful. We often get long periods of grey, drizzly weather where the sun doesn't come out to help evaporate excess moisture. This means our pots can stay saturated for days or even weeks if we haven't set them up correctly from the start.
Choosing the right container
The first step in your drainage journey starts with the pot itself. I always tell people that while a pot might look gorgeous, if it doesn't have a hole in the bottom, it isn't a pot—it’s a bucket. Every container used for growing must have a way for excess water to escape.
If you fall in love with a ceramic pot that has no drainage holes, don't worry. You can still use it as a "cachepot." This simply means you keep your plant in a plain plastic nursery pot with holes and then sit that inside the pretty ceramic one. Just remember to lift the inner pot out after watering to make sure it isn't sitting in a pool of water at the bottom.
The material of the pot also makes a big difference. Terracotta is a wonderful choice for beginners because it is porous. This means it actually breathes through the sides, helping moisture to evaporate more quickly. Plastic and glazed ceramic pots hold onto moisture for much longer, which can be great for thirsty plants like tomatoes but risky for herbs like rosemary or lavender.
The truth about pot holes
Most pots come with at least one hole, but often it isn't enough. For a medium-sized pot, I like to see several holes spaced out across the base. If you are using plastic pots, you can easily add more yourself. I often use a large drill bit or even a heated metal skewer to melt extra drainage points into the bottom of my plastic tubs.
It is also worth checking the position of the holes. Some pots have a single hole right in the centre, but the base of the pot is slightly indented. This can create a "moat" of water around the edges that never drains away. If you see this, try to drill extra holes around the perimeter to ensure every drop of excess water has an exit strategy.
If you are worried about soil washing out of the holes and making a mess on your patio, you can cover them with a small piece of fine mesh or a bit of old net curtain. This keeps the soil in place while letting the water flow freely. It’s a simple trick that keeps your garden tidy and your drainage clear.
Why garden soil fails in pots
One of the most common mistakes I see is people filling their pots with soil straight from their garden. I understand the temptation—it’s free and it looks rich. However, garden soil is far too heavy and dense for container life. When you put it in a pot, it packs down tightly, squeezing out all those vital air pockets we talked about earlier.
In the ground, soil has worms, insects, and a whole ecosystem to keep it aerated. In a pot, it just becomes a solid block of mud. This is why we use "potting compost" or "potting mix." These are specially designed to be lightweight and to hold onto just the right amount of moisture while letting the rest drain away.
For most of my containers, I use a high-quality peat-free multi-purpose compost. To give it an extra drainage boost, I often mix in a few handfuls of horticultural grit or perlite. Perlite looks like little bits of white popcorn and is fantastic for creating permanent air spaces in your soil. It’s a small investment that makes a massive difference to the health of your plants' roots.
Debunking the gravel myth
For decades, the standard advice was to put a layer of gravel or broken "crocks" (bits of old terracotta pots) at the bottom of every container. The idea was that this created a space for water to collect away from the roots. However, modern science has shown us that this actually does the opposite of what we want.
Water doesn't move easily from a fine material, like compost, into a coarse material, like gravel, until the compost is completely saturated. This creates something called a "perched water table." Essentially, you are moving the soggy, rot-prone zone higher up in the pot, right where the roots are trying to grow.
Instead of a thick layer of gravel, I recommend filling the entire pot with your well-draining compost mix. If you want to use a few crocks just to stop the drainage hole from getting plugged by a stray stone, that is fine. But skip the deep layer of stones—your plants will be much happier for it.
The power of pot feet
In the UK, our winters can be very wet and cold. If your pots are sitting flat on a cold, damp patio, the water can't always get out of the drainage holes effectively. Surface tension can actually hold the water inside the pot. This is where pot feet come in, and they are one of my favourite gardening secrets.
Pot feet are small wedges made of terracotta, plastic, or even rubber that sit under the base of your pot. By lifting the container just an inch or two off the ground, you allow air to circulate underneath and water to flow away freely. It also prevents your pots from freezing to the ground in a hard frost, which can cause the pots to crack.
If you don't want to buy fancy decorative pot feet, you can use almost anything. I’ve used old wine corks, flat stones from the garden, or even spare bricks. The goal is simply to create that small gap between the pot and the ground. It’s a small change that can save a plant's life during a rainy British autumn.
Identifying the warning signs
Knowing what to look for can help you catch root rot before it becomes fatal. While every plant is different, there are a few universal signs that your drainage might be failing. If you notice these, it’s time to take action.
- Yellowing leaves: Especially the lower leaves, which often turn pale or yellow when the roots are struggling.
- Wilting while wet: If a plant looks floppy but the soil feels damp to the touch, it isn't thirsty—the roots are likely rotting.
- A funky smell: If you get close to the soil and it smells sour or like rotting eggs, bacteria from root rot are likely present.
- Slow growth: Plants that seem "stuck" and don't produce new leaves often have compromised root systems.
- Algae or moss: A green layer forming on the surface of the compost is a sure sign that the top of the soil is staying too wet for too long.
How to rescue a waterlogged plant
If you suspect your plant is already suffering from root rot, don't panic. You can often save it if you act quickly. Start by gently tipping the plant out of its pot. If the soil is dripping wet and smells bad, you need to remove as much of that old, soggy compost as possible.
Take a look at the roots. Healthy roots should be firm and usually white or light tan. Use a clean pair of scissors or secateurs to snip away any roots that are black, mushy, or slimy. Once you have cleaned up the root ball, repot the plant into a clean container with fresh, dry potting compost mixed with plenty of grit or perlite.
Keep the rescued plant in a sheltered spot out of direct, harsh sunlight for a week or two while it recovers. Don't water it immediately; let the new compost absorb some of the excess moisture from the root ball first. It might look a bit sorry for itself for a while, but you’ll often see new, healthy green growth appearing within a few weeks.
Mastering the finger test
The best way to prevent root rot in the first place is to change how you water. Many people water on a schedule—every Monday and Thursday, for example. But plants don't work on a calendar; their needs change based on the temperature, the wind, and how much they are growing.
Before you reach for the watering can, use the "finger test." Stick your index finger into the soil up to the second knuckle. If the soil feels damp and cool, leave it alone. If it feels dry all the way down, then it’s time to give it a drink. This simple habit is the most effective way to ensure you never overwater your plants again.
Remember that in the height of a UK summer, you might need to water every day, but in the damp months of spring and autumn, you might only need to water once a fortnight. Always let the plant tell you what it needs. By paying attention to the soil moisture, you are giving the roots the perfect balance of water and air.
Managing saucers and trays
We often use saucers under our pots to protect our patios or windowsills from water stains. While these are practical, they can be a major cause of root rot if they are left full of water. After a heavy rainstorm or a deep watering session, always check your saucers.
If the pot is sitting in a pool of water for more than thirty minutes, the soil will act like a sponge and suck that water back up into the pot. This keeps the bottom of the root ball permanently saturated. I make it a habit to go around my patio after a rain shower and tip out any standing water from the saucers.
If you have a very heavy pot that you can't easily lift, you can use a large kitchen baster to suck the water out of the saucer. Alternatively, you can fill the saucer with a layer of large pebbles and sit the pot on top of the pebbles. This allows the saucer to catch the overflow without the base of the pot actually touching the water.
Creating a healthy environment
Drainage is about more than just holes and grit; it’s about the whole environment. Plants that get plenty of light and good airflow will naturally use water more efficiently, which helps keep the soil from staying too wet. If you have a damp, shaded corner, choose plants that love moisture, like ferns or hostas, rather than succulents or Mediterranean herbs.
I have found that grouping pots together can look beautiful, but if they are packed too tightly, air can't circulate around them. This can lead to damp air settling around the pots, slowing down evaporation. Give your containers a little bit of breathing room, and you will find they stay much healthier.
By following these simple steps, you are setting your garden up for success. It really is about working with nature rather than against it. Once you get the drainage right, gardening becomes so much more relaxing. You can spend your time enjoying the flowers and harvesting your herbs instead of worrying about why your plants are looking peaky.
Now that you know the secrets to perfect drainage, why not take a look at your current pots? A quick check of the drainage holes or adding a few pot feet today could make all the difference for your plants tomorrow. You'll be amazed at how much more vibrant and resilient your container garden can be with just a little bit of extra air for those roots.