We have all been there. You look out at your garden after a long winter or a scorching summer, and instead of a velvet green carpet, you see a patchwork of brown soil and thinning blades. It is one of the most common frustrations for any gardener, but the good news is that most lawn damage is entirely reversible with a bit of patience and the right technique.
Repairing a lawn is about more than just aesthetics. Those bare spots are an open invitation for opportunistic weeds and moss to take hold, which can quickly turn a small repair job into a major renovation. By acting quickly, you protect the health of your entire garden ecosystem and ensure your outdoor space remains a pleasant place to spend time.
Before we reach for the seed bag, we must understand why the grass failed in the first place. If you simply throw seed onto a problem area without addressing the root cause, you will likely find yourself repeating the task next season. We want to build a resilient lawn that can stand up to the rigours of family life and the unpredictable British weather.
Identify the cause of the patches
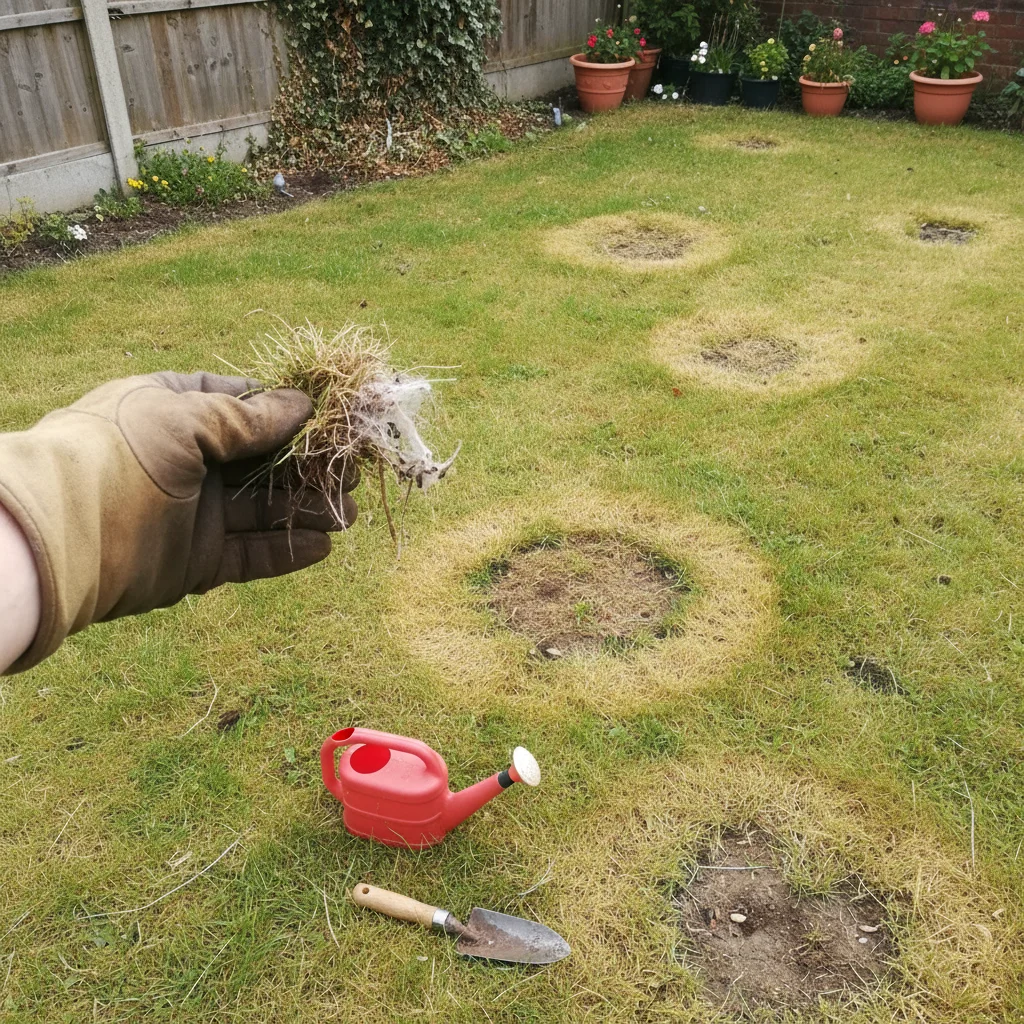
Every bare patch tells a story about what is happening beneath the surface. If the patch is in a high-traffic area, such as a path to the shed or under a children's swing, the issue is likely soil compaction. When soil is squashed tight, the tiny air pockets that grass roots need to breathe disappear, effectively suffocating the plant.
You might also notice circular brown patches that seem to appear overnight. This is often the work of garden pests like leatherjackets or chafer grubs, which feast on grass roots. Alternatively, it could be a sign of "dog burn," where the high nitrogen content in pet urine scorches the grass. Knowing the cause allows us to tailor our repair method for the best possible results.
Sometimes the problem is environmental rather than physical. Deep shade under a large tree or a north-facing fence can starve grass of the light it needs for photosynthesis. In these cases, simply reseeding with a standard mix won't work; we need to look at shade-tolerant varieties or perhaps consider whether a different type of planting would be more sustainable in that specific spot.
The best time for lawn repairs
Timing is the most critical factor in successful lawn repair. For the best results in the UK, you should aim for either late spring or early autumn. During these windows, the soil is warm enough to encourage germination, and we can usually rely on the British clouds to provide the consistent moisture that young grass plants crave.
In spring, wait until the soil temperature is consistently above 10°C. If you sow too early while the ground is still icy and waterlogged, the seeds will simply rot before they have a chance to sprout. April and May are generally the "sweet spots" when the garden is waking up and growth is at its most vigorous.
Autumn is my personal favourite time for lawn repairs, specifically September and early October. The soil has been baked by the summer sun and holds its heat well into the evening, while the morning dews provide a natural irrigation system. Grass sown in autumn has several months to establish a deep, healthy root system before the heat of the following summer arrives.
Essential tools for the job
You do not need a shed full of expensive machinery to fix a patchy lawn, but having a few specific items will make the process much smoother. Most of these are basic requirements for any well-maintained garden, and investing in quality versions will save you money and effort in the long run.
- A sturdy garden fork for aerating compacted soil.
- A metal leaf rake or a specialized scarifying rake to clear debris.
- A hand trowel for precise digging and levelling.
- Quality top-dressing or peat-free seed compost.
- A watering can with a fine rose attachment to avoid washing seeds away.
- The correct grass seed mix for your specific garden conditions.
Preparing the ground for repair
Preparation is the stage where most people get impatient, but it is the most important part of the process. Start by removing any dead grass, weeds, or moss from the bare patch. I find a sharp trowel or a hand fork is best for this, as it allows you to get right to the roots of the weeds without disturbing too much of the surrounding healthy grass.
Once the area is clear, you need to tackle compaction. Use your garden fork to poke holes about 10cm to 15cm deep across the patch. This allows oxygen, water, and nutrients to reach the root zone. If your soil is particularly heavy clay, you might want to brush some sharp sand into these holes to improve the long-term drainage and prevent the area from becoming a puddle again.
After aerating, the goal is to create a "fine tilth." This is a gardening term for soil that has been crumbled into small, pea-sized particles. Use your rake to level the surface and break up any large clods. If the patch is lower than the rest of the lawn, add a layer of high-quality, peat-free compost mixed with a little topsoil to bring it back up to the correct level.
How to reseed bare patches
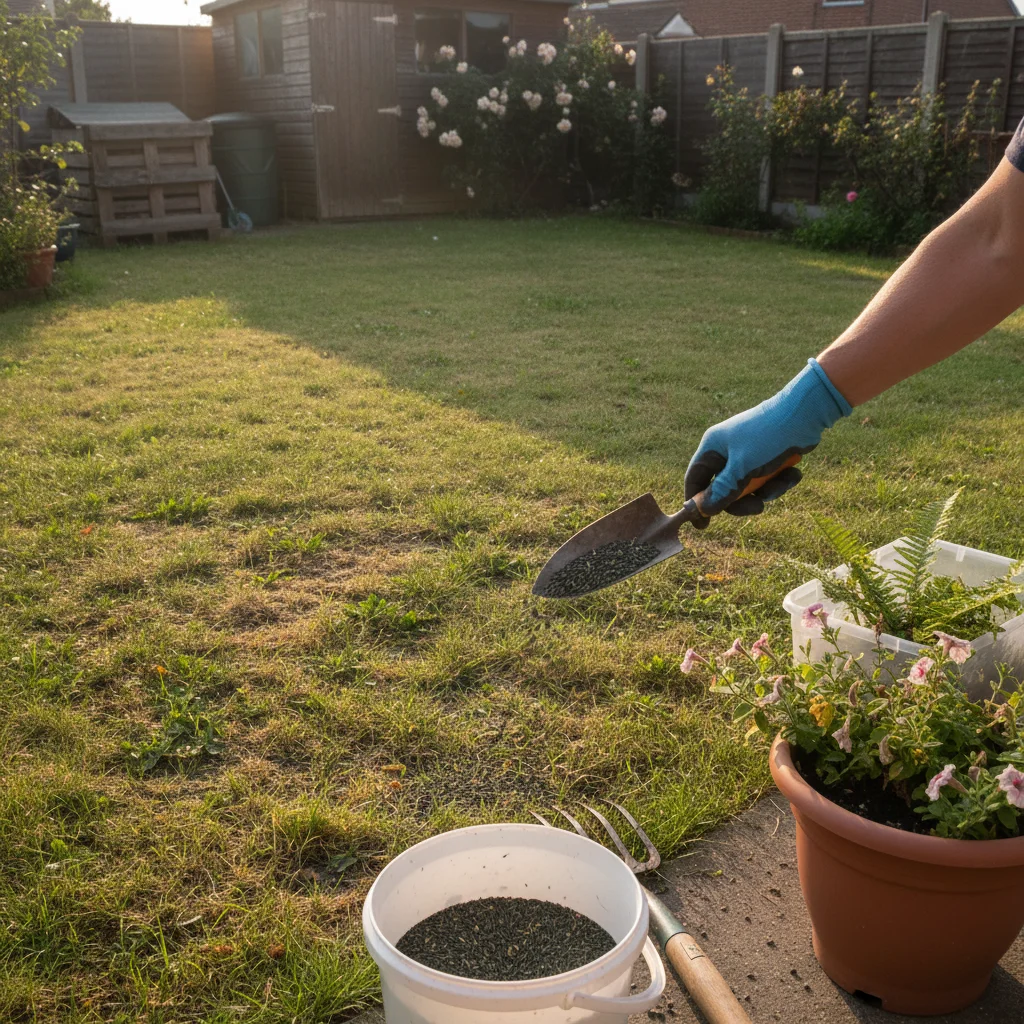
Reseeding is the most cost-effective way to fix a lawn. When choosing your seed, look for a mix that matches your existing grass. Most UK lawns are a blend of Ryegrass for durability and Fescues for a finer appearance. If your garden is a playground for kids and pets, a "tough" or "hardwearing" mix with a higher percentage of Perennial Ryegrass is the sensible choice.
Scatter the seed evenly across the prepared soil. A good rule of thumb is about 20g to 30g per square metre for repair work. You want enough seed to ensure good coverage, but not so much that the seedlings are fighting each other for space and nutrients. I usually suggest sowing half the seed in one direction and the other half at a right angle to ensure no spots are missed.
Once the seed is down, lightly rake it so it is just barely covered by soil. Grass seed needs some light to germinate, so don't bury it deep. Firm the area down gently with the back of your rake or by treading lightly with your boots. This ensures "seed-to-soil contact," which is vital for the seed to absorb moisture and begin growing.
Turfing for an instant fix
If you have a large bare patch or simply don't want to wait weeks for seed to grow, turfing is an excellent alternative. It provides an "instant" lawn and is particularly useful on slopes where seed might be washed away by heavy rain. However, it does require a bit more physical effort and a slightly higher budget than seeding.
Start by cutting out a neat square or rectangle around the bare patch using a half-moon edging iron or a sharp spade. You want to remove the top 2cm to 3cm of soil so that when you lay the new turf, it sits flush with the rest of the lawn. If the new turf sits too high, your mower will scalp it; if it sits too low, it will become a muddy hollow.
Lay the turf over the hole and trim it to fit perfectly. Use a blunt kitchen knife or a small saw to get a precise edge. Once in place, firm it down well to remove any air pockets. It is a good idea to fill the seams between the new turf and the old lawn with a little bit of compost to prevent the edges of the turf from drying out and shrinking.
Managing water and moisture
Whether you choose seed or turf, water is the lifeblood of your new repair. For the first two weeks, the soil should be kept consistently moist but never waterlogged. In dry weather, this might mean a light watering every morning and evening. Use a fine rose on your watering can or a mist setting on your hose to avoid dislodging the seeds or shifting the soil.
As the grass begins to grow and reaches about 2cm to 3cm in height, you can start to reduce the frequency of watering but increase the amount of water you apply. This encourages the roots to grow deeper into the soil in search of moisture, making the plant more resilient to future droughts. Always water in the early morning or late evening to minimise evaporation.
One common mistake is to stop watering as soon as the green shoots appear. These young plants are very vulnerable until they have established a robust root system. Continue to monitor the patch for at least a month, especially if we have a dry spell. If the grass starts to look a dull, blue-grey colour, it is a sign that it is under moisture stress and needs a soak.
Dealing with pet damage
If your lawn patches are caused by your four-legged friends, you need a slightly different approach. Dog urine is very high in nitrogen; while nitrogen is a key component of lawn fertiliser, too much of it in one concentrated spot will "burn" the grass. You will often see a dead brown centre surrounded by a ring of very lush, dark green grass where the nitrogen is at a more helpful concentration.
When a "burn" happens, the first step is to flush the area with plenty of water as quickly as possible to dilute the nitrogen. If the grass is already dead, you must remove the dead patch and the top inch of soil, as the soil itself may be too salty for new seeds to grow. Replace it with fresh topsoil before reseeding.
For a more sustainable solution, consider training your dog to use a specific "pottery" area filled with bark mulch or gravel. This protects your lawn entirely and makes clean-up much easier. If that isn't possible, keeping a watering can handy to douse the spot immediately after your dog has been out can prevent the patch from forming in the first place.
Choosing the right nutrients
Once your new grass is about 5cm tall, it might benefit from a light feed to help it thicken up. However, you must be careful not to use a strong "weed and feed" product on young grass, as the herbicides can kill the tender new plants. Look for a dedicated "pre-seeding" or "starter" fertiliser which has a balanced NPK ratio.
NPK stands for Nitrogen (N), Phosphorus (P), and Potassium (K). For young grass, we want a bit more Phosphorus (the middle number) because this is the element that promotes strong root development. A healthy root system is the foundation of a healthy lawn; it allows the grass to access water from deep in the ground and helps it recover from wear and tear.
Always apply fertiliser when the soil is moist and rain is forecast, or water it in well by hand. Over-applying fertiliser can be just as damaging as the original problem, leading to "fertilisers burn" or excessive, weak growth that is prone to disease. Follow the manufacturer's instructions to the letter—more is definitely not better when it comes to lawn chemicals.
Mowing your repaired lawn
It is tempting to get the mower out as soon as the new grass looks a bit untidy, but patience is a virtue here. You should wait until the new grass is at least 5cm to 7cm tall before its first cut. Make sure your mower blades are as sharp as possible; dull blades will tear the young, delicate grass out of the ground rather than cutting it cleanly.
For the first few mows, set your mower to its highest possible setting. You only want to remove the very tips of the grass blades—never more than one-third of the total height. This encourages the plant to "tiller," which means it sends out new shoots from the base, helping the patch to thicken up and blend in with the rest of the lawn.
After a few weeks of light trimming, you can gradually lower the mower height to match the rest of your garden. By taking it slow, you allow the grass to build up its strength. A lawn that is cut too short too soon will become stressed, making it more likely that those bare patches will return during the next heatwave or cold snap.
Long term lawn health
The secret to a lawn without patches isn't just in the repairs; it is in the ongoing maintenance. Regular aeration once a year, usually in the autumn, prevents the compaction that leads to many bare spots. Similarly, an annual scarification to remove thatch—that layer of dead organic matter that sits on the soil surface—allows the grass to breathe and prevents moss from taking over.
I also highly recommend "overseeding" your entire lawn every few years. This involves scattering a light layer of seed over the existing grass after scarifying. It keeps the lawn young and thick, leaving no room for weeds to establish. It is a much easier task to maintain a thick lawn than it is to constantly repair a thin, struggling one.
Finally, think about your soil health. Using peat-free top-dressings and organic fertilisers feeds the soil microbes and earthworms, which in turn keep your soil aerated and fertile. A healthy, living soil is the best defence against pests and diseases. By working with nature rather than against it, you can enjoy a lush, green, and patch-free lawn that serves as the perfect backdrop for your British garden.