We have all been there. You are walking through a local garden centre in London or Bristol, you spot a stunning hydrangea, and then you see the price tag. Buying established shrubs can be a serious investment, especially when you are trying to green up a small urban patio or a rented courtyard on a budget.
The good news is that if you already have one healthy shrub, or a neighbour willing to let you borrow a branch, you can create new plants for free. Layering is perhaps the most "set and forget" method of propagation available to us. Unlike taking cuttings, which often require a heated propagator, misting, and a lot of luck, layering lets the parent plant do all the hard work.
In a small garden, we often lack the space for a dedicated nursery bed or a greenhouse. Layering is the perfect solution because the new plant develops right there at the base of the original. It is a space-saving, low-effort way to fill your pots and borders with more of the plants you already love.
Why layering is perfect for urban gardeners
Layering is essentially a way of tricking a plant into growing roots from a stem while it is still attached to the mother plant. This means the "baby" plant continues to receive water and nutrients from the parent throughout the entire process. It is far less stressful for the plant than a cutting, which has to survive on its own from day one.
For those of us with busy city lives, this is a game-changer. We have all forgotten to water our pots during a sudden British heatwave. If you forget to water a cutting, it dies in hours. If you forget to water a layered stem, the parent plant simply keeps it alive until the next rain or watering session.
This method is also ideal for those with limited tools. You do not need rooting powders, special lighting, or a degree in horticulture. If you have a trowel, a bit of wire, and a small patch of soil or a nearby pot, you have everything you need to start multiplying your garden.
The best time to start layering
In the UK, timing is everything when it comes to the rhythm of the garden. For most shrubs like rhododendrons, camellias, and hydrangeas, the best time to start layering is in early spring or autumn. In spring, the sap is rising and the plant is full of energy for growth. In autumn, the soil is still warm from the summer sun, which encourages root development before the winter frosts arrive.
If you are working on a balcony or a windy roof terrace, keep an eye on the weather. A very dry spring might mean you need to check the moisture levels of your layered stems more frequently. However, generally speaking, as long as the ground isn't frozen, you can get started.
Patience is the only real requirement here. While some plants might root in a single season, others can take a full year or even two to develop a root system strong enough to survive on its own. It is a slow-burn project that rewards the patient gardener with a robust, healthy new shrub.
Simple layering step by step
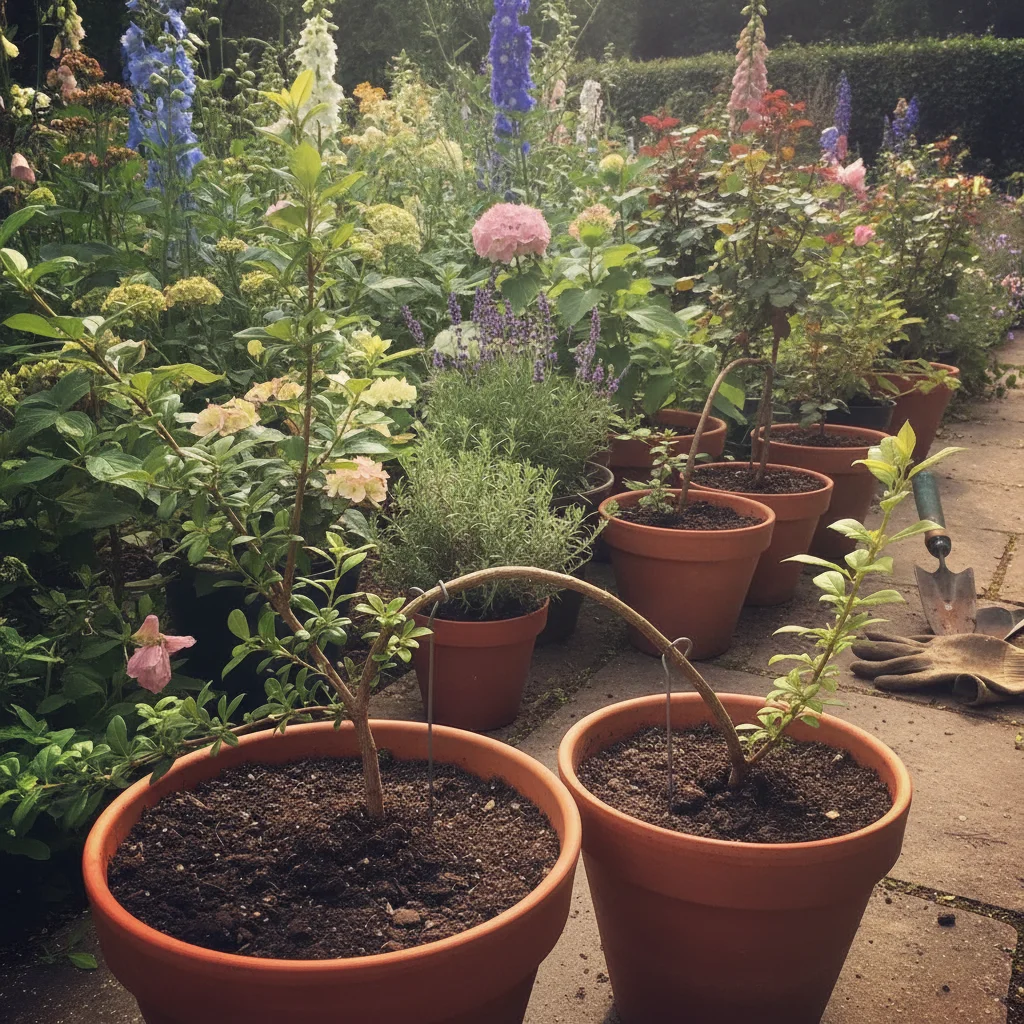
To begin, look for a flexible, young stem near the base of your shrub. You want something that can easily be bent down to the ground without snapping. If your plant is in a pot, you can simply place another pot filled with compost right next to it and bend the branch into the new container.
Once you have chosen your stem, clear away any leaves from the middle section where it will touch the soil. You want a clean stretch of stem about ten centimetres long. Use a sharp knife to gently nick the underside of the stem or scrape away a small sliver of bark. This "wound" encourages the plant to send out roots at that specific point.
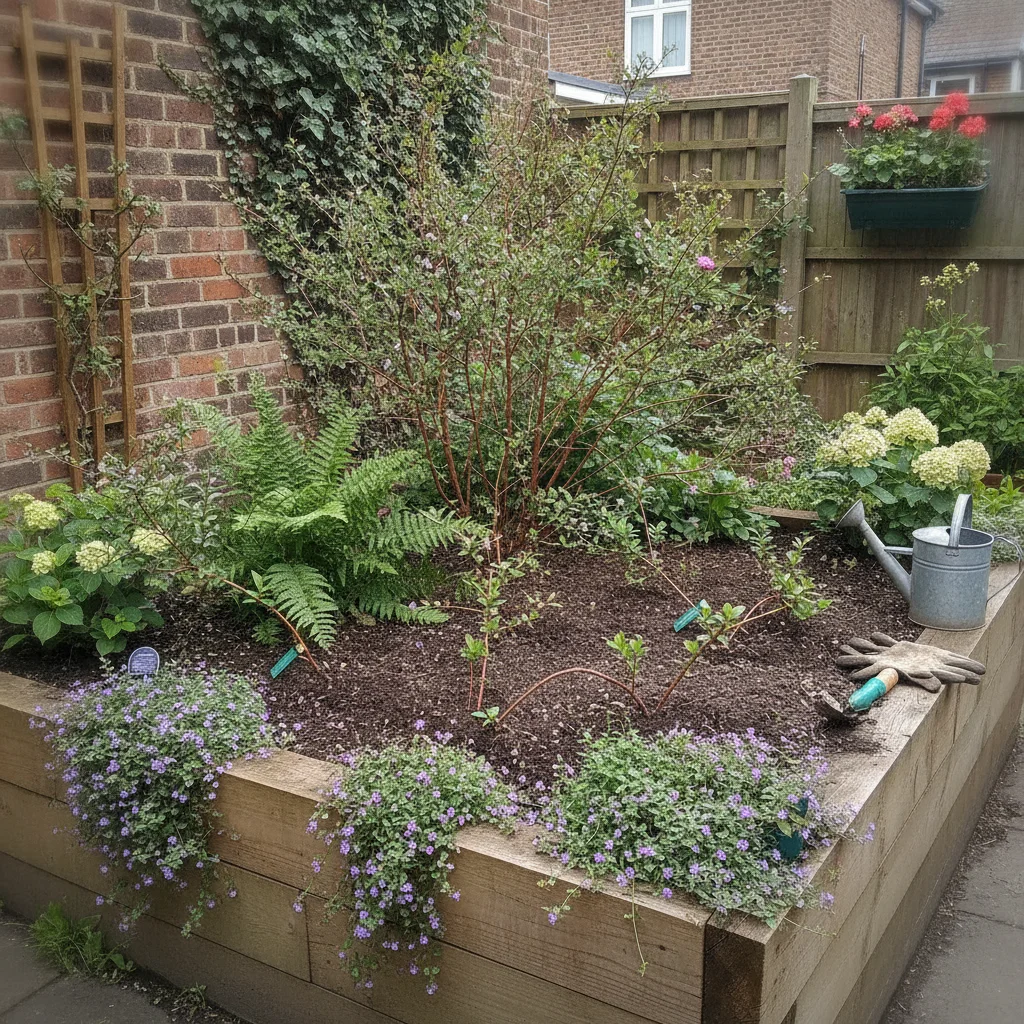
Dig a small trench in the soil or compost about five to ten centimetres deep. Gently push the wounded part of the stem into the trench, making sure the tip of the branch stays above the ground. You want the end of the branch to be pointing upwards, so it grows into a straight new shrub.
Securing and caring for your new plant
The most common mistake people make is letting the branch pop back out of the soil. To prevent this, you need to pin it down firmly. You can buy professional garden pegs, but a bent piece of heavy-duty wire or even a large, flat stone works just as well.
Once the stem is pinned, cover the trench with soil and firm it down with your hand. If you are layering into a pot on a balcony, make sure the pot is heavy enough that it won't be blown away by the wind, dragging the branch with it. A few heavy pebbles on the surface of the soil can help keep everything stable.
Keep the area moist but not waterlogged. In a typical UK summer, our regular rainfall might do most of the work for you. However, if we get a dry spell, give your layered stems a quick drink when you water your other pots. You are looking for consistent moisture to trigger those new roots.
Essential kit for the urban propagator
You really do not need a shed full of equipment to succeed with layering. Most of these items are likely already sitting in your kitchen or a small garden bag.
- A sharp kitchen knife or clean secateurs for wounding the stem.
- U-shaped wire pegs or even a repurposed wire coat hanger.
- A small bag of peat-free multi-purpose compost.
- A few heavy stones or decorative pebbles to hold everything in place.
- A small trowel or even a sturdy old tablespoon for digging the mini-trench.
- A watering can with a fine rose to avoid washing away the soil.
Mastering air layering for balconies and patios
What if you don't have any ground space, or your shrub doesn't have branches low enough to reach a pot? This is where air layering comes in. It is a brilliant technique for urban gardeners with tall, woody plants like ficus, magnolias, or even some types of roses.
Instead of bringing the branch to the soil, you bring the soil to the branch. You perform the same "wounding" technique on a higher stem, but instead of burying it, you wrap the wound in a handful of damp sphagnum moss or compost. You then wrap the whole thing in clear plastic film and secure it with string or tape.
This creates a little "greenhouse" around the stem. Over a few months, you will actually be able to see the new white roots growing through the moss inside the plastic. Once the roots fill the moss, you simply snip the branch off below the root ball and pot it up. It is a fantastic way to propagate when you are tight on floor space.
Choosing the right shrubs to multiply
While many plants can be layered, some are particularly well-suited to this method in our UK climate. Hydrangeas are perhaps the easiest; their flexible stems and vigorous growth make them perfect candidates for beginners. You can easily turn one large hydrangea into a whole hedge for a small courtyard in just a couple of years.
Rhododendrons and azaleas also respond beautifully to layering. These can be expensive to buy from nurseries, so layering is a very cost-effective way to add that classic spring colour to your garden. Because they prefer acidic soil, make sure you use ericaceous compost in your layering trench or pot if your garden soil is alkaline.
Climbing plants like honeysuckle and clematis are also natural candidates. They often "self-layer" in the wild, with stems rooting wherever they touch the damp ground. If you have a clematis climbing up a balcony railing, you can easily pin a stray stem into a pot at its base to create a gift for a friend or another plant for your collection.
Recognizing when roots have formed
The hardest part of layering is the waiting game. It is very tempting to keep tugging on the stem to see if it has rooted, but this can break the delicate new root hairs. Instead, wait at least six months before you even think about checking.
A good sign of success is seeing new, vigorous green growth on the tip of the layered branch. This usually means the plant has its own root system and is no longer relying solely on the parent. You can gently move a little soil away to check for roots, but be very careful not to disturb them too much.
Once you are sure there is a healthy root ball, use sharp secateurs to sever the link to the parent plant. Leave the new plant in place for another few weeks to make sure it can cope on its own before you dig it up and move it to its final home. This "weaning" period helps reduce transplant shock.
Troubleshooting common layering problems
Sometimes things don't go according to plan. If your layered stem dies back, it is often because the soil dried out completely during a hot spell. In small pots or shallow trenches, the soil can lose moisture very quickly. Adding a layer of mulch or a flat stone over the buried section can help keep the moisture where it is needed.
If you find that no roots have formed after a year, the wound might not have been deep enough. The plant needs to feel a bit of "stress" to trigger root production. Next time, try making a slightly larger nick or using a tiny bit of rooting hormone gel on the wound to give it a nudge.
Pests can occasionally be an issue, especially slugs hiding under the stones or pegs. Keep an eye out for any nibbled leaves on your new growth. Generally, though, layering is very resilient. Because the plant is still attached to its parent, it can survive minor pest attacks that would kill a standalone cutting.
Moving your new plants to their final home
When the time comes to move your new shrub, treat it with the same care you would a store-bought plant. If you have layered into a pot, the process is easy. If it is in the ground, dig a wide circle around the new roots to ensure you get as much of the root ball as possible.
In an urban garden, we often have to deal with poor soil or heavy clay. When you transplant your new shrub, dig a hole twice as wide as the root ball and mix in some good quality compost. This gives the young roots an easy start as they move out into the surrounding soil.
If you are planting into a container, choose a pot that is only slightly larger than the root ball. Putting a small plant into a massive pot can lead to "sour" soil where the water sits unused. You can always pot it up into something larger next year as it grows.
Sharing the garden bounty
One of the best things about layering is the abundance it creates. In a small space, you might find you quickly run out of room for ten new hydrangeas. This is a wonderful opportunity to swap plants with your neighbours or local gardening groups.
In many London boroughs, there are thriving plant swap communities. Trading a home-grown rhododendron for some heritage tomato seeds or a rare indoor plant is a great way to meet fellow gardeners. It turns a solitary hobby into a social one, which is what urban gardening is all about.
By mastering this simple, traditional technique, you are taking control of your garden's future. You are no longer limited by your budget or the stock at the local garden centre. You can curate a space filled with plants that have a personal history, all grown by your own hand.
Now is the perfect time to head outside and look at your shrubs with fresh eyes. Find a flexible branch, grab a tent peg or a piece of wire, and start your first layer today. Within a year, you will have a thriving new plant ready to fill that empty corner of your patio or to give away as a truly special, home-grown gift.