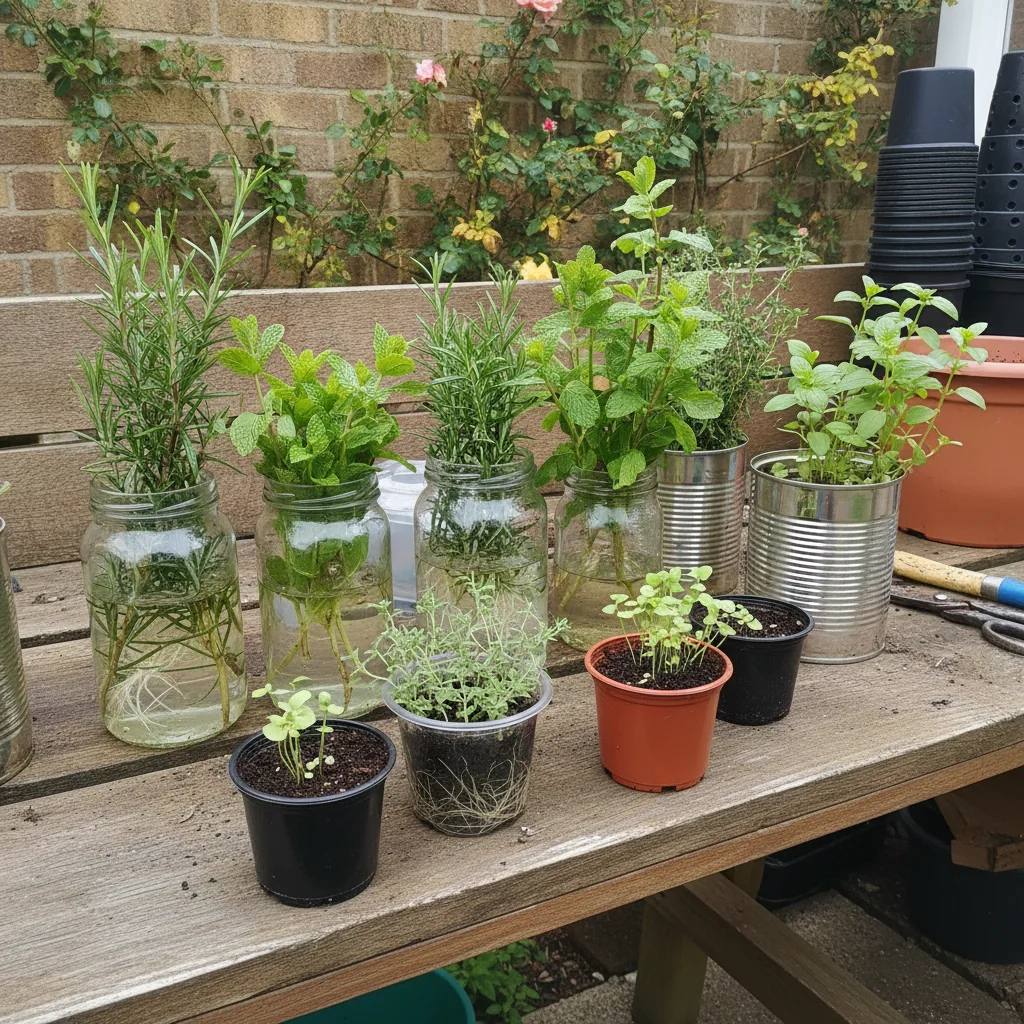
We’ve all been there. You’re in the supermarket, you grab a plastic-wrapped bunch of basil or rosemary for a recipe, and three days later, the leftovers are a sad, slimy mess at the bottom of the fridge. It feels like a waste of money and a waste of good flavour. Even the "living" pots from the veg aisle often give up the ghost the moment they cross your threshold. But there is a better way to keep your kitchen stocked with fresh scents and tastes without needing a massive allotment or a dedicated greenhouse.
Propagating your own herbs is one of those gardening "hacks" that feels like a magic trick once you master it. You are essentially taking a tiny piece of a plant you already love and turning it into a brand-new, independent version of itself. For those of us gardening on balconies, window sills, or tiny paved courtyards, this is the ultimate way to maximise our space. You don't need to buy expensive seeds or wait weeks for finicky seedlings to sprout. You just need a healthy mother plant, a bit of water or grit, and a little bit of patience.
In the city, we often deal with less-than-ideal growing conditions, from swirling winds on a fifth-floor balcony to the deep shade of a neighbouring brick wall. Propagation allows us to create "clones" of plants that we already know can handle our specific microclimate. If your current rosemary bush is thriving in that windy corner of the patio, its offspring will have the exact same hardy DNA. It’s about being practical with what we have and ensuring we never have to settle for those tasteless, supermarket-bought sprigs again.
Why propagation makes sense for urban growers
Space is the biggest constraint for most of us. We can’t exactly plant a sprawling herb garden that takes up half a lawn because, well, we don't have a lawn. By propagating, we can keep our herb collection compact and refreshed. Older herb plants, especially woody ones like sage or rosemary, can eventually become leggy and unproductive. Instead of struggling with a gnarled old shrub that’s outgrown its pot, you can start fresh with young, vigorous cuttings that fit perfectly in a window box or a small terracotta pot.
There’s also the cost factor to consider. A single high-quality herb plant from a local garden centre might cost four or five pounds. If you want a lush display or enough mint to fuel a summer’s worth of mojitos and tea, that adds up quickly. Propagation turns that one-off investment into an infinite supply. We’ve all felt the pinch of rising grocery prices, so being able to "grow your own" from a single cutting is a brilliant way to save a few quid while making your outdoor space look much more inviting.
Beyond the practicalities, there is something deeply satisfying about the process. In a fast-paced urban environment, taking five minutes to snip a few stems and set them in water is a grounding experience. It connects us to the seasons and the natural world, even if the only "wildlife" nearby is the local pigeon population or a stray bee visiting your balcony lavender. It’s gardening at its most accessible and rewarding.
The essentials for your propagation station
You really don't need a shed full of tools to get started with this. Most of what you need is likely already in your kitchen or tucked away in a corner of your balcony. Because we are working in small spaces, we want to keep our kit minimal and effective. You don't need fancy heat mats or misting systems; the natural light from a bright window or the gentle warmth of a British spring is usually enough to get things moving.
Before you start snipping away at your favourite plants, it helps to have a few basics ready to go. You want to make sure your tools are clean to avoid spreading any plant diseases, which can be a real issue when plants are grown closely together in containers. A simple pair of sharp kitchen scissors or a small pocket knife will do the job perfectly well as long as they are wiped down first.
To give your cuttings the best chance of survival, you should have the following items nearby:
- A sharp, clean pair of scissors or a craft knife
- Small jars or glasses for water-based propagation
- A few 9cm pots or recycled yoghurt pots with drainage holes
- A bag of peat-free multi-purpose compost mixed with a little horticultural grit or perlite
- A clear plastic bag or a recycled clear fruit punnet to act as a mini-propagator
- Labels and a pen so you don't forget which variety is which
Water propagation for soft herbs
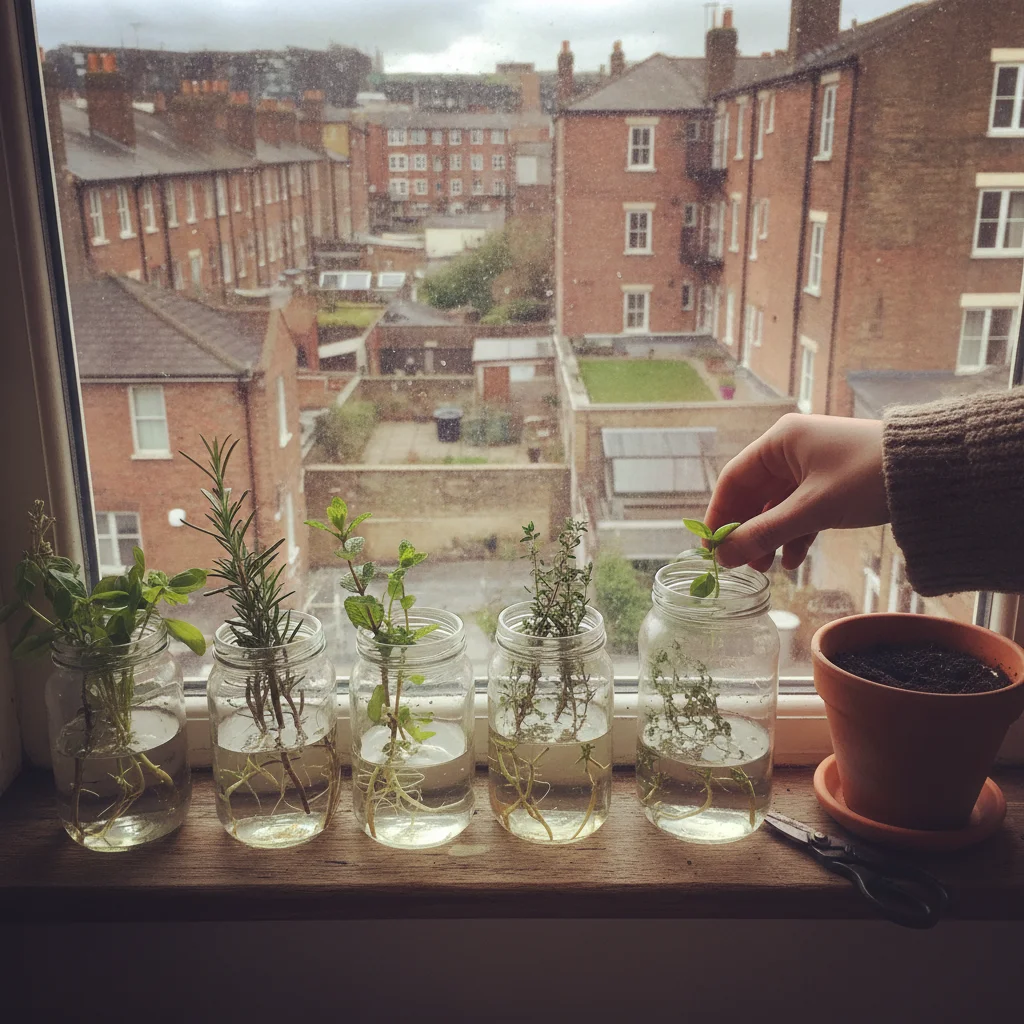
Mint is the absolute king of water propagation. If you’ve ever left a bunch of mint in a glass of water on the counter for too long, you’ve probably seen those white, thread-like roots starting to emerge from the stems. We can use this natural resilience to our advantage. This method works brilliantly for soft-stemmed herbs like mint, basil, and lemon balm. It’s also a great way to garden if you don't want to get soil all over your kitchen table just yet.
To start, look for a healthy, green stem on your mint plant that hasn't started flowering yet. Snip a piece about ten centimetres long, making the cut just below a "node"—that’s the little bump where the leaves emerge from the stem. This is where the plant's growth hormones are most concentrated. Strip off the lower leaves so you have a bare stem to submerge, leaving just a few leaves at the very top to catch the sunlight.
Drop the stem into a small glass of water, making sure no leaves are touching the water, as they will just rot and turn the water murky. Place the glass on a bright window sill, but try to avoid direct, scorching midday sun which can cook the cutting before it has roots. You’ll need to change the water every couple of days to keep it fresh and full of oxygen. Within a week or two, you should see a healthy cluster of roots. Once those roots are a couple of centimetres long, you can pot the new plant up into some compost.
Taking softwood cuttings from sage
Sage is a bit more substantial than mint, with its beautiful velvety leaves and slightly tougher stems. While you can sometimes get sage to root in water, it often performs much better when tucked straight into a pot of gritty compost. This is known as a softwood cutting, taken when the new growth is still flexible but has a bit of "snap" to it. In the UK, the best time for this is usually late spring or early summer, before the heat of July really kicks in.
When you’re taking a sage cutting, aim for a piece of this year’s growth. You want it to be about seven to ten centimetres long. Just like with the mint, you’ll want to cut just below a leaf node and remove the lower leaves. Because sage leaves are quite large and fuzzy, they can lose a lot of moisture through evaporation. To stop the cutting from wilting, you can actually snip the remaining top leaves in half horizontally. It looks a bit odd, but it reduces the stress on the stem while it’s trying to grow roots.
Dip the end of the stem into a little bit of water, then push it into a small pot filled with a mix of compost and grit. The grit is essential for urban pot gardening; it ensures that the water drains away quickly so the delicate new roots don't sit in cold, damp soil and rot. Place a clear plastic bag over the pot to create a humid environment—sort of like a tiny, personal sauna for your plant. Keep it in a bright spot out of direct sun, and in about three to four weeks, you’ll notice new green growth appearing at the tip.
Hardwood and semi-ripe cuttings for rosemary
Rosemary is a staple of the urban garden because it is incredibly tough. It can handle the wind, it doesn't mind a bit of drought if you forget to water the balcony for a day, and it stays green all winter. However, because it is a woody shrub, it takes a little longer to propagate than its softer cousins. We usually take "semi-ripe" cuttings in late summer or "hardwood" cuttings in the autumn.
For a semi-ripe cutting, look for a stem that is green at the very tip but starting to turn brown and woody at the base. This middle ground is the sweet spot for rosemary. You want a cutting about fifteen centimetres long. Pull the lower leaves off with a gentle downward motion, which sometimes creates a small "tail" of bark that can help with rooting. If you have any rooting hormone powder lying around, you can use it, but it’s not strictly necessary for rosemary if you’re patient.
Because the UK weather can be a bit unpredictable in late summer, these cuttings need a sheltered spot. A cold frame is great, but if you’re on a balcony, simply placing the pot in a larger container or a sheltered corner near the house wall will provide enough warmth. Rosemary cuttings can take several months to fully root, so don't be discouraged if nothing seems to be happening for a while. As long as the needles stay green and don't go brittle and brown, your plant is still working hard under the surface.
Managing light and heat on a balcony
One of the biggest challenges we face in small, urban spaces is the intensity of the microclimate. A south-facing balcony can become a sun trap that reaches temperatures far higher than a traditional garden, while a north-facing window sill might stay chilly and damp. When you are propagating, you have to be mindful of these extremes. A young cutting doesn't have a root system to pull up water, so if it gets too hot, it will simply dry out and die within hours.
If your outdoor space is particularly sunny, try to find a "dappled" spot for your new cuttings. This might be in the shadow of a larger tomato plant or tucked behind a chair. You want the light to be bright but indirect. If you’re propagating indoors on a window sill, be careful of "lens effect" where the glass magnifies the sun’s heat. Moving the pots just a few inches back from the glass can make a world of difference to their survival rate.
On the flip side, if you’re in a particularly shaded spot, you might find that your cuttings take much longer to root. In this case, using a clear plastic cover is even more important to trap whatever warmth is available. We’ve all dealt with the grey, drizzly British summer, so don't be afraid to bring your pots inside if the weather takes a turn for the worse. The beauty of container gardening is that your "garden" is mobile.
Troubleshooting common propagation problems
Even the most experienced gardeners have cuttings that fail. It’s part of the process, and in a small space, it’s always worth taking a few more cuttings than you actually need. One of the most common issues we see is "damping off," which is a fungal disease that causes the stem to turn black and shrivel at the soil line. This usually happens because the air is too stagnant or the compost is too wet.
If you notice your cuttings are looking a bit sad, check for these common signs:
- Grey or white mould on the surface of the soil or leaves
- Stems that feel mushy or soft to the touch
- Leaves falling off at the slightest bump
- No new growth after six weeks of waiting
- Water in the jar turning brown or smelling unpleasant
To prevent these issues, make sure you’re giving your plants a little bit of "breathable" time. If you’re using a plastic bag as a cover, take it off for an hour every day to let fresh air circulate. If you’re propagating in water, make sure you’re using a clean glass and changing the water regularly. And remember, sometimes a cutting just wasn't meant to be. If one fails, just compost it and try again with a fresh snip from the mother plant.
Potting on and hardening off
Once your cuttings have developed a strong set of roots, they are ready for the big wide world—or at least, a slightly larger pot on your balcony. This transition is a delicate time. You’ve pampered these little plants in a controlled environment, and suddenly moving them into the wind and varying temperatures of the outdoors can be a shock to their system.
We call the process of getting them used to the outdoors "hardening off." Start by putting your newly potted herbs outside for just a couple of hours during the warmest part of the day, then bring them back in. Gradually increase their outdoor time over the course of a week. This allows the plant to toughen up its leaf cuticles and get used to the movement of the wind. Even a "hardy" herb like rosemary needs a bit of a transition period if it’s been started in a warm kitchen.
When choosing a permanent pot, remember that herbs like rosemary and sage hate having "wet feet." Choose a pot with plenty of drainage and use a potting mix that is at least twenty percent grit or perlite. For mint, you actually want something that retains a bit more moisture, as mint is naturally a bank-side plant that loves a damp spot. A standard peat-free compost usually works fine for mint, provided you don't let it bake dry in the summer sun.
The joy of a constant harvest
There is nothing quite like the feeling of stepping out onto your balcony or reaching over to your window box to snip a few sprigs of herbs that you grew yourself. It changes the way you cook and the way you feel about your home. Instead of the stress of "using up" a supermarket packet before it rots, you have a living pantry that grows with you. You can take just what you need—two leaves of sage for a butter sauce, a sprig of rosemary for a roast, or a handful of mint for a salad.
By mastering these simple propagation techniques, you are taking control of your food and your space. You are turning a small urban footprint into a productive, fragrant sanctuary. And the best part? You can pass the joy on. Once you have a surplus of young herb plants, they make the perfect, thoughtful gift for friends and neighbours who might be looking to start their own small-space garden.
The next time you’re pruning your herbs to keep them tidy, don't throw those offcuts away. Grab a glass of water or a small pot of compost and see what happens. You’ll soon find that your biggest problem isn't a lack of herbs, but finding enough shelf space for all your thriving new plants. Enjoy the process, embrace the occasional failure, and look forward to a kitchen filled with the freshest flavours all year round.