There is something truly magical about watching a pile of old potato peelings and grass clippings transform into rich, crumbly "black gold." When I first started gardening in my small Yorkshire plot, I used to lug heavy bags of multi-purpose compost home from the garden centre every spring. It was expensive, exhausting, and I hated seeing all those plastic bags go to waste.
Then I started my first compost heap, and everything changed. Composting is much easier than you might think, and you certainly don't need a massive country estate to do it. Whether you have a sprawling lawn, a modest allotment, or just a small balcony with a few pots of 'Tumbler' tomatoes, you can turn your waste into the best plant food money can’t buy.
You might have heard that composting is smelly or attracts pests, but I promise that if you follow a few simple steps, your bin will smell like a fresh woodland floor. It’s simply nature’s way of recycling, and we are just giving it a little nudge in the right direction. By the time you finish reading this, you will have the confidence to start your own heap and save a fortune on garden supplies.
Why composting matters for your garden
Compost is the single best thing you can give your soil. In the UK, our garden soil can often be a bit tricky, ranging from heavy, sticky clay that bakes hard in summer to thin, sandy soil that loses water instantly. Adding home-made compost improves the structure of any soil type, helping it hold onto moisture while still letting excess rain drain away.
Beyond the physical benefits, compost is teeming with life. It’s full of beneficial bacteria, fungi, and worms that work tirelessly to keep your plants healthy. When you feed the soil with compost, you are creating a resilient ecosystem that helps your flowers and vegetables resist pests and diseases naturally.
It’s also a fantastic way to do your bit for the planet. A huge amount of the waste we throw into our general rubbish bins is organic matter that could have been composted. When this waste goes to a landfill, it produces methane, a harmful greenhouse gas. By composting at home, you’re locking those nutrients back into the earth where they belong.
Choosing the right bin for your space
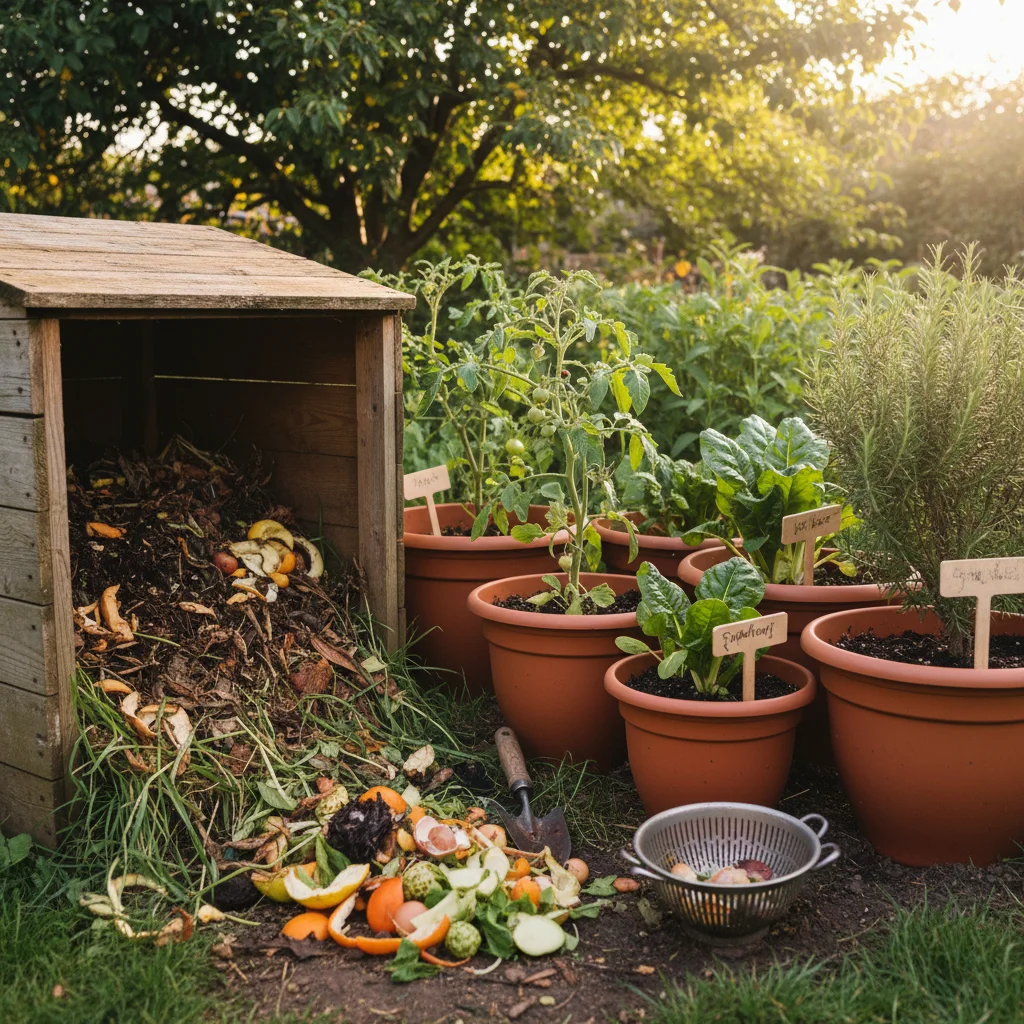
Before you start throwing scraps into a corner, you’ll want to decide where to keep your compost. The best choice depends entirely on how much space you have and how much waste you produce. You don't need to spend a fortune; in fact, some of the best bins are the simplest ones.
If you have a medium-sized garden, the classic "Dalek" style plastic bin is a brilliant place to start. These are often available at a discount through local councils and are great at keeping the heat in, which speeds up the process. They are sturdy enough to withstand a typical UK winter and keep everything looking neat and tidy.
For those with very limited space, like a patio or a balcony, don't feel left out. A wormery is a fantastic option that fits into a tiny footprint. It uses special brandling worms to eat through your kitchen scraps, producing a very rich liquid fertiliser and a small amount of incredibly potent compost.
If you are lucky enough to have a larger garden or an allotment, you might prefer a wooden New Zealand box system. These are usually made from old pallets and allow for plenty of airflow. Having two or three side-by-side means you can have one pile "cooking" while you add fresh material to the other.
Finding the perfect spot
Once you have your bin, you need to find a home for it. Most people think the compost bin should be tucked away in the darkest, dampest corner of the garden, but that’s not always the best move. A bit of warmth from the sun can actually help the microbes work faster, especially during the cooler months.
You should aim to place your bin on level ground to ensure it doesn't topple over when it gets heavy. It is also really important to place it directly on soil or turf if you can. This allows worms and other helpful organisms to climb up into the bin and start their work, and it lets any excess liquid drain away easily.
If you have to put your bin on a hard surface like paving or decking, don't worry. You can simply add a few shovelfuls of garden soil to the bottom of the bin to introduce those essential microbes. Just be aware that you might need to keep a closer eye on the moisture levels since it won't be able to draw liquid from the ground.
Getting the right mix of ingredients
This is the part that often confuses beginners, but it's actually very straightforward. To get great compost, you need a balance of two things: "Greens" and "Browns." Think of it like a recipe where the greens provide the energy and the browns provide the structure.
Greens are materials that are high in nitrogen and break down quickly. These are usually moist and soft, like your vegetable peelings, grass clippings, and even spent coffee grounds. Browns are high in carbon and take longer to rot. These are things like cardboard, shredded paper, straw, and dry leaves.
If you have too many greens, your heap will become a smelly, slimy mess. If you have too many browns, it will just sit there and do nothing for months. The secret is to aim for a roughly equal mix of both. Every time you empty a caddy of kitchen scraps into the bin, try to toss in a handful of torn-up egg boxes or brown paper bags to keep things balanced.
To help you get started, here is a quick guide to what you can put in your bin:
- Fruit and vegetable scraps including citrus peels and onion skins.
- Grass clippings and soft green prunings from the garden.
- Crushed eggshells which add essential calcium to the soil.
- Cardboard boxes, toilet roll tubes, and egg cartons torn into small pieces.
- Old newspapers and non-glossy junk mail.
- Tea bags and coffee grounds, though do check that your tea bags are plastic-free.
What to leave out of your bin
While many things can be composted, there are a few items you should definitely keep out of a standard garden bin. Some things can attract unwanted visitors like rats, while others simply won't break down or might even harm your plants later on.
Avoid adding meat, fish, or dairy products to your bin. These will smell as they rot and are the primary reason people end up with pests. You should also avoid cooked food, as this can also attract rodents. Stick to raw fruit and veg scraps for the safest results.
Be careful with weeds. While most annual weeds are fine, you should avoid perennial weeds with thick, fleshy roots like couch grass or bindweed. A standard home compost heap rarely gets hot enough to kill these roots, and you might accidentally spread them all over your flower beds when you use the finished compost.
Finally, never add pet waste from cats or dogs to a bin that you intend to use on your vegetable patch. These can contain pathogens that aren't safe for humans. It’s also best to avoid glossy magazines or heavily printed cardboard, as the inks and coatings can sometimes contain chemicals you don't want in your soil.
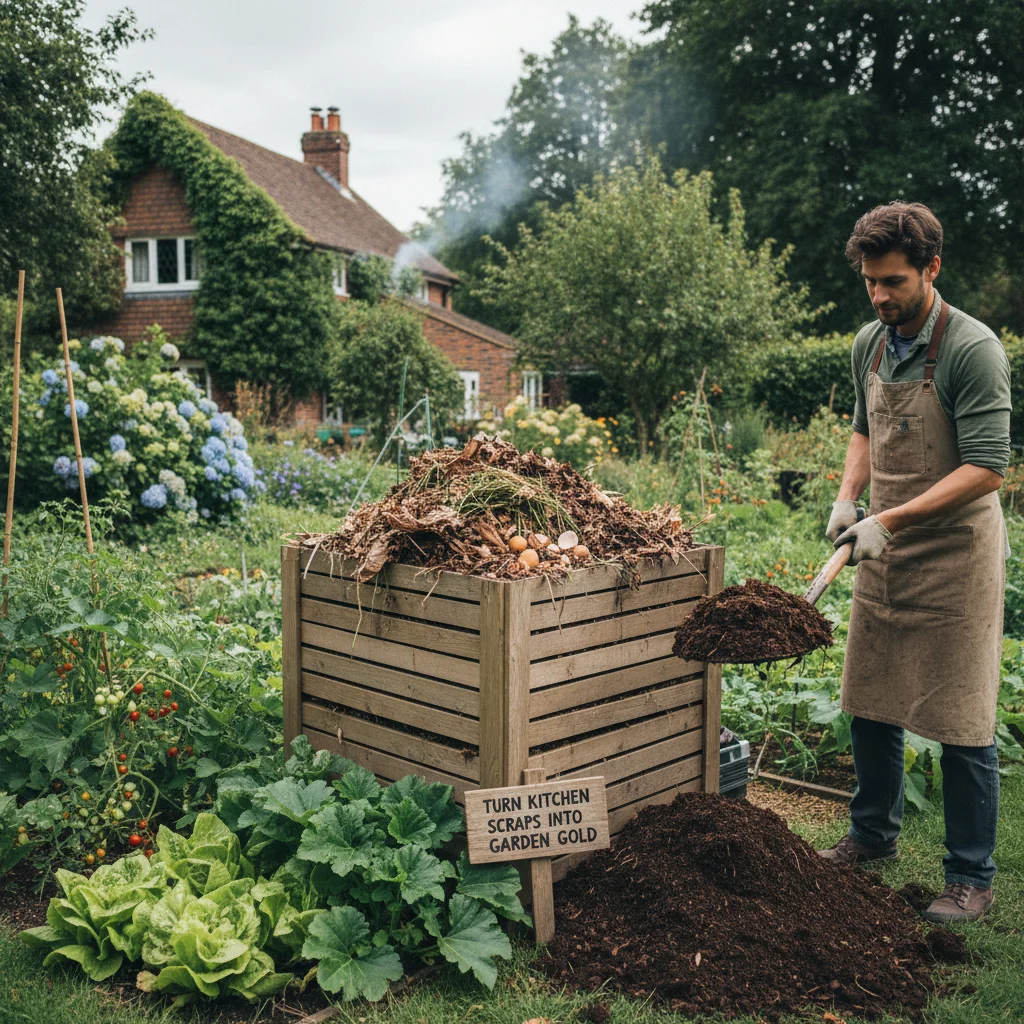
Managing your compost pile
Once your bin is set up and you've started adding your layers, there isn't much "work" to do, but a little bit of attention goes a long way. The most helpful thing you can do is give the pile a stir every few weeks. This adds oxygen, which the hard-working microbes need to survive.
You don't need to do a full "turn" of the heap if it's too heavy. I often just use a garden fork or a dedicated compost aerator tool to poke holes and wiggle things around. This prevents the middle of the pile from becoming compacted and airless, which is when things start to get a bit pongy.
Keep an eye on the moisture levels too. Your compost should feel like a wrung-out sponge. If it’s too dry, the decomposition will stop. In a hot UK summer, you might actually need to give your bin a quick splash with the watering can. If it’s too wet, add more dry browns like shredded cardboard to soak up the excess.
Don't be discouraged if things seem to happen slowly. In the height of summer, a bin can be ready in as little as six months, but over winter, the process slows down significantly. Just keep adding your scraps and trust that the worms are doing their job beneath the surface.
Troubleshooting common problems
Even experienced gardeners run into the occasional compost hiccup. If your bin starts to smell like rotten eggs, it's usually a sign that it has become too wet and compacted. The fix is simple: stir it up to get some air in and add plenty of dry, brown material like torn-up cardboard or straw.
If you find your bin is full of tiny fruit flies, don't panic. They are harmless, but they can be a bit annoying. They are usually attracted to fresh fruit scraps sitting on the very top of the pile. You can stop them by simply covering your fresh "green" additions with a layer of "browns" or a bit of finished compost.
Sometimes a pile just refuses to rot down. This usually happens if the material is too dry or if there are too many browns. Try adding some "activators" to give it a boost. A big bag of fresh grass clippings is a great way to heat things up, or you can even buy organic compost accelerators from the garden centre.
If you see a mouse or a rat near your bin, it’s usually because there is something tasty in there that shouldn't be, like bread or cooked food. Make sure your bin has a secure lid and try to keep the contents moist, as rodents prefer dry, quiet places to nest. Turning the heap regularly also disturbs them and encourages them to move on.
Knowing when it is ready to use
The most exciting part of the process is opening the hatch at the bottom of your bin and seeing what’s inside. Finished compost is dark, crumbly, and has a pleasant, earthy smell. You shouldn't be able to recognise the original ingredients; the potato peels and egg boxes should have completely vanished.
Don't worry if there are still a few stubborn bits, like avocado stones or thick twigs. You can simply scoop these out and pop them back into the top of the bin to go around again. I like to keep a small riddle or sieve handy to get a fine texture for potting up seedlings, but for the garden beds, a few lumps don't matter at all.
In the UK, the best time to harvest your compost is usually in the autumn or early spring. I love to spread a thick layer over my vegetable beds in November. The worms will spend the winter pulling those nutrients down into the soil, leaving the ground perfectly prepped for planting when the first warm days of spring arrive.
You can also use your home-made gold to top up large containers or as a mulch around the base of fruit trees and roses. Because it’s so rich, you’ll notice your plants looking much greener and healthier within just a few weeks of application. It’s incredibly satisfying to know that your morning coffee and yesterday’s newspaper are now helping your roses bloom.
Your next steps toward better soil
Starting a compost bin is one of those rare things in life that is good for your wallet, your garden, and the environment all at the same time. You don't need to be an expert or have a perfectly manicured garden to make it work. Just start small by saving your kitchen scraps in a tub by the sink and see how you get on.
The best time to start is today. Find a corner of your garden or patio, grab a bin, and start layering those greens and browns. Within a few months, you’ll be rewarded with the best soil conditioner you’ve ever used, and you'll never look at a potato peeling the same way again. Happy composting!